Difference between revisions of "Explore Starter Kit for AVR"
| (10 intermediate revisions by 2 users not shown) | |||
| Line 1: | Line 1: | ||
[[Category:AVR Development Boards]] | [[Category:AVR Development Boards]] | ||
{{Box|type=l_green_light|text= | {{Box|type=l_green_light|text= | ||
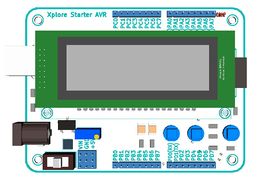
| − | + | The Explore Starter Kit for AVR bundles everything that is required to get kick started for AVR development. It comes with [[Starter AVR USB]] development board and host of other component, that quickly help you learn the internal details of the MCU as well as experiment with external interfaces. | |
}} | }} | ||
| − | [[File: | + | [[File:Cart add.png|right|link=https://www.exploreembedded.com/product/Starter%20ATmega32%20AVR%20USB%20Development%20Kit]] |
| − | [[ | + | [[File:Explorers_Starter_Kit_for_AVR.jpg|x450px|Fig 1: AVR Starter]] |
| − | <gallery> | + | |
| − | File: | + | <gallery mode="packed"> |
| − | File: | + | File:DSC00818.JPG |
| − | File: | + | File:DSC00822.JPG |
| + | File: DSC00825.JPG | ||
File:AVR Starter USB With LCD 3d.JPG | File:AVR Starter USB With LCD 3d.JPG | ||
</gallery> | </gallery> | ||
| − | = | + | =Kit Includes= |
{{Box|type=l_green_light|text=<br/> | {{Box|type=l_green_light|text=<br/> | ||
| − | * | + | *[[Starter_AVR_USB]] Development Board |
| − | ** | + | *LCD 16 x 2 |
| − | ** | + | *Switches 12mm (x2) |
| − | * | + | *LEDs 5mm x20 |
| − | * | + | *LED RGB x2 |
| − | * | + | *7 Segment |
| − | * | + | *Buzzer |
| − | * | + | *Relay |
| − | * | + | *Pot 10K |
| − | * | + | *DC Motor |
| − | * | + | *Light Dependent Resistor (LDR) |
| − | * | + | *Temperature Sensor (LM35) |
| − | + | *Transistor BC547 | |
| − | * | + | *Resistors: 1K, 10K (10 each) |
| − | * | + | *USB Cable 1 |
| − | * | + | *Jumper wires male to female x15 |
| − | + | *Breadboard | |
}} | }} | ||
| + | |||
=Physical Features= | =Physical Features= | ||
{{Box|type=l_green_light|text=<br /> | {{Box|type=l_green_light|text=<br /> | ||
| Line 65: | Line 67: | ||
}} | }} | ||
| − | + | ||
| − | + | ||
| − | + | ||
| − | + | ||
| − | + | ||
| − | + | ||
==Support== | ==Support== | ||
For Questions, technical support and feedback about this product, do comment below! | For Questions, technical support and feedback about this product, do comment below! | ||
{{DISQUS}} | {{DISQUS}} | ||
Latest revision as of 16:41, 4 April 2015
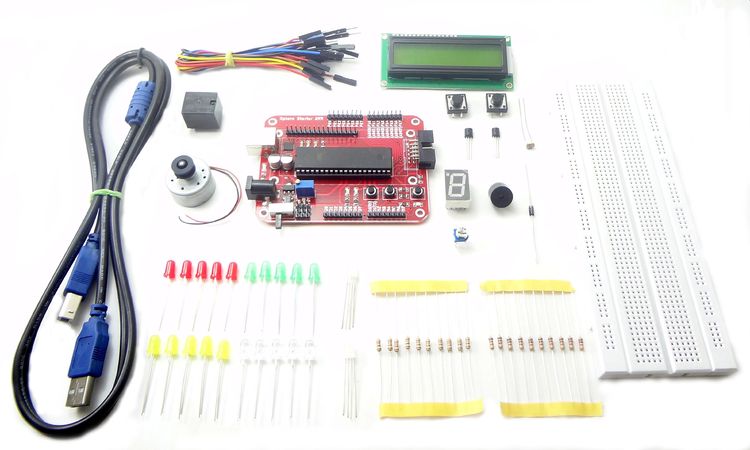
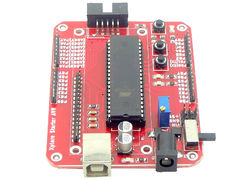
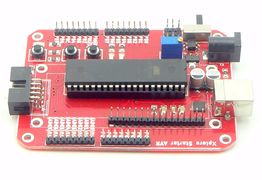
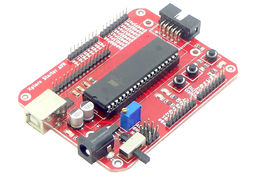
The Explore Starter Kit for AVR bundles everything that is required to get kick started for AVR development. It comes with Starter AVR USB development board and host of other component, that quickly help you learn the internal details of the MCU as well as experiment with external interfaces.
Contents
Kit Includes
- Starter_AVR_USB Development Board
- LCD 16 x 2
- Switches 12mm (x2)
- LEDs 5mm x20
- LED RGB x2
- 7 Segment
- Buzzer
- Relay
- Pot 10K
- DC Motor
- Light Dependent Resistor (LDR)
- Temperature Sensor (LM35)
- Transistor BC547
- Resistors: 1K, 10K (10 each)
- USB Cable 1
- Jumper wires male to female x15
- Breadboard
Physical Features
- Dimensions: 70mm X 90mm
- 1.6mm Glass Epoxy, FR4 PCB
- Wave Soldered.
Downloads:
Setting up the XploreFlash Programmer
Step 1: Xplore flash is based on various opensource software, it requires avrdude. Avrdude is part of WinAVR GCC complier. Download and install it.
Step 2:To connect Development board with computer USB driver is required. Windows USB to UART Drivers for CP2102
- For Other Operating system please download from Silicon Labs website.
Step 3: Download and install XploreFlash GUI. (XploreFlash GUI is based on AVRDUDESS)
Step 4: Follow the steps on images below to flash the board.
Note: The GUI software will require .NET framework 2.0 or later please download and install it.
Support
For Questions, technical support and feedback about this product, do comment below!


