
In this tutorial we will look at the basic setups of setting up the ExploreM3 on Arduino and installing DFU and Vcom drivers on Windows, Linux and MAC. Finally we will flash a simple led-blink example.

Contents
[hide]The Explore M3 Parts
The figure shows location of various parts on the board, which will be using during the setup. Look at the switches, the RGB led and the led on pin 13 in particular.

Using Board Manager
Download and install the Arduino IDE (1.6.12 preferred). Open the Arduino IDE and go to File-->Preferences and paste the below json URL into the Additional Board Manager URLs text box and hit OK.
- https://raw.githubusercontent.com/ExploreEmbedded/Explore-M3/master/package_ExploreM3_index.json

Open the Board Manager from Tools-->Board-->Boards Manager. Scroll down and look for Explore-M3(32-bits ARM Cortex-M3) board. Click on the board entry and hit install.

This will install the Explore-M3 board and the arm-none-eabi-gcc tool chain. Installation may take few minutes depending on the internet speed. Once the installation has completed, an Arduino-blue INSTALLED will appear next to the entry.

Now the Explore-M3 board will appear in the board list.

Driver installation
Windows
- Install Virtual COM driver ; This driver makes the same USB interface appear as virtual com port. The virtual COM code on the Arduino resides with every sketch that uses the Serial Class.
- Connect the board to system, the COM port will appear as shown.
- Go to run window (Windows+R), type %appdata% and click ok.
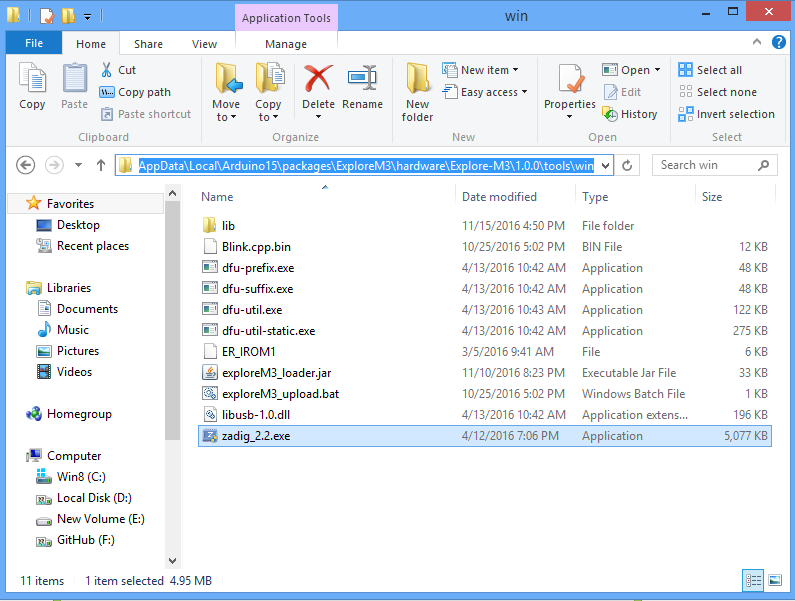
- Go to AppData\Local\Arduino15\packages\ExploreM3\hardware\Explore-M3\1.0.0\tools\win and run the Zadig utility.
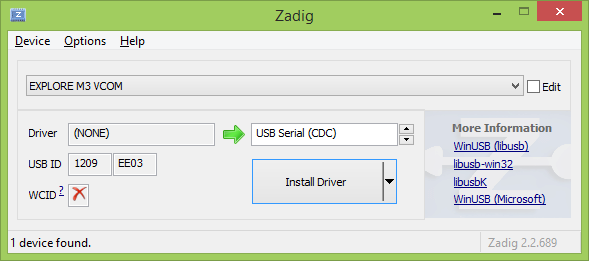
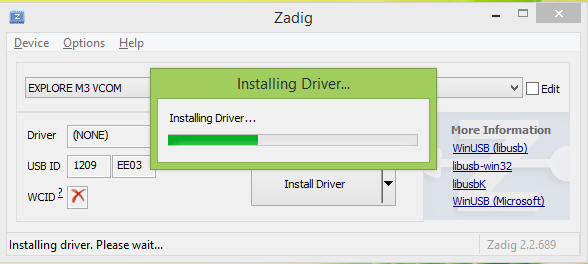
- Install the CDC driver using the Zidag utility this time.
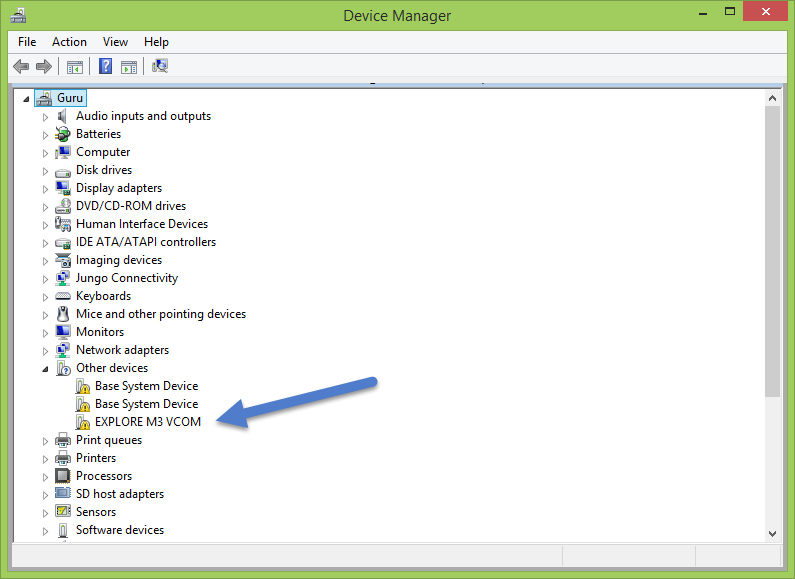
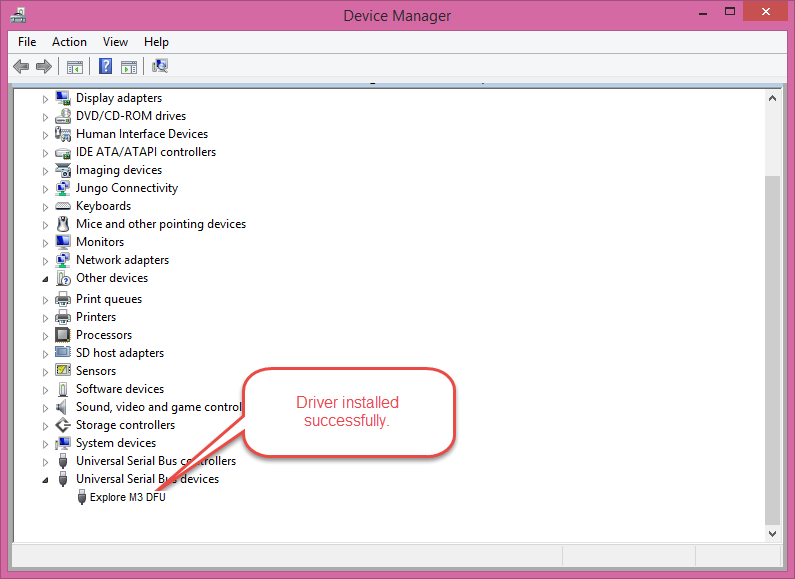
- Verify successful installation in the device manager.
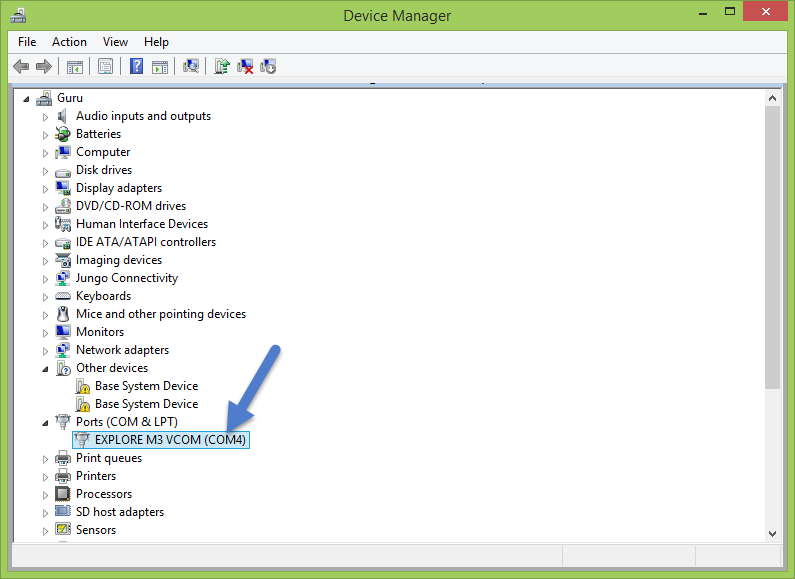
- Connect the board to system, the COM port will appear as shown.


- Installing the Device Firmware Upgrade(DFU) Driver. This driver is used for programming the Explore M3.
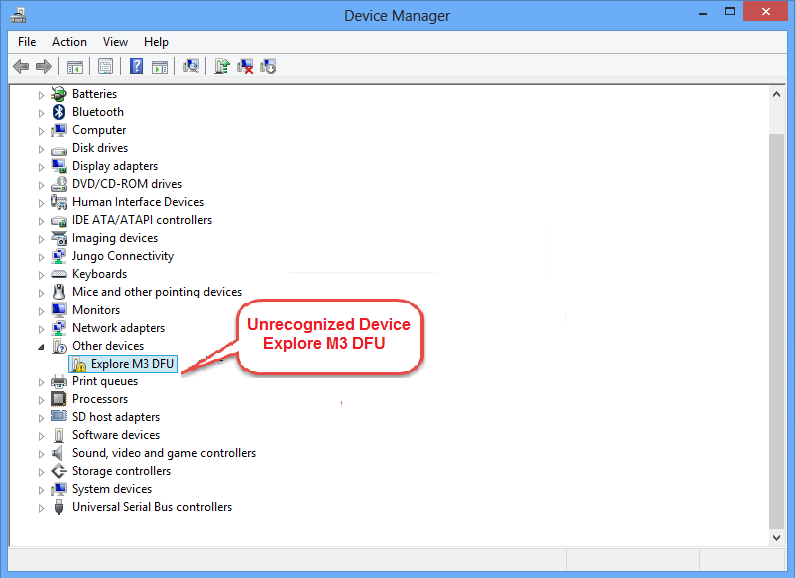
- To upload a new program to Explore M3, put the board in programming mode by holding down the USB Boot switch, press and release the reset switch and then release the USB Boot switch. The RGB LED turns green indicating USB Boot mode.
- The board shows up as unknown device in device manager.
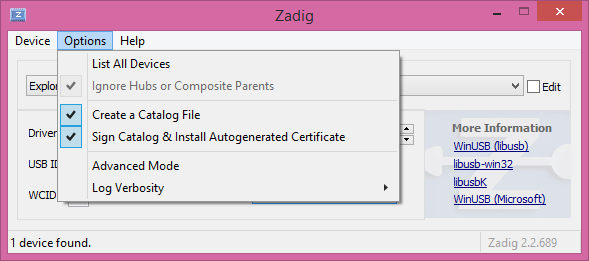
- Click on Options and select List All Devices
- Select the device as Explore M3 and assign WinUSB driver as shown
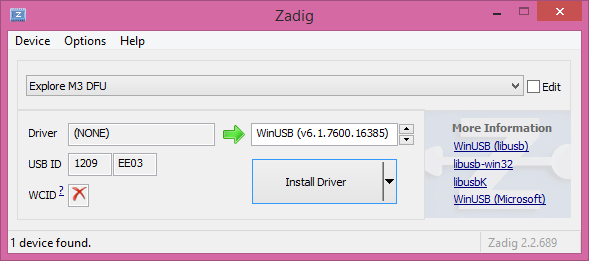
- Click on Install driver
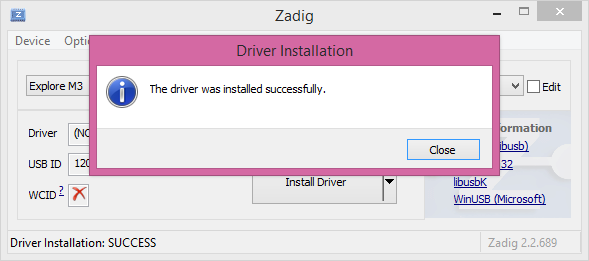
- Verify in the device Manager that the driver is successfully installed.


Linux
This setup has been tested on Ubuntu 64 bit. If you should have any errors other linux flavours, do post in the comments. One good thing I noticed, drivers are not required but only the device needs to be enabled. So lets get started.
- UDEV Rules: To enable Explore M3 as USB DFU and COM port run the install.sh file from hardware\Explore-M3\1.0.0\tools\linux
- Connect the board to USB port now, put it in bootloader mode. Hold down the USB Boot switch and press reset and release the reset switch and than release the USB Boot Switch.
Notes
- Give appropriate permissions when running the install.sh and other files.
- You may be required to give permissions to use virtual com port.
- Note that Explore M3 acts as Device Firmware Upgrade (DFU) and virtual COM port with the same USB interface.
MAC
Running First Example on M3
After setting up the board and indtalling the drivers it's time to run the first example on Explore-M3 board.
- Select the board as Explore M3, and upload the the test code
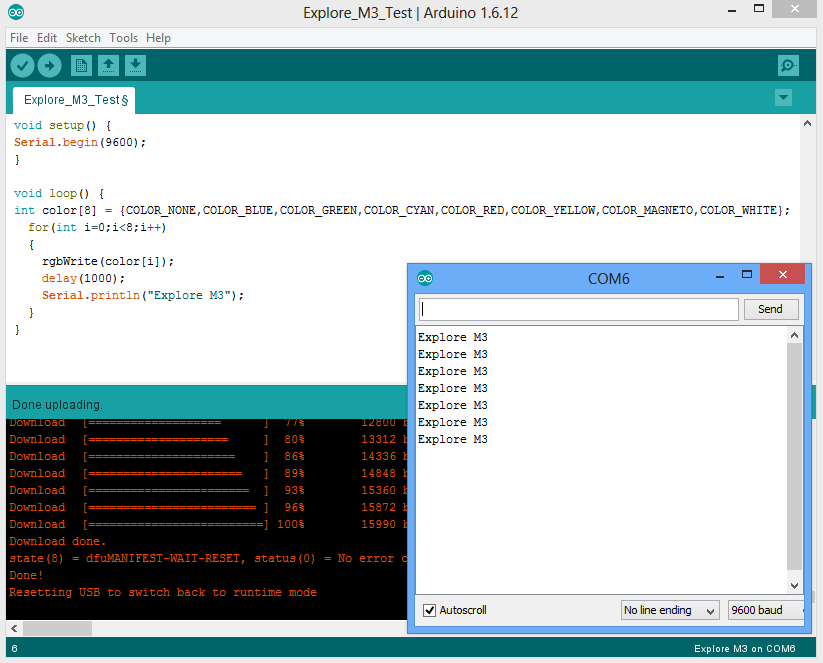
- Test code for reference

| void setup() { | |
| Serial.begin(9600); | |
| } | |
| void loop() { | |
| int color[8] = {COLOR_NONE,COLOR_BLUE,COLOR_GREEN,COLOR_CYAN,COLOR_RED,COLOR_YELLOW,COLOR_MAGNETO,COLOR_WHITE}; | |
| for(int i=0;i<8;i++) | |
| { | |
| rgbWrite(color[i]); | |
| delay(1000); | |
| Serial.println("Explore M3"); | |
| } | |
| } |
Repository Link
Have a opinion, suggestion , question or feedback about the article let it out here!