
Difference between revisions of "Arduino Setup for Explore M3"
| Line 2: | Line 2: | ||
This page is placeholder for adding Arduino IDE support for Explore M3. Since there could be a few changes on bootloader front etc till the board goes for crowdfunding, this will be updated later. Also with the new board management feature on Arduino, the board can be added with a simple URL for all major Operating Systems. So do check back later! | This page is placeholder for adding Arduino IDE support for Explore M3. Since there could be a few changes on bootloader front etc till the board goes for crowdfunding, this will be updated later. Also with the new board management feature on Arduino, the board can be added with a simple URL for all major Operating Systems. So do check back later! | ||
| − | |||
=Using Board Manager= | =Using Board Manager= | ||
| − | |||
=Manual Installation= | =Manual Installation= | ||
==Windows== | ==Windows== | ||
| Line 24: | Line 22: | ||
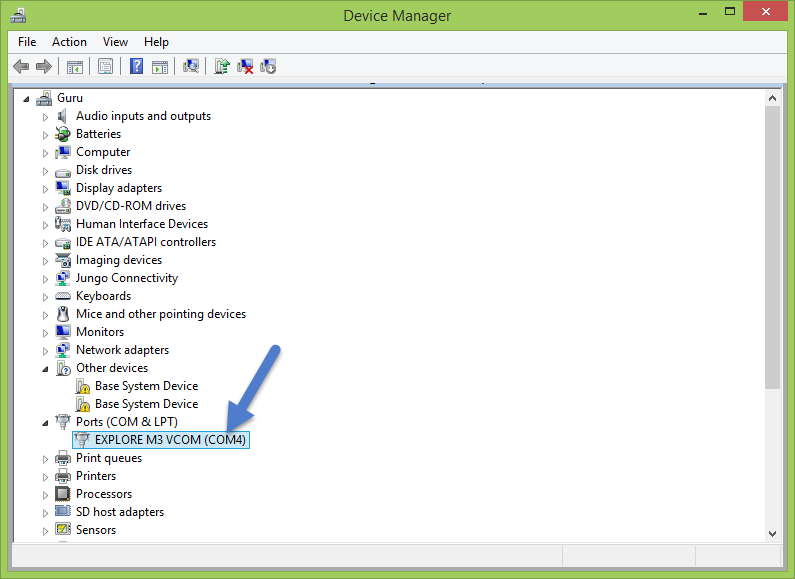
##Verify successful installation in the device manager. [[File:11 driver M3.png]] | ##Verify successful installation in the device manager. [[File:11 driver M3.png]] | ||
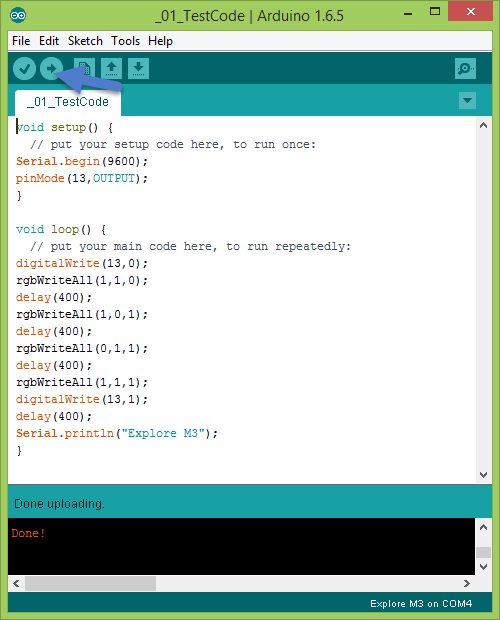
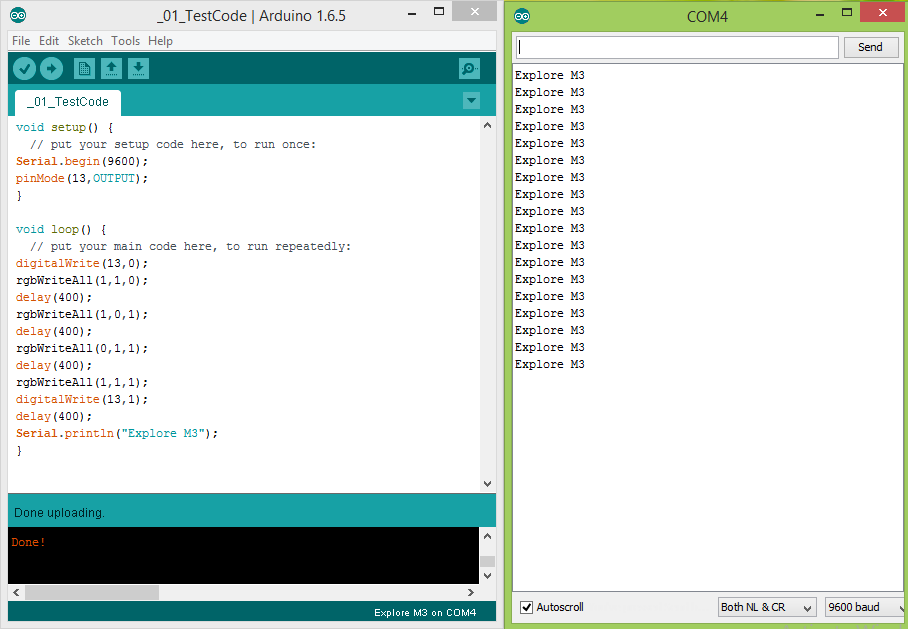
#Select the appropriate COM port in the Arduino IDE and open the terminal to observe the output.[[File:12 driver M3.png]] | #Select the appropriate COM port in the Arduino IDE and open the terminal to observe the output.[[File:12 driver M3.png]] | ||
| + | <br/> | ||
| + | Also notice that the RGB LEDs and the LED on pin 13 blink in a sequence. | ||
Revision as of 15:11, 17 May 2016
This page is placeholder for adding Arduino IDE support for Explore M3. Since there could be a few changes on bootloader front etc till the board goes for crowdfunding, this will be updated later. Also with the new board management feature on Arduino, the board can be added with a simple URL for all major Operating Systems. So do check back later!
Using Board Manager
Manual Installation
Windows
- Download and install the Arduino IDE (1.6.5 or later).
- Download and extract the contents of repository inside Arduino>Hardware directory of your Arduino Installation. Usually found under Documents>Arduino>Hardware. Verify that the directory structure looks like C:\Users\myPC\Documents\Arduino\hardware\Explore-M3. Note: This is for beta testers only, to get access to repo, please send an email with your github user-id
- Installing the Device Firmware Upgrade(DFU) Driver. This driver is used for programming the Explore M3.
- To upload a new program to Explore M3, put the board in programming mode by holding down the boot-loader switch, press and release the reset switch and then release the boot-loader switch.
- The board shows up as unknown device in device manager.

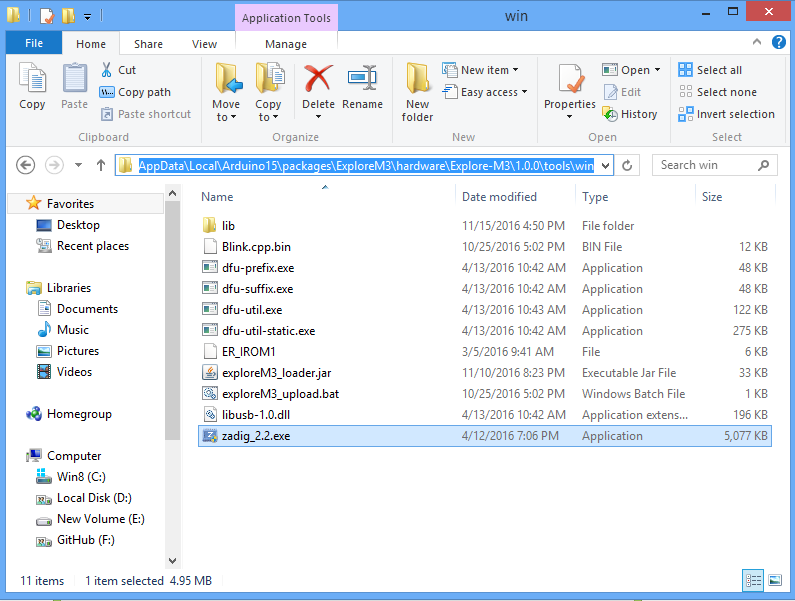
- Go to ..\Documents\Arduino\hardware\Explore-M3\tools\win and run the Zidag utility.
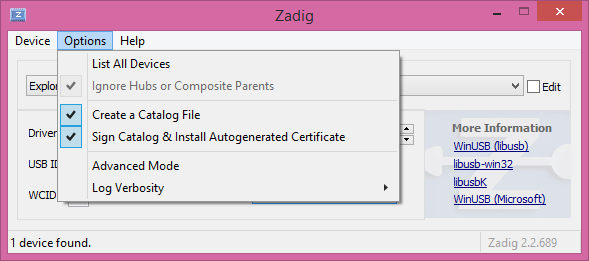
- Click on Options and select List All Devices
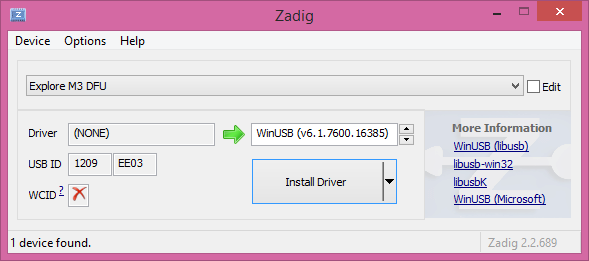
- Select the device as Explore M3 and assign WinUSB driver as shown
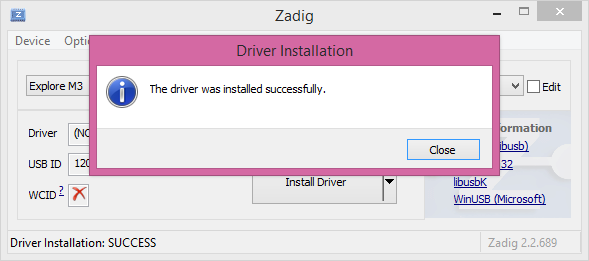
- Click on Install driver
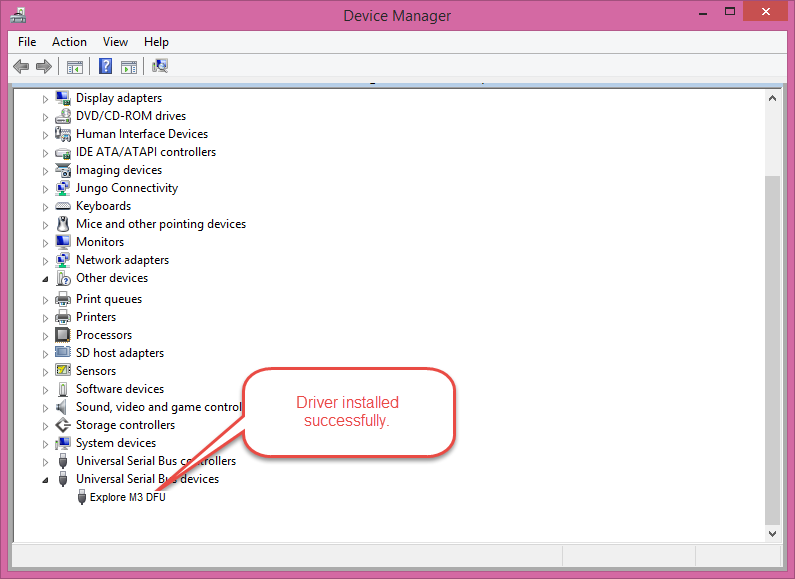
- Verify in the device Manager that the driver is successfully installed.
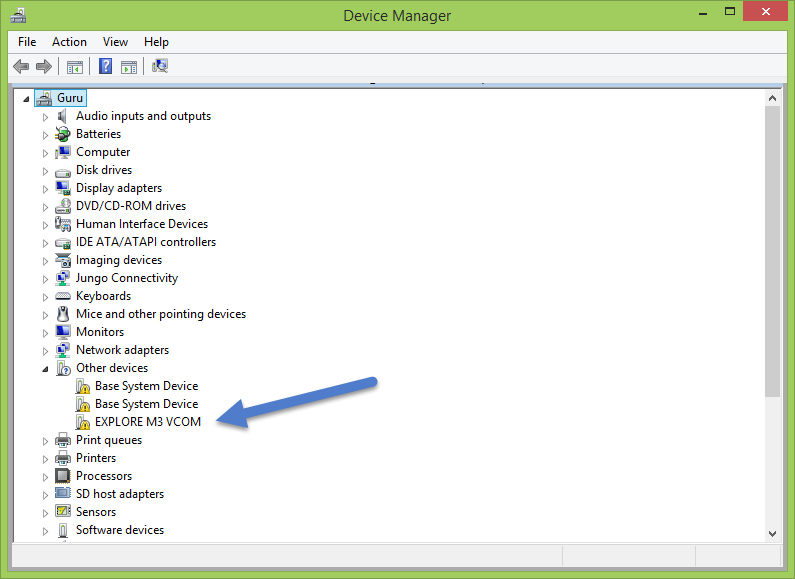
- Install Virtual COM driver ; This driver makes the same USB interface appear as virtual com port. The virtual COM code on the Arduino resides with every sketch that uses the Serial Class.
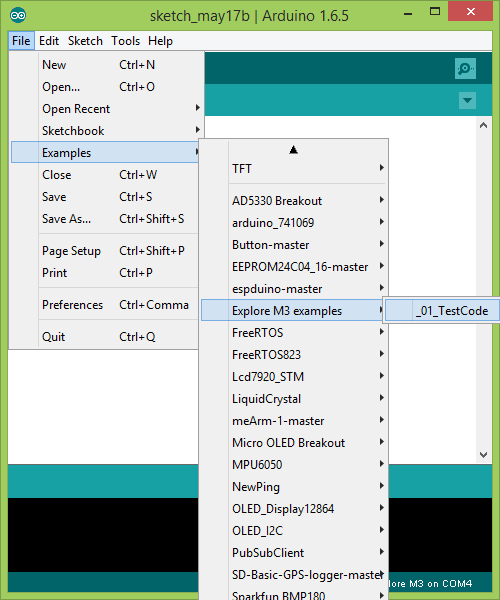
- Open the _01_TestCode example as shown.
- Put the board in programming mode and upload the sketch.
- The COM port will appear as shown.
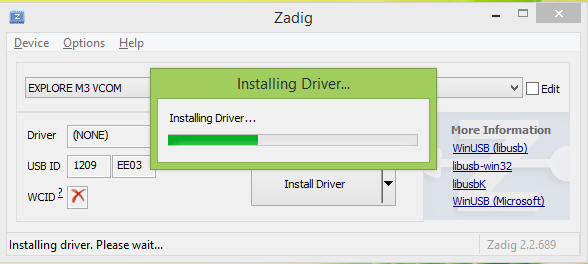
- Install the CDC driver using the Zidag utility this time.
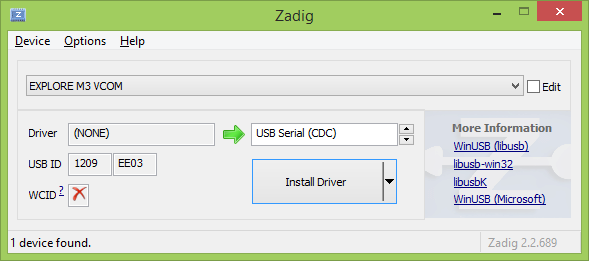
- Verify successful installation in the device manager.
- Open the _01_TestCode example as shown.
- Select the appropriate COM port in the Arduino IDE and open the terminal to observe the output.


Also notice that the RGB LEDs and the LED on pin 13 blink in a sequence.