Xplore007 (talk) 15:25, 4 February 2016 (IST)
Contents
Hookup
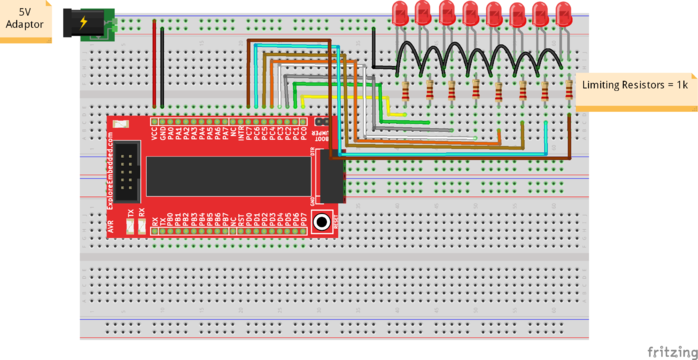
You may look this up with the simple breadboard as shown in section below or you could use the Ultra AVR dev kit if do not wish to jumble with wires and resistors.
Type 1:Breadboard with Explore AVR 40 Pin Breakout Board with Atmega32
Components Used
| 1 |
|
AVR 40 pin breakout board with Atmega32 |
| 2 |
|
Breadboard |
| 3 |
|
Male to Male Jumper Wires |
| 4 |
|
LED - 5mm RED |
| 5 |
|
Resistor |
Wiring diagram
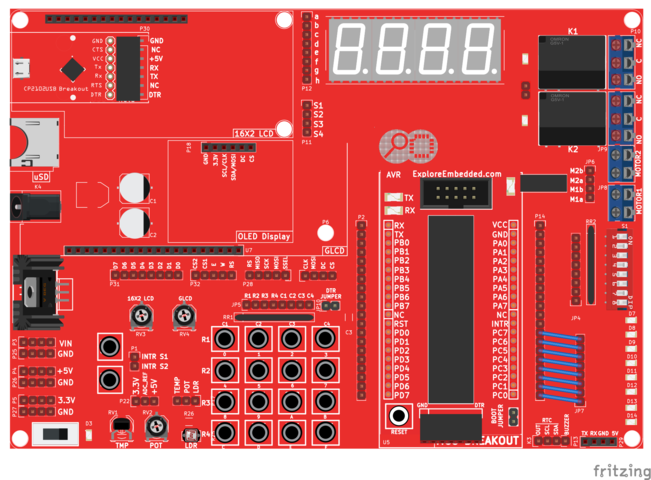
Type 2:Using Explore Ultra AVR Dev Kit
Components Used
The Explore Ultra AVR Kit comes with all the things required, not just for this experiment but for the entire series. And even if you think of migrating to PIC or Arduino, you'll have breakout boards that fit on to this, hence we believe it is a great investment for learning hands on Embedded Systems. The kit is fully open source, you may use the schematics, the design files and all of the source code and build something cool on your own. And when you do that do not forget to share with us what you've done. We would be happy to see you building something cool.
- Explore Ultra AVR Dev Kit: Buy from EE Store

Code
#include <avr\io.h>
#include "stdutils.h"
#include "delay.h" //User defined library which contains the delay routines


#define LedOn 0xFF
#define LedOff 0x00

/* start the main program */
void main()
{
  /*Configure all the ports as output */
   DDRA= C_PortOutput_U8;
   DDRB= C_PortOutput_U8;
   DDRC= C_PortOutput_U8;
   DDRD= C_PortOutput_U8;

  while(1)
    {

	 /* Turn On all the leds and wait for one second */
	   PORTA=LedOn;
	   PORTB=LedOn;
	   PORTC=LedOn;
	   PORTD=LedOn;
	   DELAY_sec(1);
	 /* Turn off all the leds and wait for one second */
	   PORTA=LedOff;
	   PORTB=LedOff;
	   PORTC=LedOff;
	   PORTD=LedOff;
	   DELAY_sec(1);
	  }
  }
Video Tutorial
For those of you, who would like to watch instead of read we have made a video with all the gyan.


