Interrupts, are perhaps one of the most important pieces that you need to understand for completing most of your micro-controller projects. Interrupts allow micro-controllers to continue doing their main job and provide mechanism to handle all other tasks which need the controller attention. Before we go ahead with the examples here, are a few situations where you may want to use these:
- Let's say you have a device like GSM interfaced to your Micro-controller using UART or other serial interface. You simple do not know when you'll receive a new text message or a call. One way to handle this is continuously monitor for the even to occur. The other way is to configure a serial interrupt. Yes, you guessed it right, this is a Software Interrupt indeed.
- Now let's say you're building a music player. The main task of the processor is to read and play back the audio file. However the player should be able to play/pause/forward/rewind. And this could happen any time. How about connecting the switches to hardware interrupt pins? The processor will be notified any time the events happen.
With AVR Micro-controllers, you can configure interrupts on various sources such as:
- Port Pins : INT0, INT1 and INT2
- Timers
- UART
- SPI
- ADC
- EEPROM
- Analog Comparator
- TWI or I2C
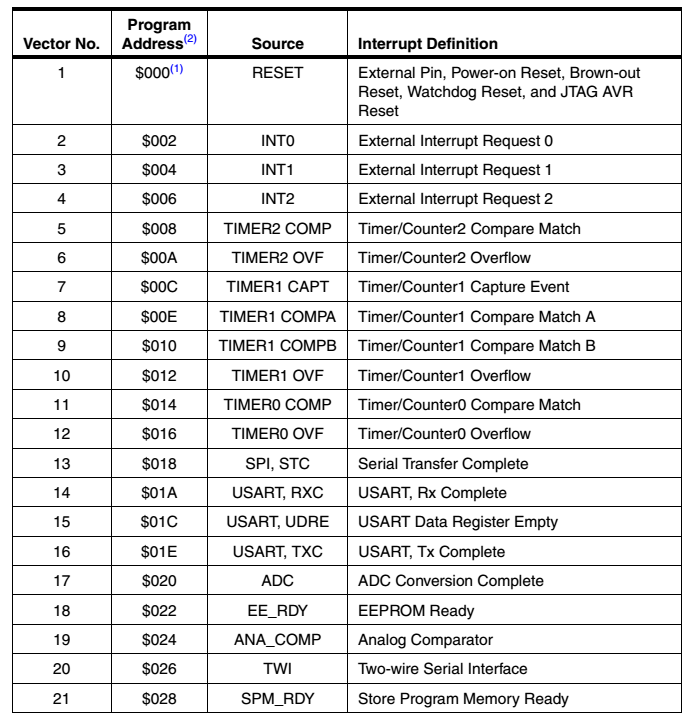
The vector table below shows the mapping of various interrupts. Notice that the RESET interrupt has an address of $000, the first address of the program memory indeed.
Also notice that the next interrupt starts at an offset of 2 words(AVR Memory is word addressable 1 Word = 2 Bytes). Indeed no program can be stored in 4 bytes. What it will hold is a Jump instruction to actual Interrupt service routine(ISR) in the memory. ISR, the name might sound fancy, but it is nothing more than a program that executes once the interrupt is generated.
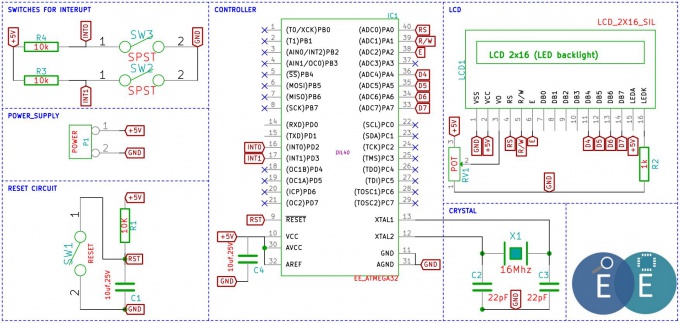
Now, lets get started and configure the External Interrupts and show you a simple example. Schematic


