Difference between revisions of "Interfacing KS0108 GLCD with Starter AVR"
| Line 15: | Line 15: | ||
[[file:DSC01796.JPG|400x400px]] | [[file:DSC01796.JPG|400x400px]] | ||
| − | + | = Downloads= | |
| + | Download the complete project folder from the below link: | ||
| + | https://github.com/ExploreEmbedded/ATmega32_ExploreStarterAvr/archive/master.zip<br> | ||
| + | |||
| + | Have a opinion, suggestion , question or feedback about the article let it out here! | ||
{{DISQUS}} | {{DISQUS}} | ||
Revision as of 15:26, 20 April 2016
Now a days GLCD's are more popular than character LCD's as we can create different fonts, display bitmap images and lot more. So in this tutorial we will interface KS0108 GLCD with our Starter AVR board which has ATmega 32 micro controller on it. To learn more about this GLCD, visit our Interfacing KS0108 based JHD12864E Graphics LCD with Atmega32 tutorial.
Contents
Basic
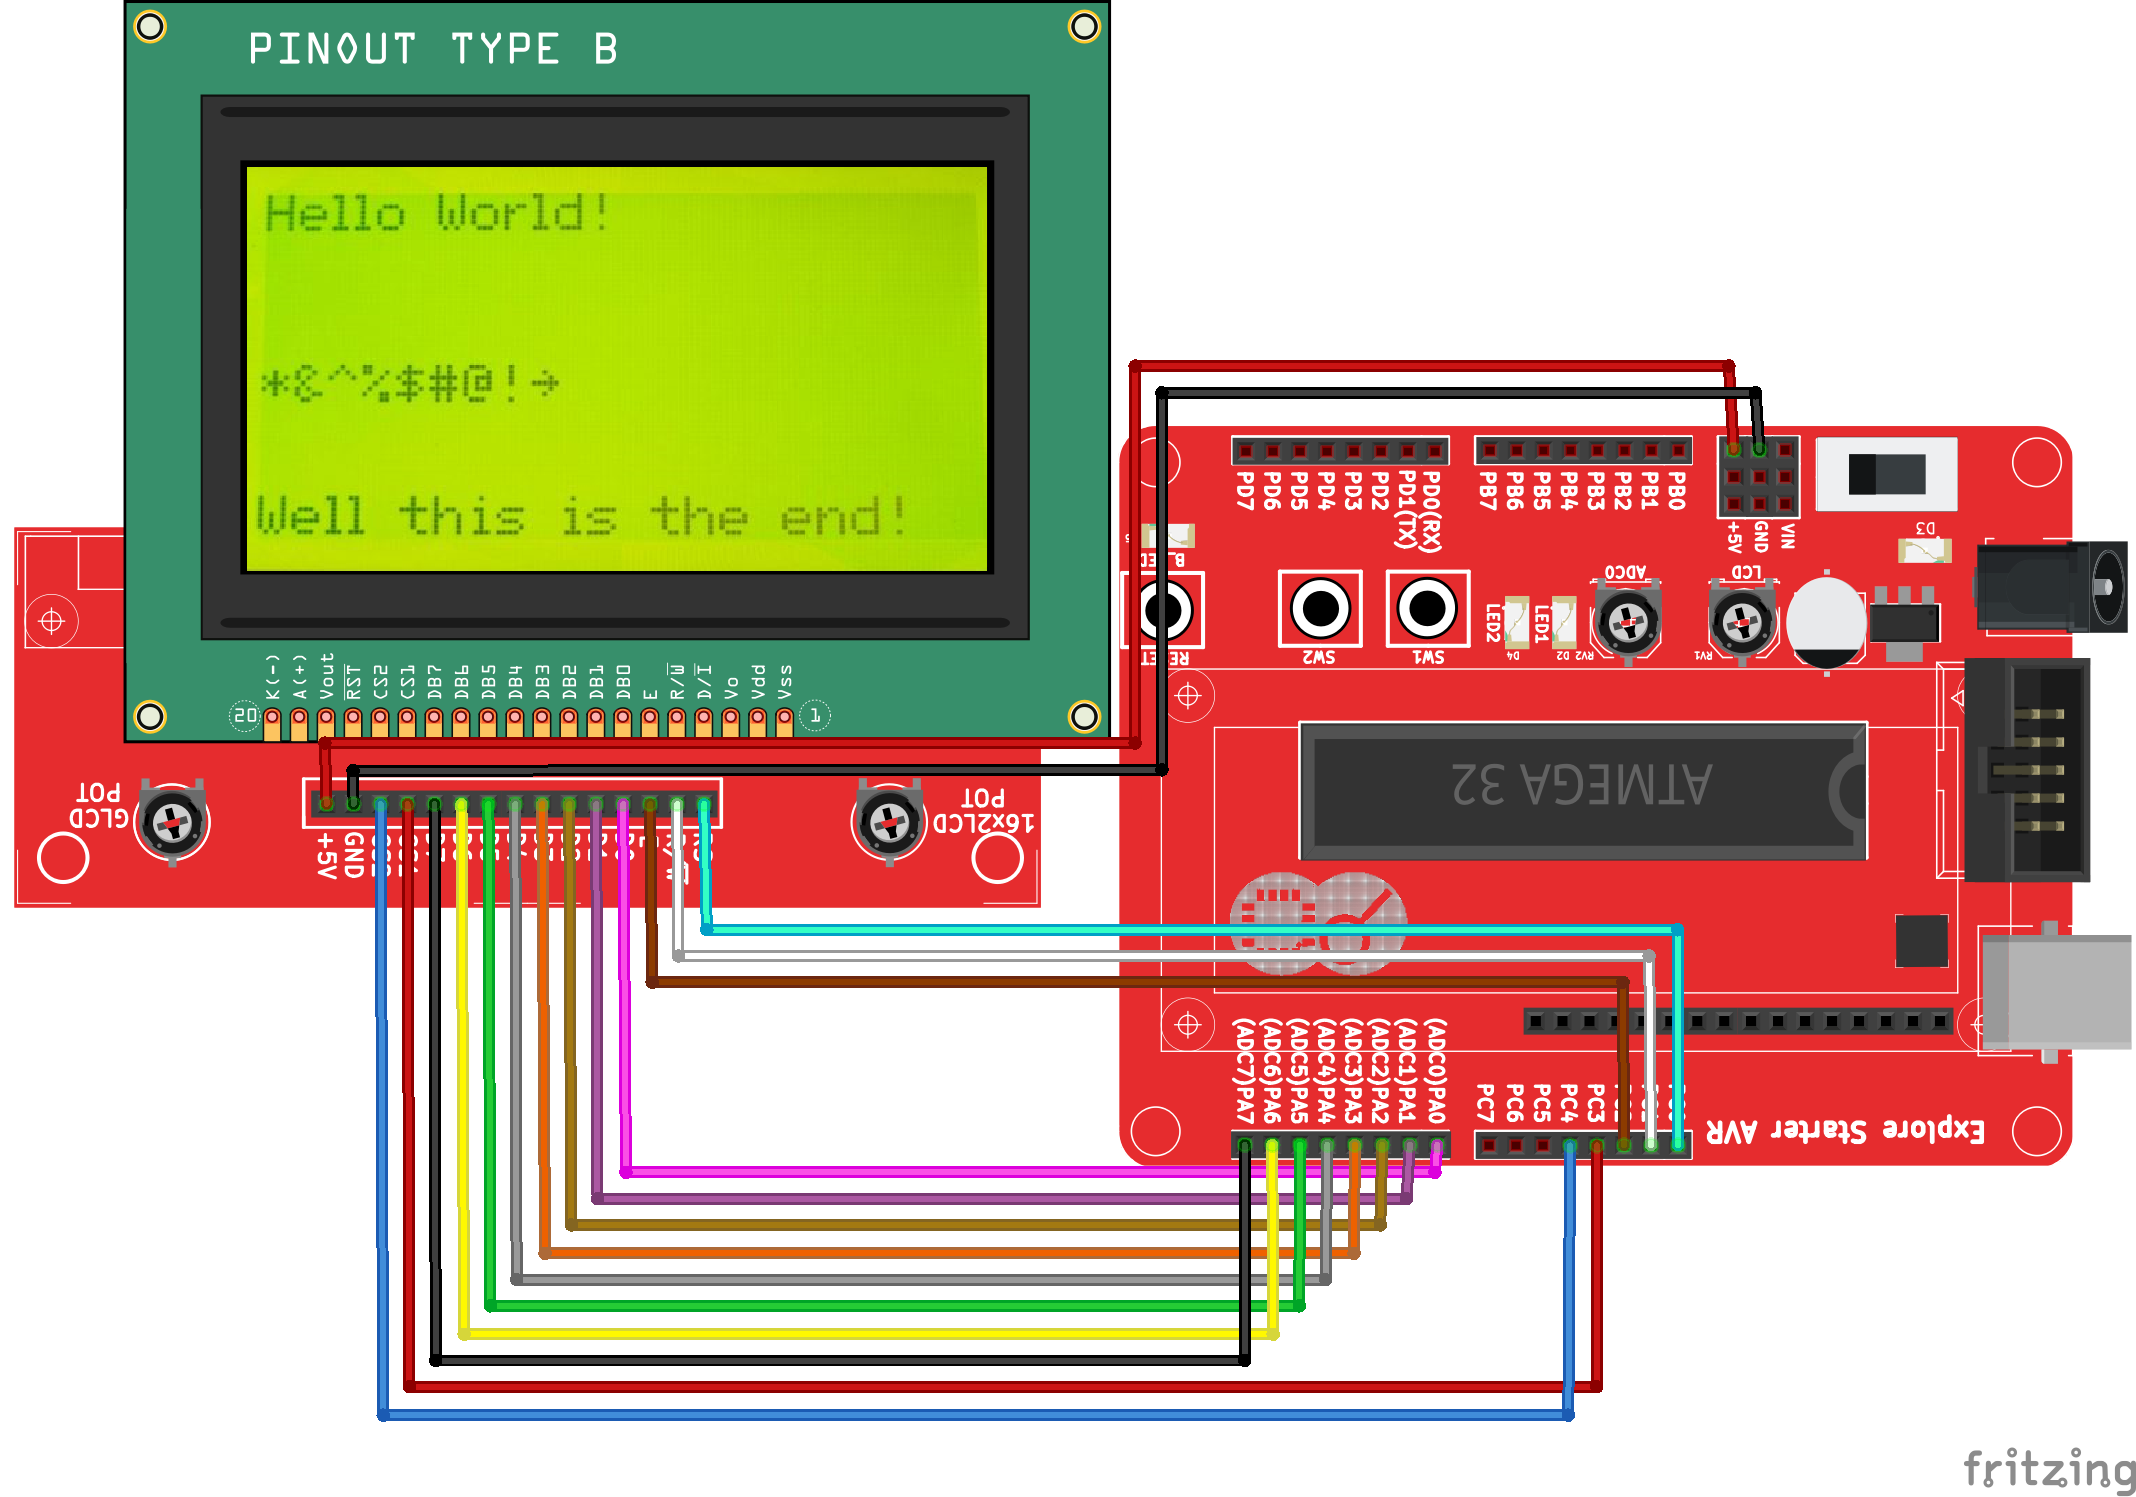
As Starter AVR board has facility to connect character LCD directly on board but not GLCD, we will use LCD Breakout Board. As shown in hookup connect data lines to PORTA, RS to PC0, R/W to PC1, Enable to PC2 and CS1-CS2 to PC3-PC4. Connect GLCD in given slot on LCD breakout and flash the code to see results.
Hookup
Code
Demo
Downloads
Download the complete project folder from the below link:
https://github.com/ExploreEmbedded/ATmega32_ExploreStarterAvr/archive/master.zip
Have a opinion, suggestion , question or feedback about the article let it out here!


