Difference between revisions of "LPC1768: Keil Project For Hex File"
| Line 33: | Line 33: | ||
[[File:Lpc1768_Keil_08.png]]<br><br> | [[File:Lpc1768_Keil_08.png]]<br><br> | ||
| − | <b>Step9:</b> Add the recently saved file to the project<br> | + | <b>Step9:</b> Add the recently saved file to the project.<br> |
[[File:Lpc1768_Keil_09.png]]<br><br> | [[File:Lpc1768_Keil_09.png]]<br><br> | ||
| Line 59: | Line 59: | ||
<b>Step17:</b> Check the project folder for the generated .hex file.<br> | <b>Step17:</b> Check the project folder for the generated .hex file.<br> | ||
[[File:Lpc1768_Keil_17.png]]<br> | [[File:Lpc1768_Keil_17.png]]<br> | ||
| + | |||
| + | After generating the .hex file check the tutoial [[LPC1768: Uploading Hex and Bin files.|LPC1768 Tutorials]]. | ||
<br><br> | <br><br> | ||
Revision as of 00:42, 26 March 2016
Objective
In this tutorial we will see how to setup a keil project to generate .hex file for LPC1768

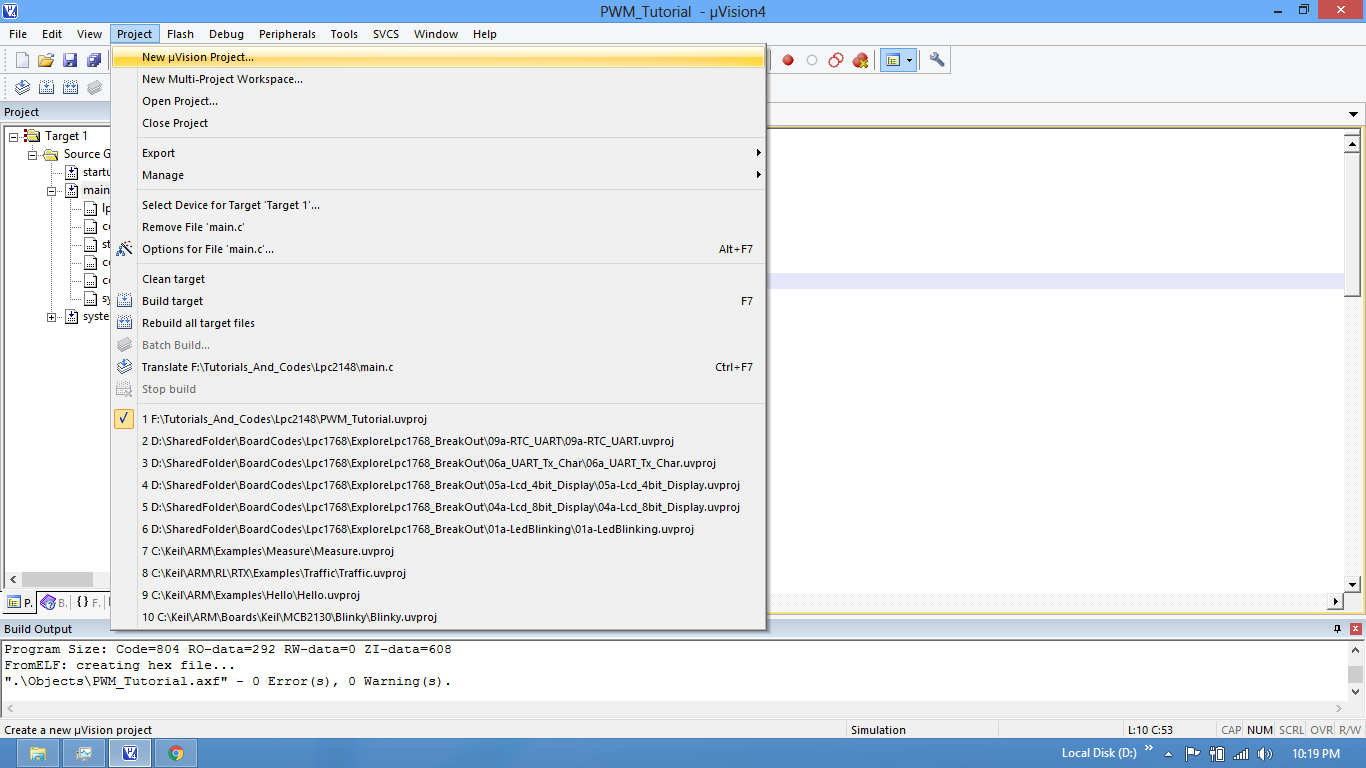
Step1: Open the Keil software and select the New Microvision project from Project Menu as shown below.
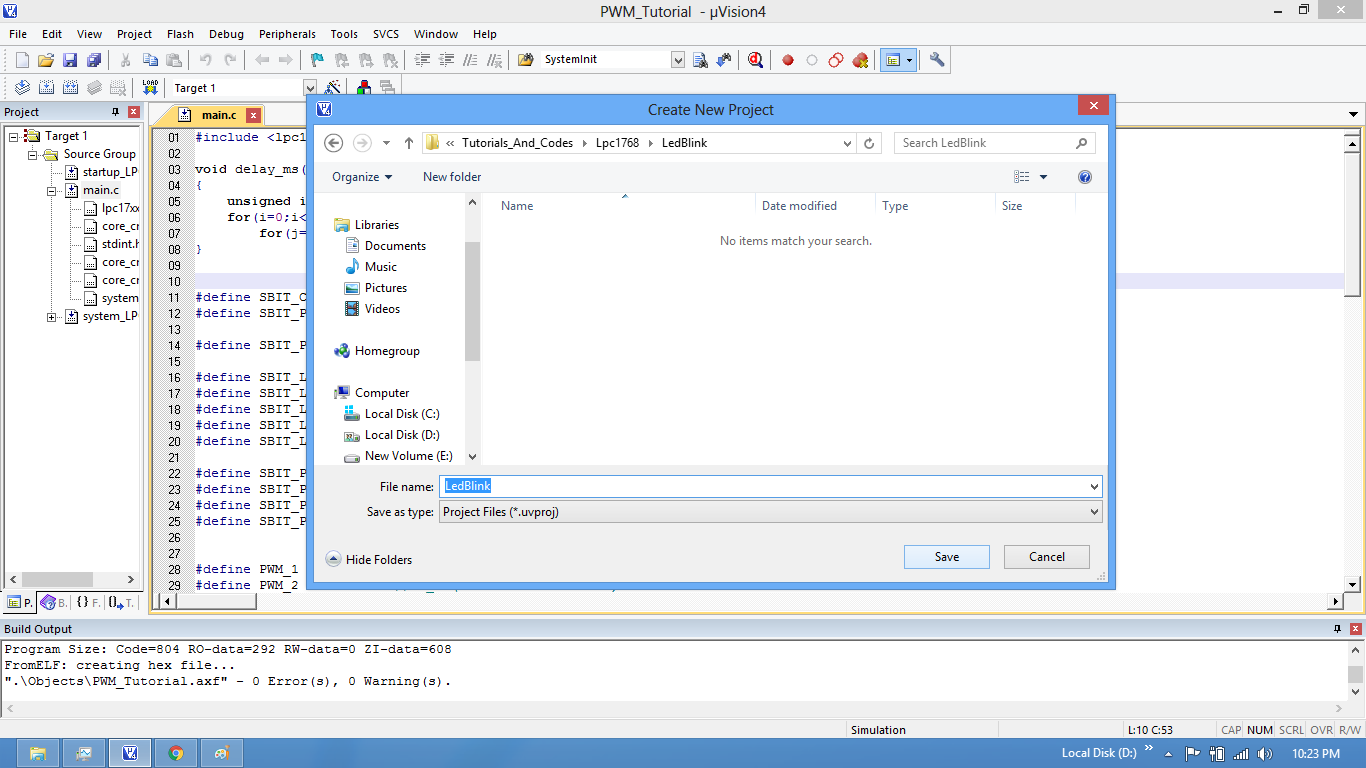
Step2: Browse to your project folder and provide the project name and click on save.
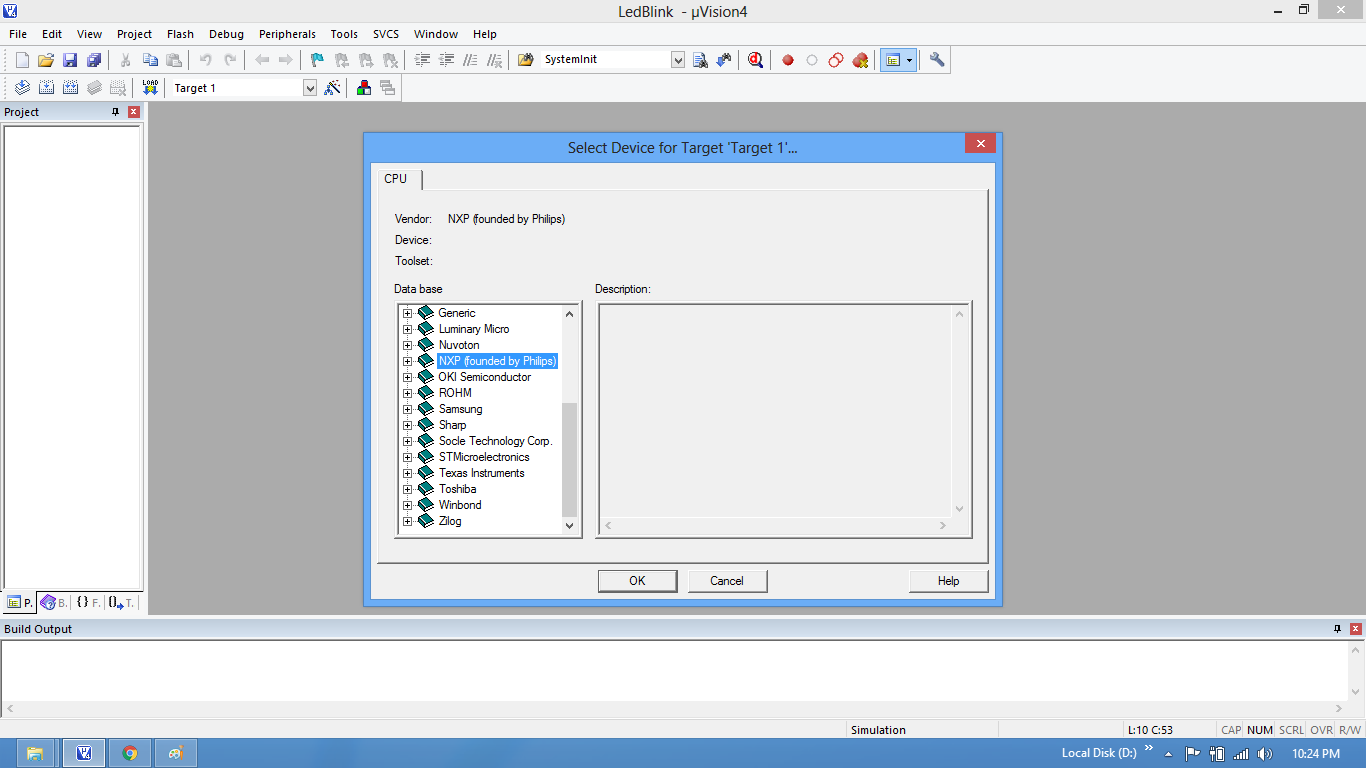
Step3: Once the project is saved a new pop up “Select Device for Target” opens, Select the controller(NXP:LPC1768) and click on OK.
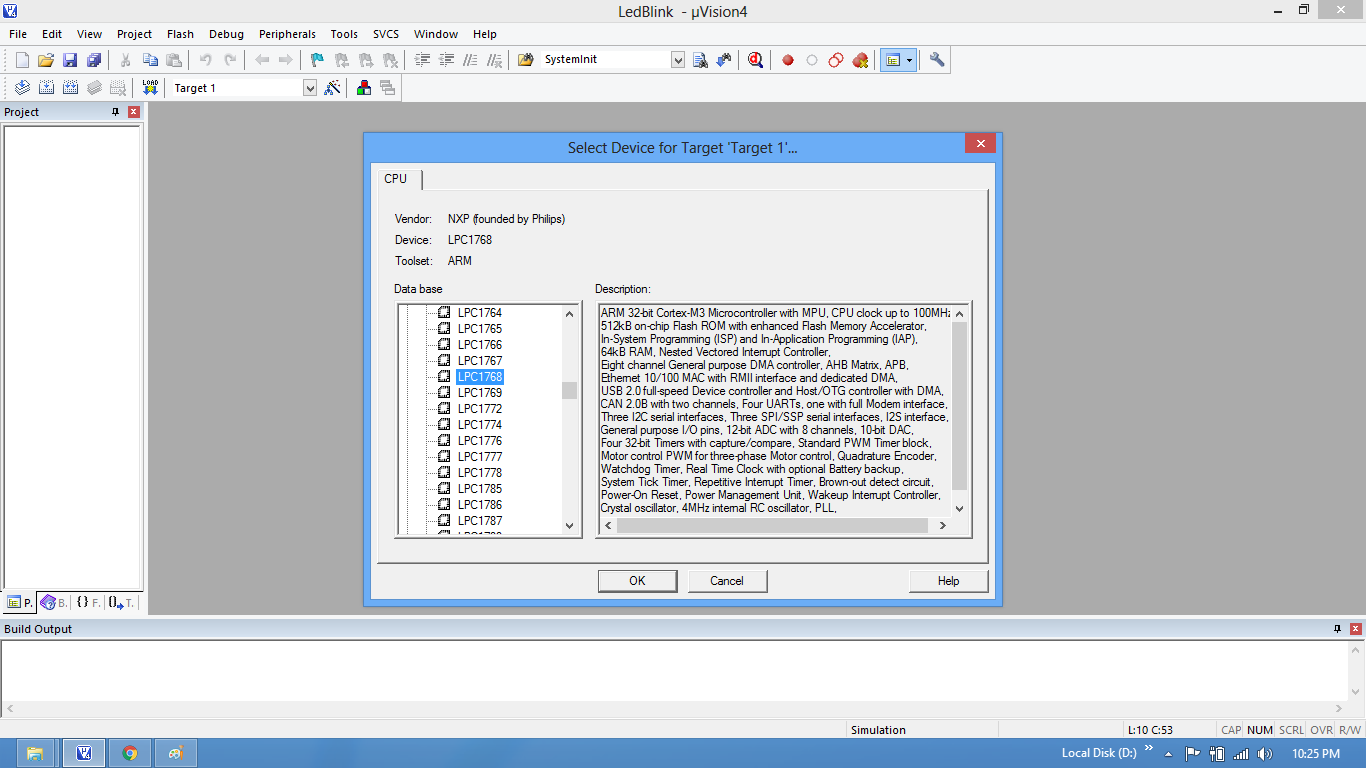
Step4: Select the controller(NXP:LPC1768) and click on OK.
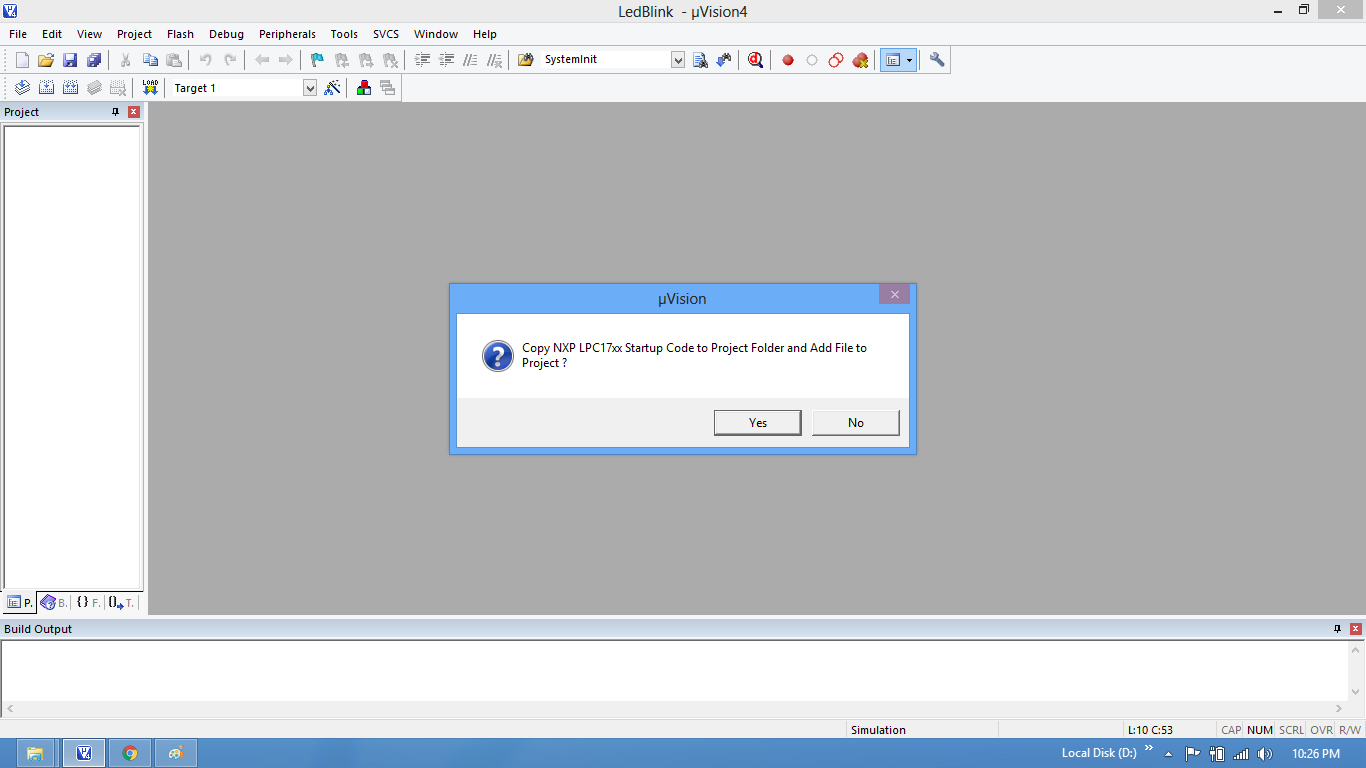
Step5: As LPC1768 needs the startup code, click on Yes option to include the LPC17xx Startup file.
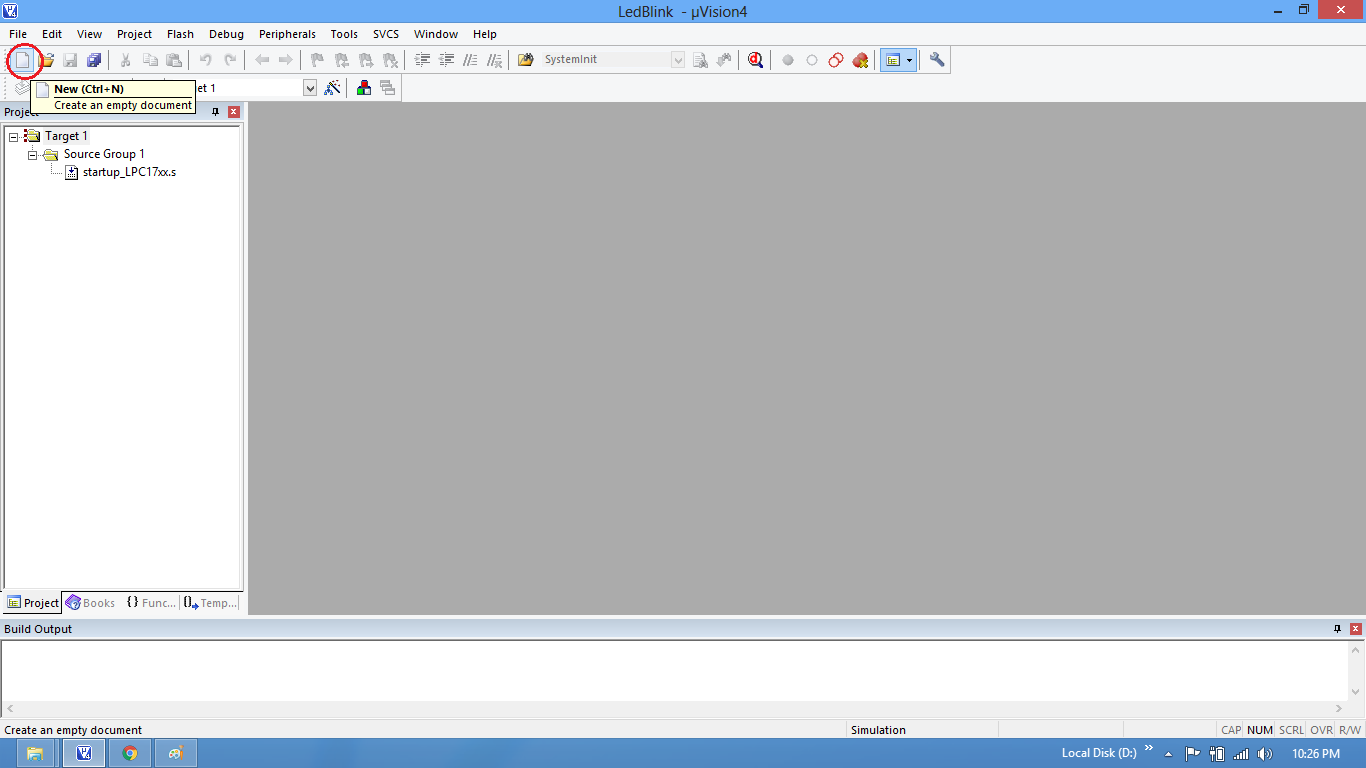
Step6: Create a new file to write the program.
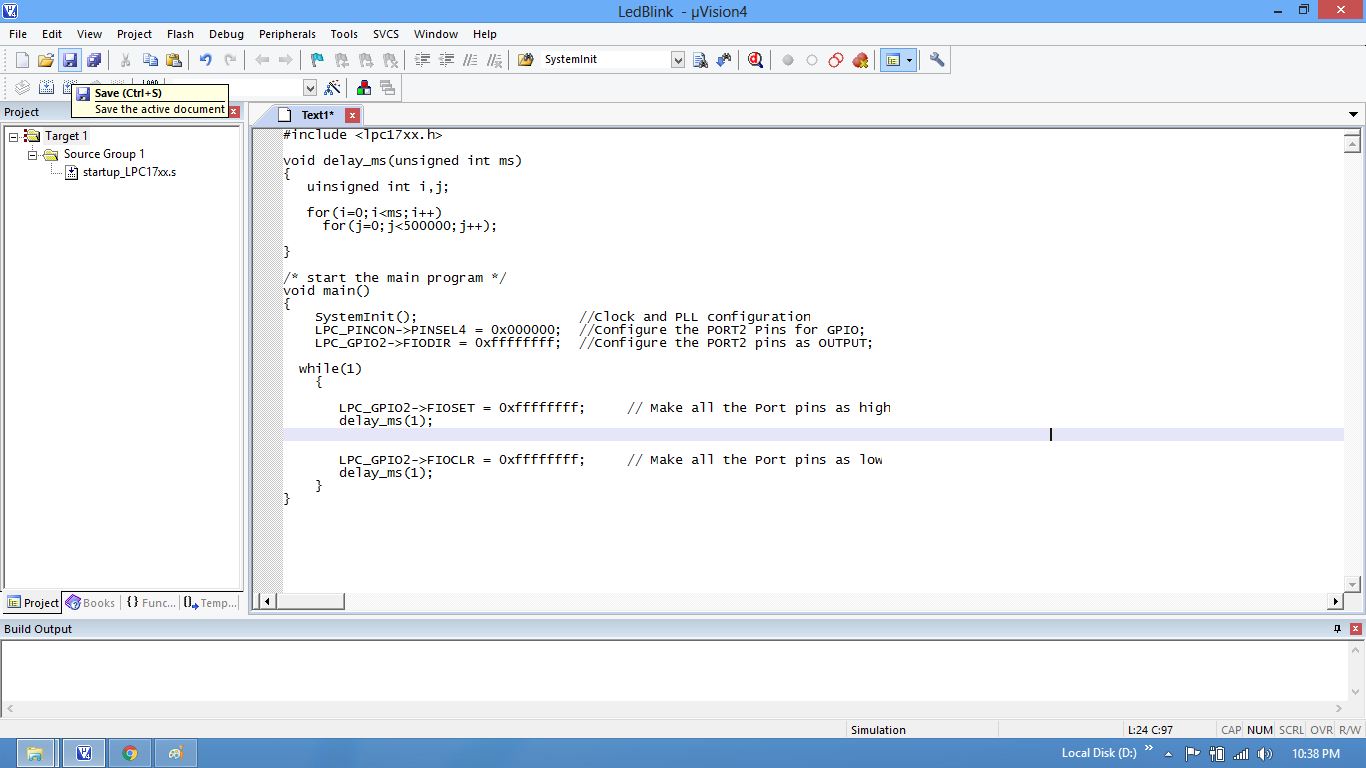
Step7: Type the code or Copy paste the below code snippet.
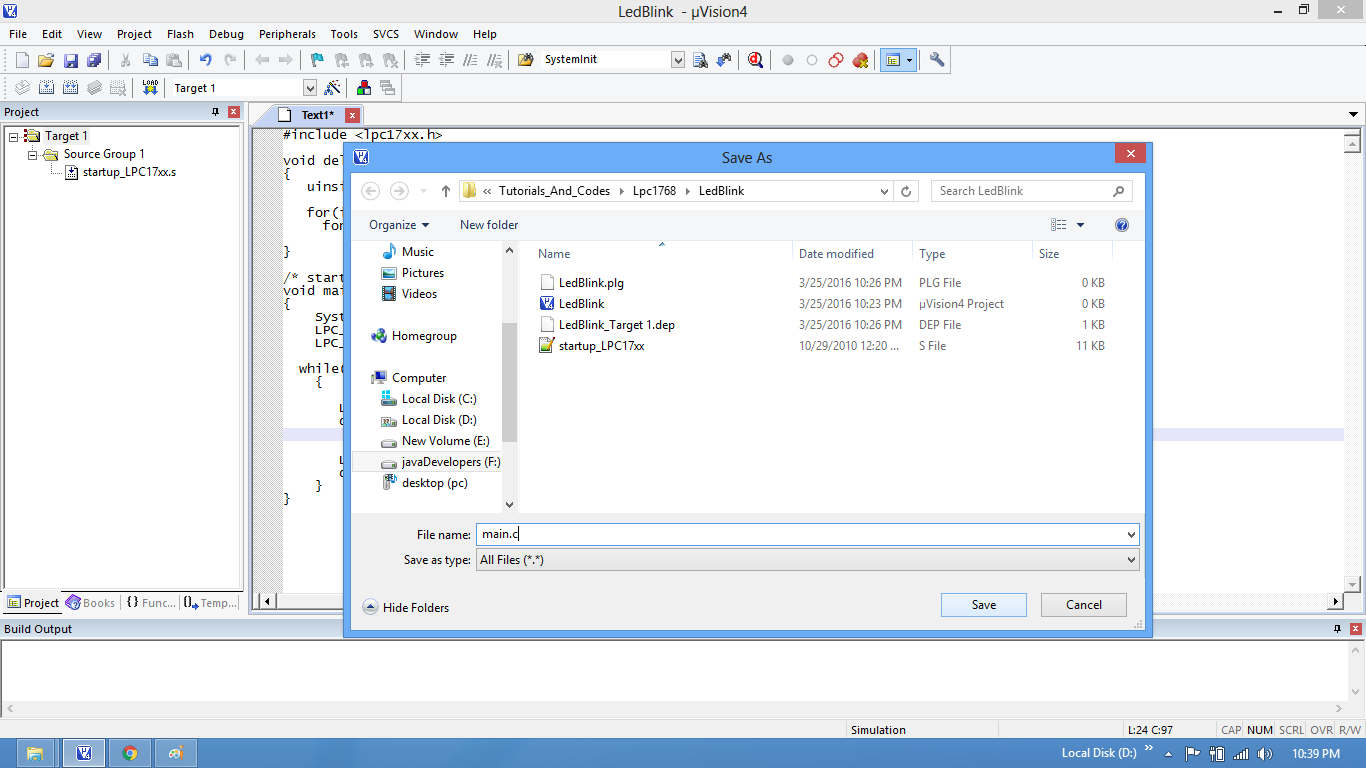
Step8: After typing the code save the file as main.c.
Step9: Add the recently saved file to the project.
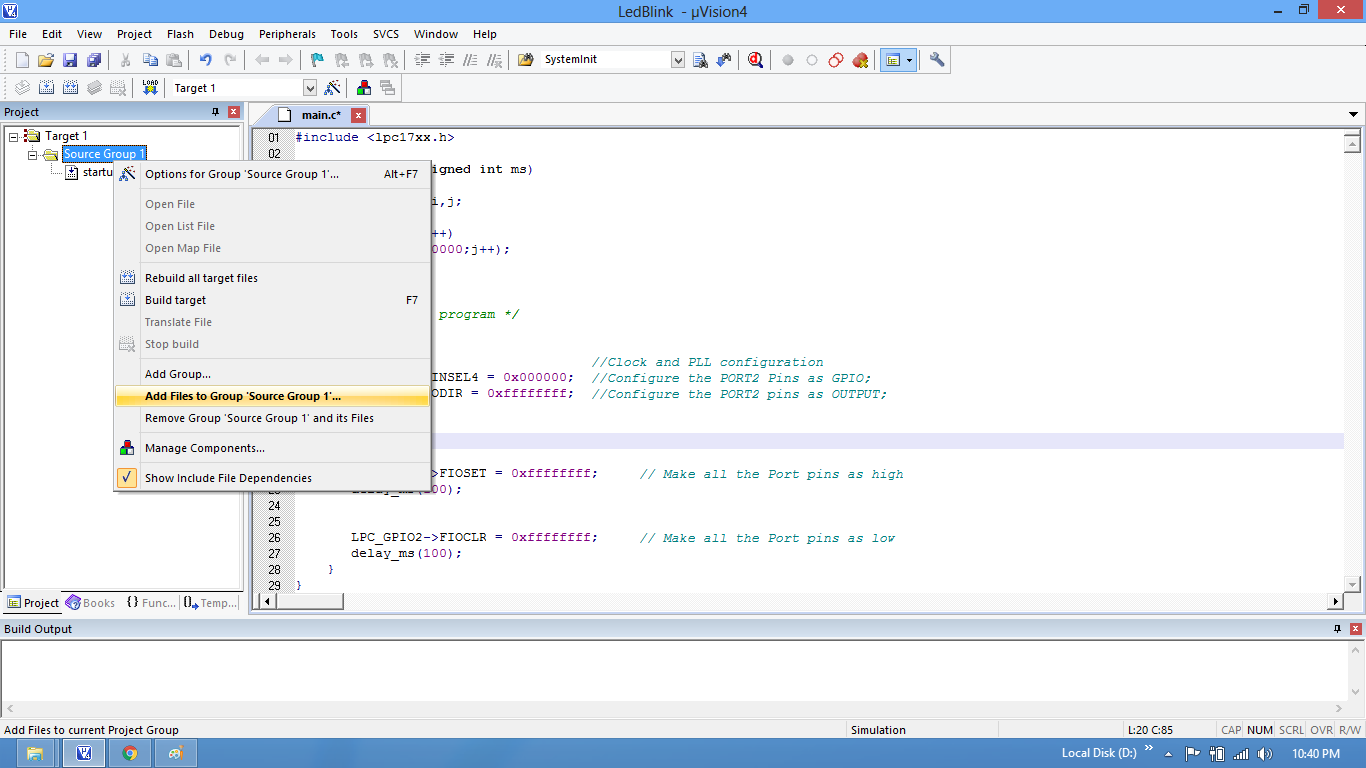
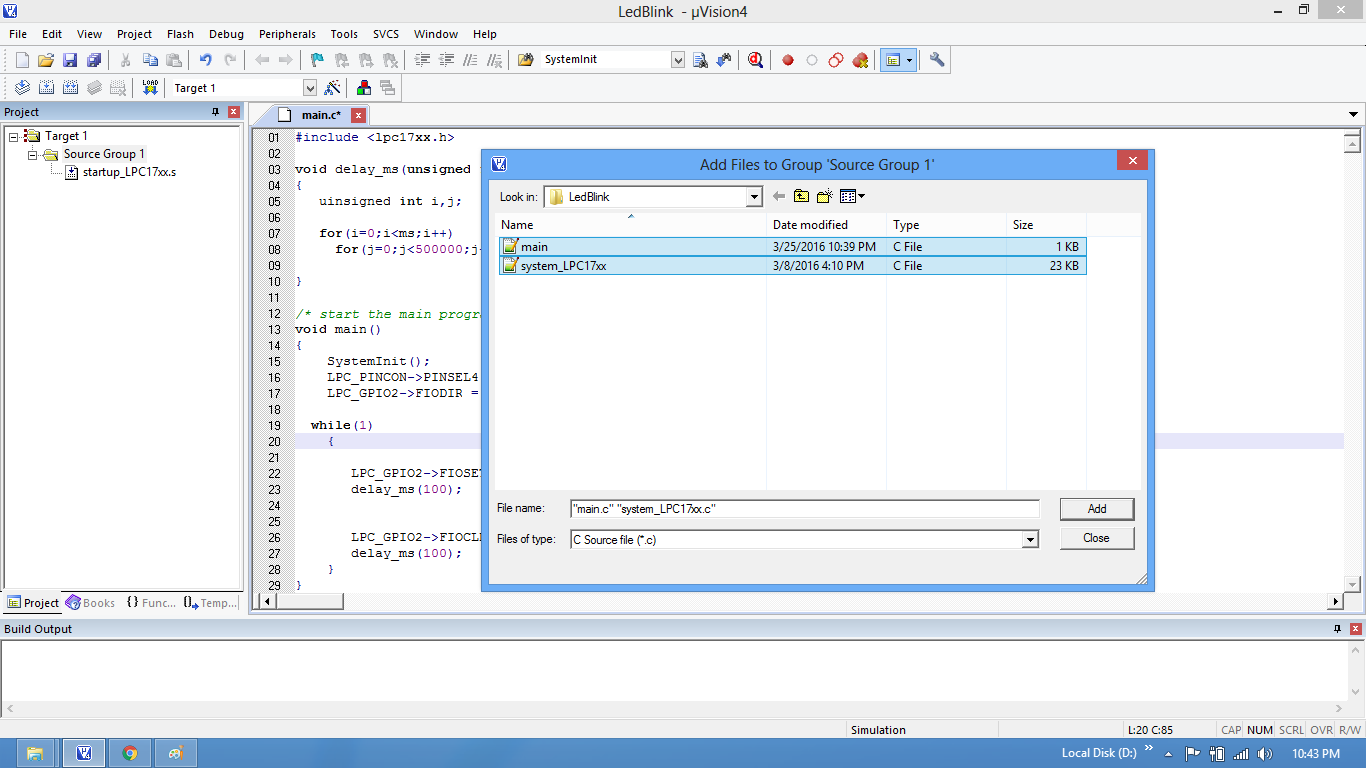
Step10: Add the main.c along with system_LPC17xx.c.
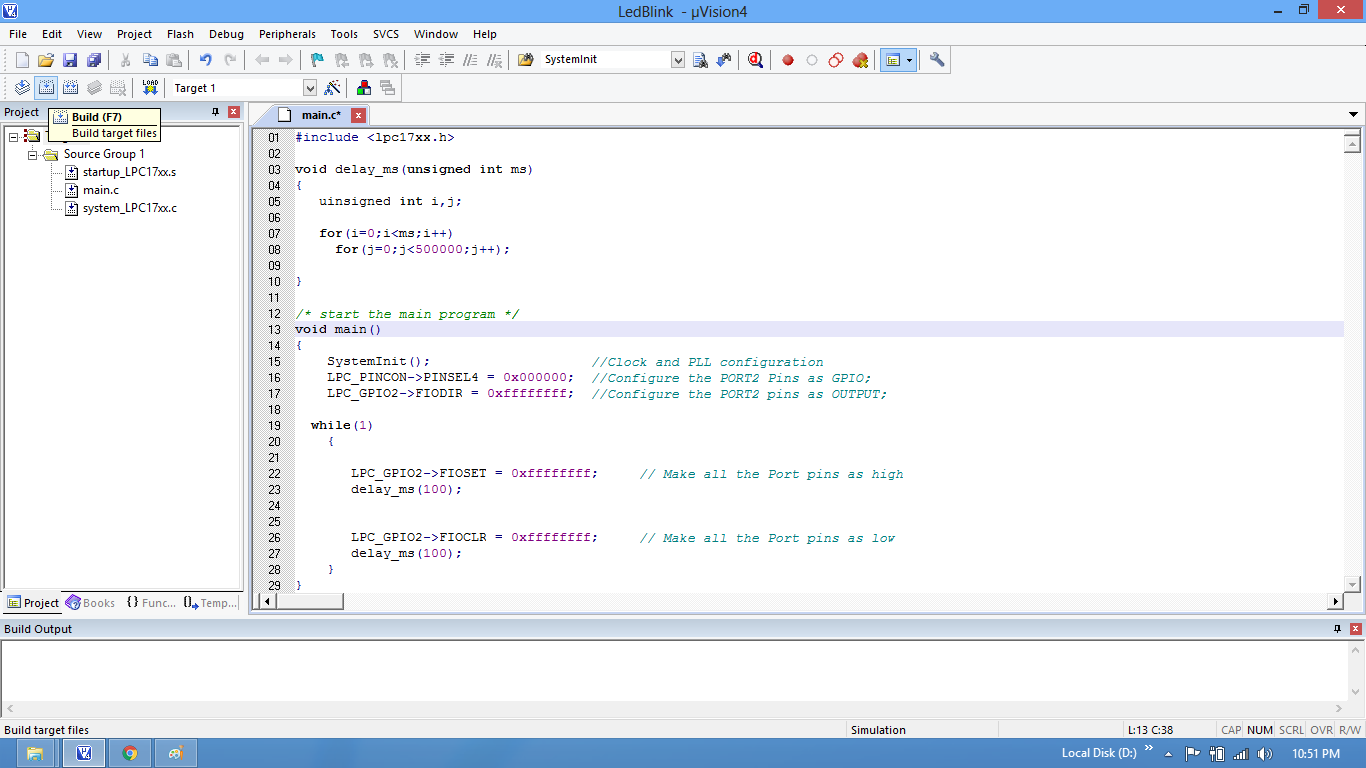
Step11: Build the project and fix the compiler errors/warnings if any.
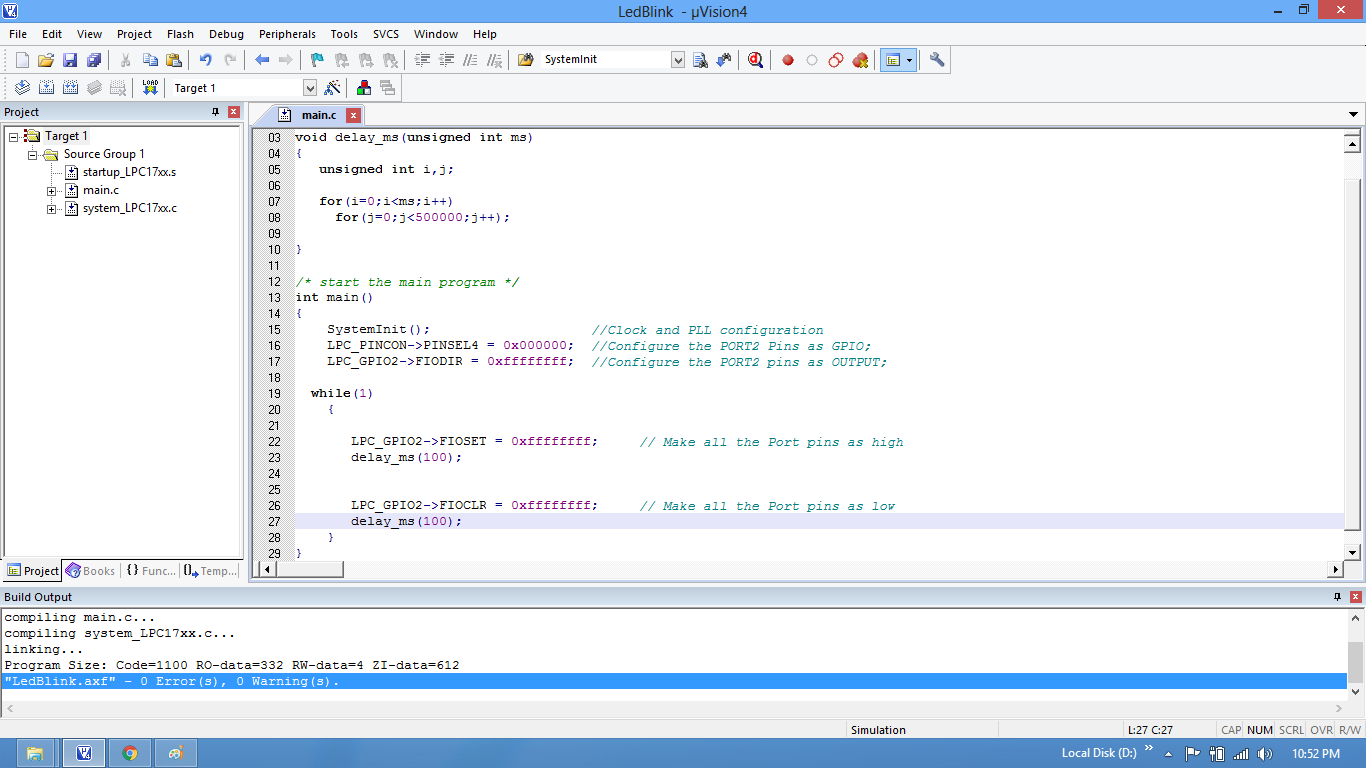
Step12: Code is compiled with nor errors. The .hex file is still not generated.
Step13: Click on Target Options to select the option for generating .hex file.
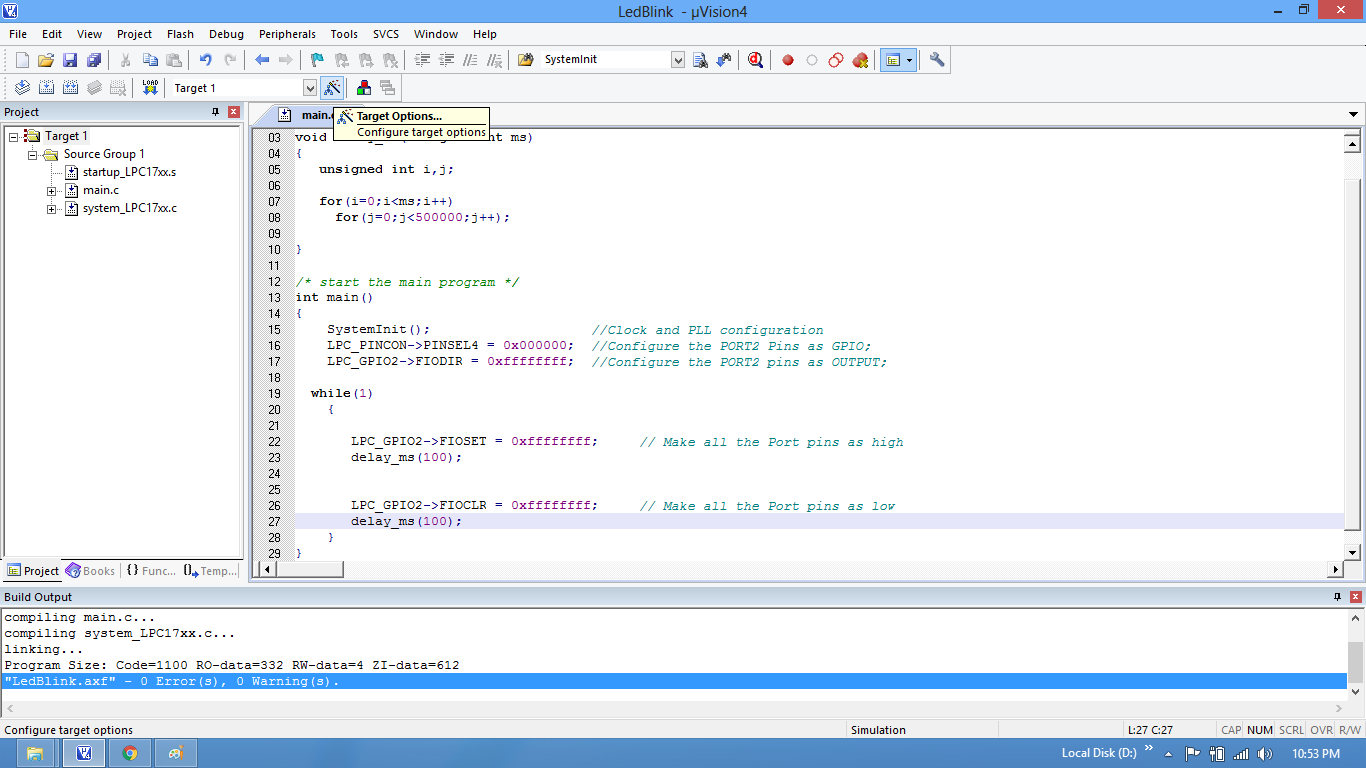
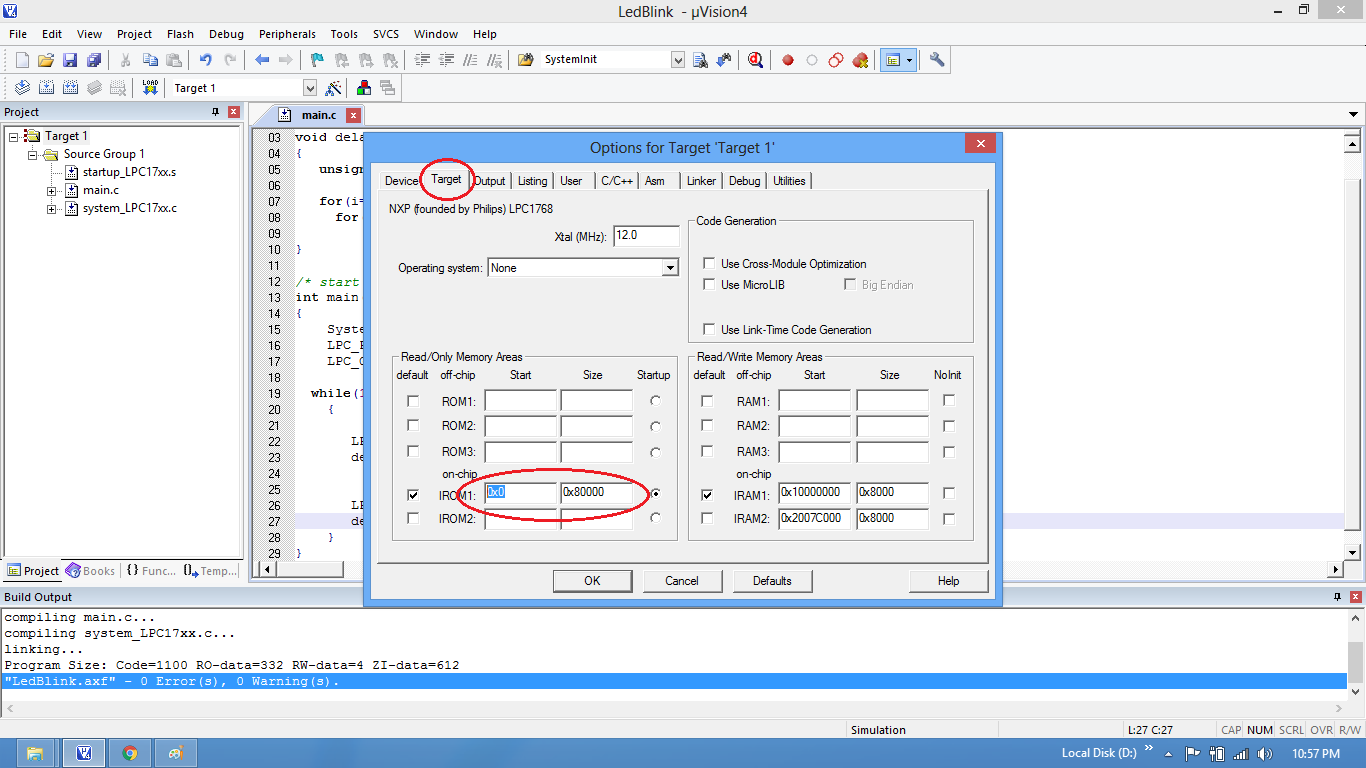
Step14: Set IROM1 start address as 0x0000.
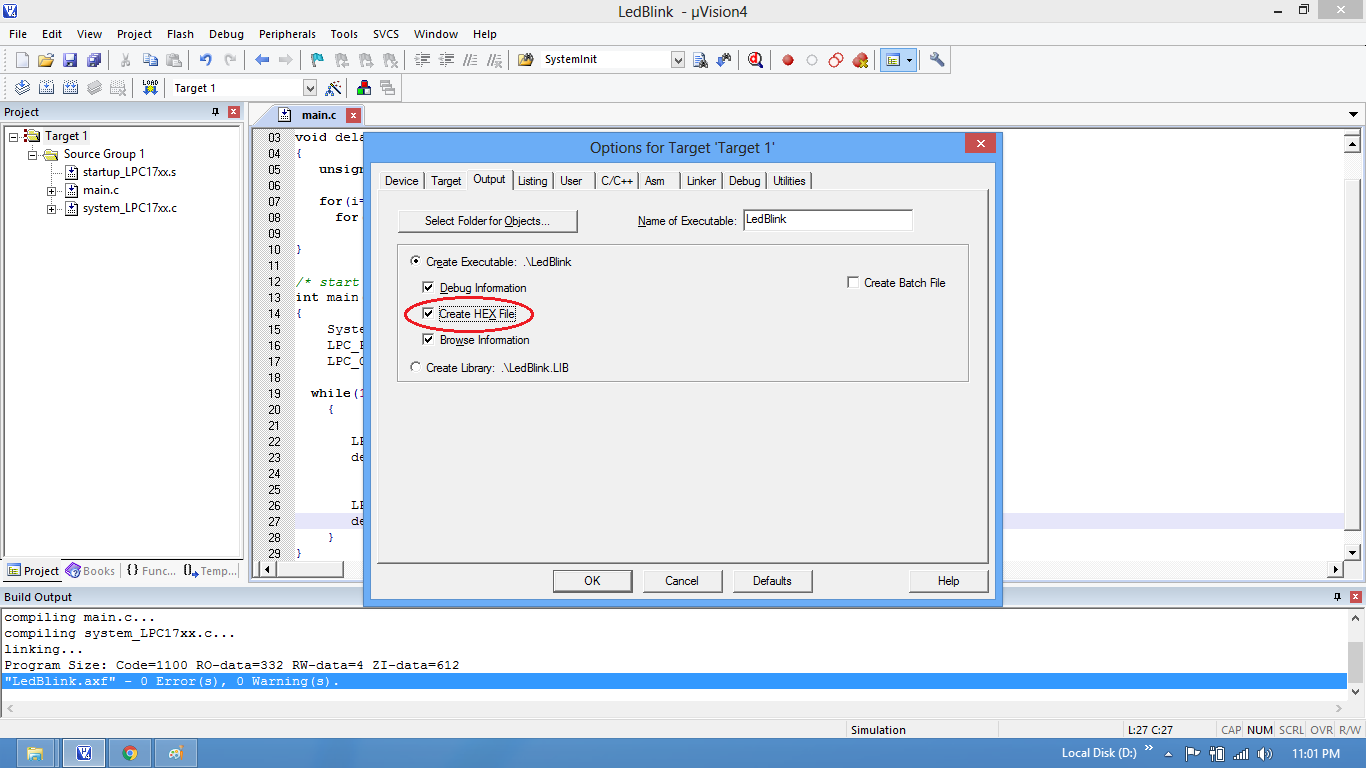
Step15: Enable the option to generate the .hex file
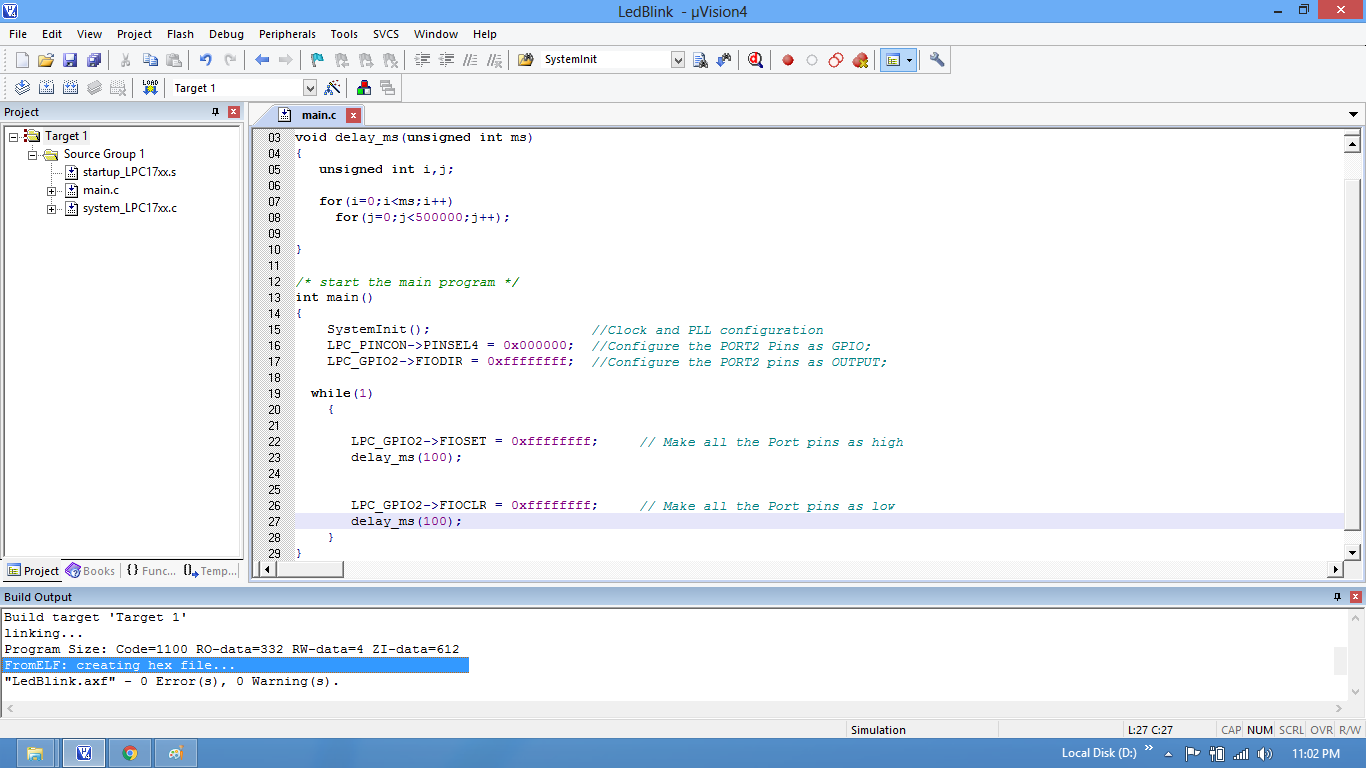
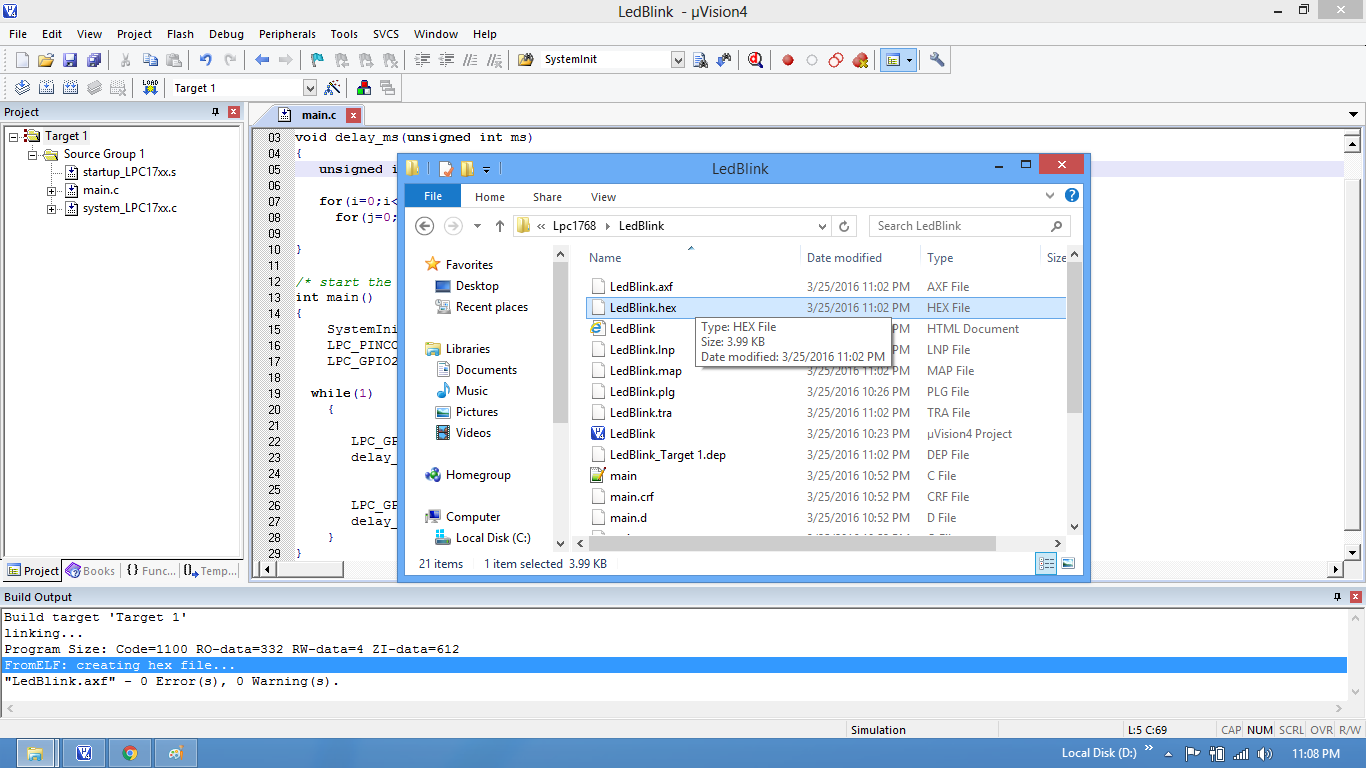
Step16: .Hex file is generated after a rebuild.
Step17: Check the project folder for the generated .hex file.
After generating the .hex file check the tutoial LPC1768 Tutorials.
