Difference between revisions of "CoIDE with ARMGCC for ARM Development"
m |
|||
| Line 9: | Line 9: | ||
=Downloads= | =Downloads= | ||
| − | CoIDE version 1.7.8 | + | [http://www.coocox.org/software/coide.php CoIDE version 1.7.8] |
| − | + | [https://launchpad.net/gcc-arm-embedded/4.9/4.9-2014-q4-major/+download/gcc-arm-none-eabi-4_9-2014q4-20141203-win32.zip ARM GNU tool ] | |
| − | + | ||
| − | + | ||
| − | + | ||
| − | https://launchpad.net/gcc-arm-embedded/4.9/4.9-2014-q4-major/+download/gcc-arm-none-eabi-4_9-2014q4-20141203-win32.zip | + | |
=Setup= | =Setup= | ||
Latest revision as of 14:04, 30 May 2015
Amruta (talk) 10:30, 10 March 2015 (IST)
Intro
Welcome to the world of ARM Microcontrollers. In this tutorial, we will look at setting up free and open-source tools for ARM Development. We have been working on LPC1768 for some-time with Keil and other development suites. However an open source alternative is always good to have. For student’s academia and startups this is a boon.
You could use eclipse with ARMGCC straightway, however Co-IDE from Coo-Cox, simplifies a lot of things and it is also based on eclipse. In one package it configures all that you require except the ARMGCC. It will configure most of the ARM based MCUs from major vendor for you. The best part is, it is directly connected to GITHUB and uses a component model, with which you can add all the peripheral libraries and sample codes on the fly. Download and install both from the links below:
Downloads
Setup
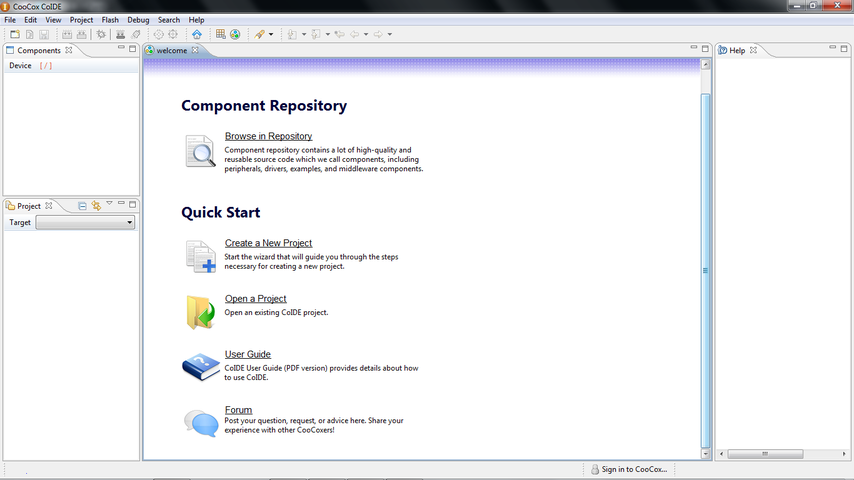
After you have installed the CoIDE and ARM GNU compiler, launch the CoIDE application.
You can see following window :
Toolchain Configuration
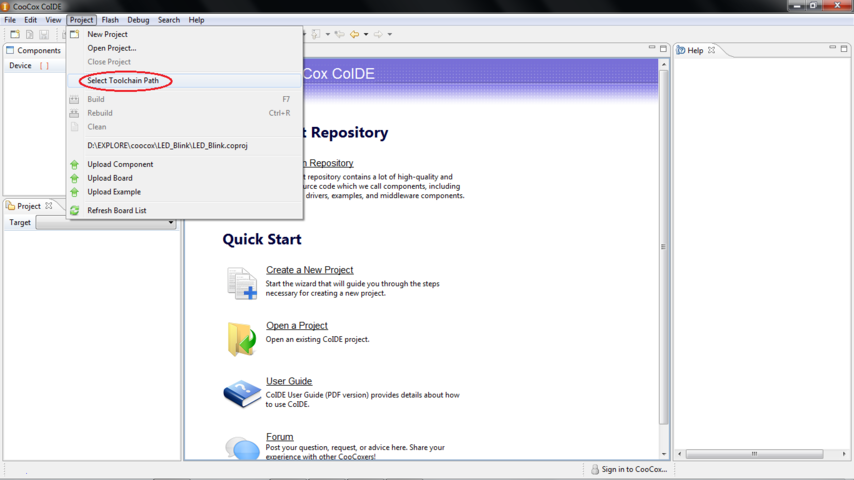
Now you need to configure tool-chain path for ARM compilation. Follow the following steps :
1. From Menu bar go to the ‘Project’ menu, select the option ‘Select Toolchain Path’.
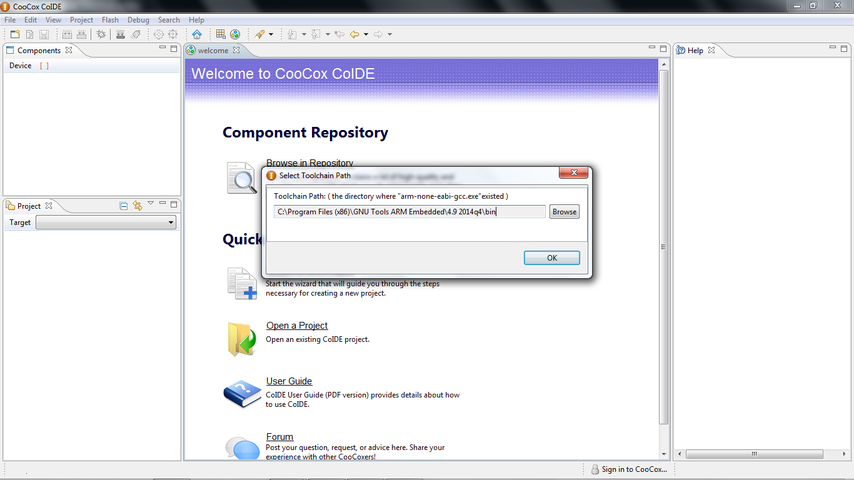
2. Now give the path where you had installed ARM GNU compiler and click OK.
Path will be like " C:\Program Files (x86)\GNU Tools ARM Embedded\4.9 2014q4\bin " (for Windows 7 64 bit)
Now your CoIDE is ready to use.
Sample Project for LPC1768
Let’s create a simple project to blink a LED.
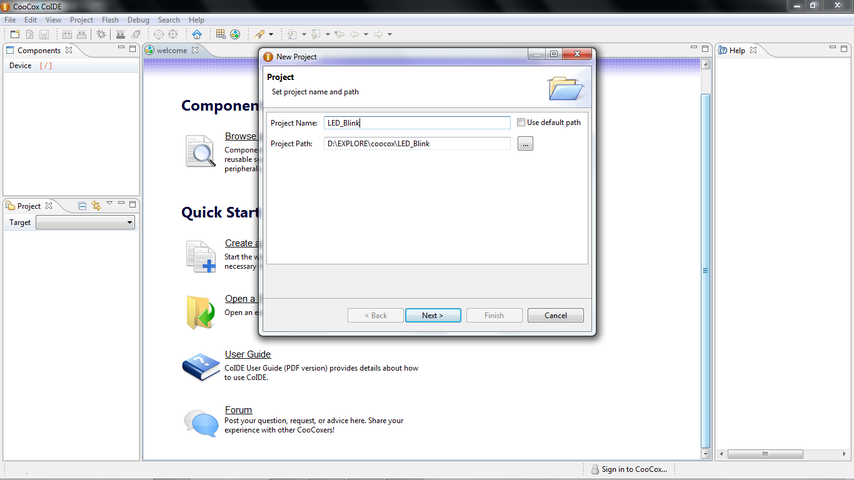
1. Select the option Create a New Project.
Give the project name, say, LED_Blink. This will create your project in default CoIDE workspace.
If you want to change the workspace, just uncheck 'Use Default Path' give the folder path for our new workspace.
It’s a good practice to create separate folder for each new project.
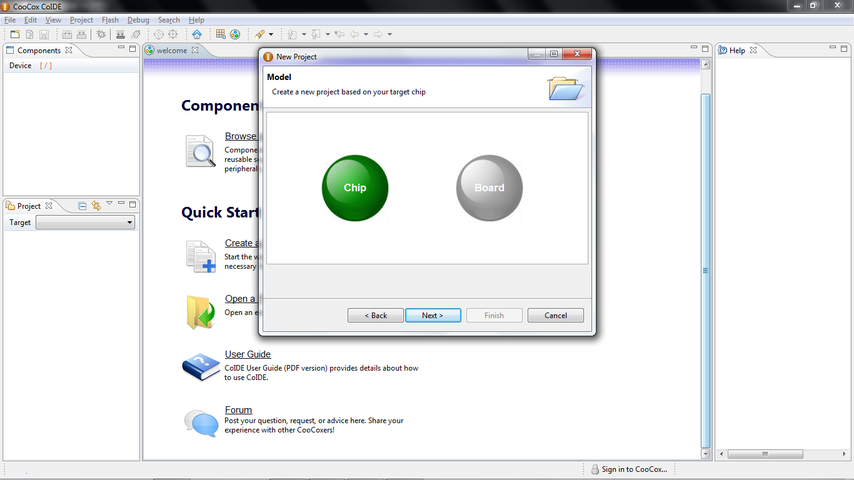
2. With CoIDE you can directly do board specific programming. For that you need to select ‘Device ‘ option.
Here we will select ‘Chip’ ( Click the bubble ) and go Next.
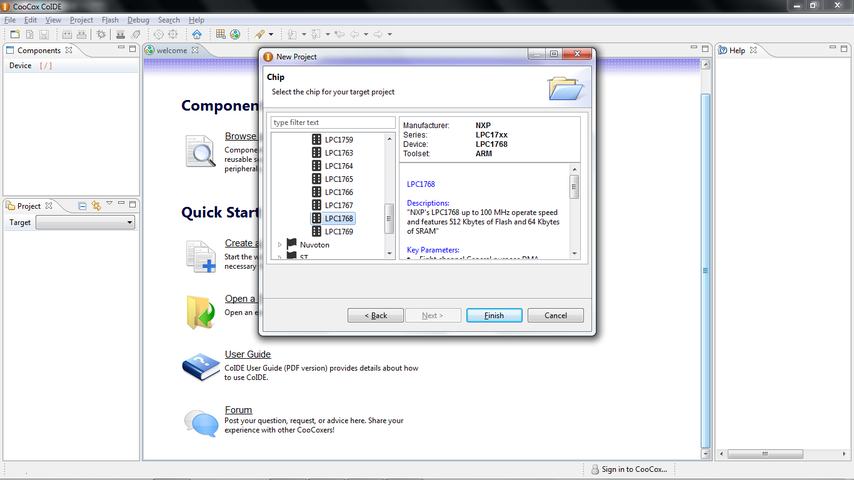
3. It’s time to select the micro-controller.
To select LPC1768 follow NXP -> LPC17XX -> LPC1768. You will see the following window.
In the right tab you can get basic information about the LPC1768. Click Finish.
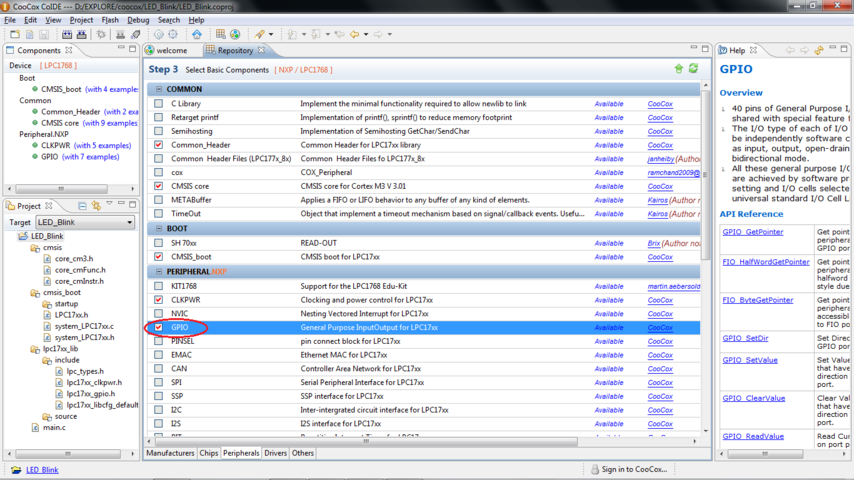
4. Now ‘Component’ window will appear.
With CoIDE it’s very easy to program any peripheral. You only need to select required peripherals here. Respective library files will be automatically added to your project.
For LED blinking, we will check GPIO.
Notice that, all other required libraries like header files, CMSIS files, etc. are checked automatically. This is the beauty of CoIDE.
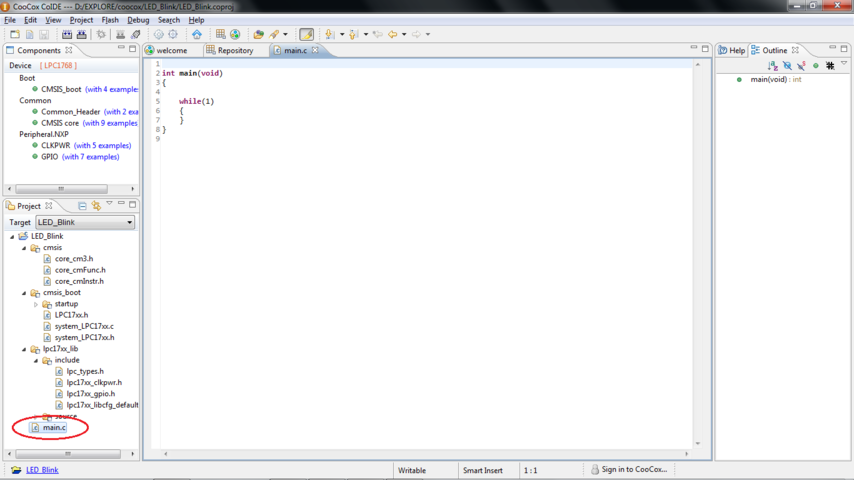
5. In the 'Project' tab ( left bottom side ) you can see all included files. Open 'main' file to start programming.
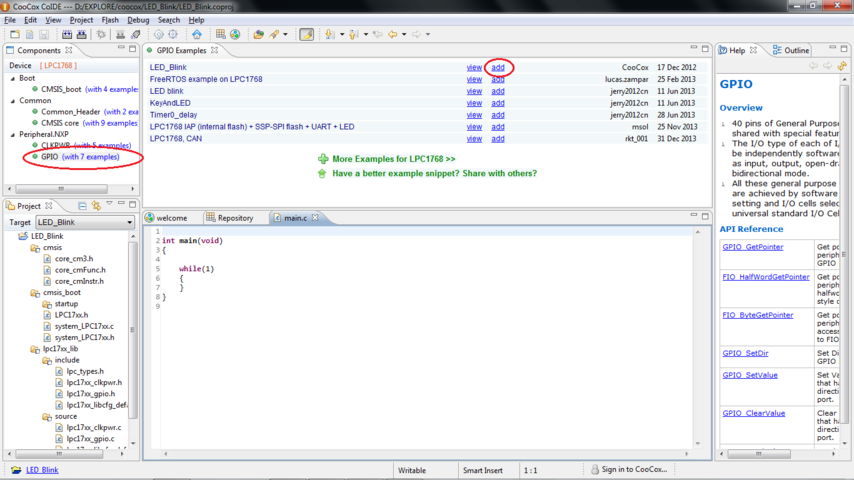
6. Now instead of writing the code we are going to use Example project already available.
To do this, select 'GPIO' from 'Component' tab ( left top side ) and 'add' LED_Blink example from 'GPIO Example' tab.
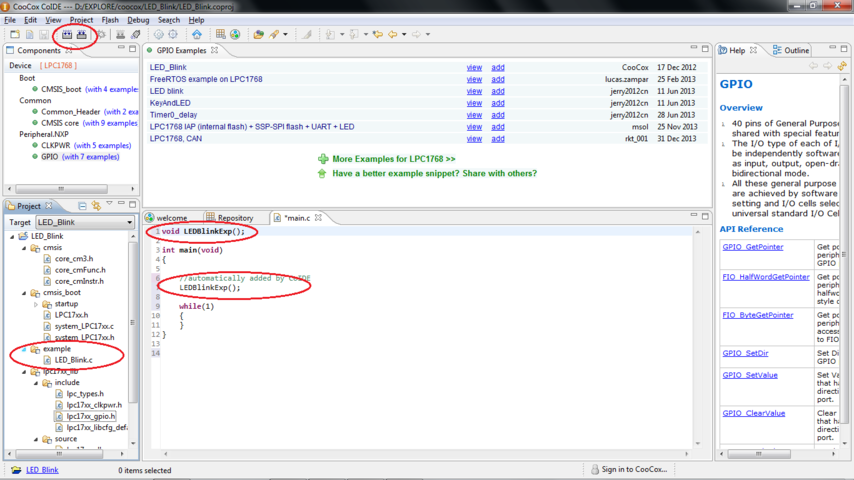
7. Notice the changes in main.c file.
Now save the project and build it by clicking 'Build' tool on toolbar to compile it.
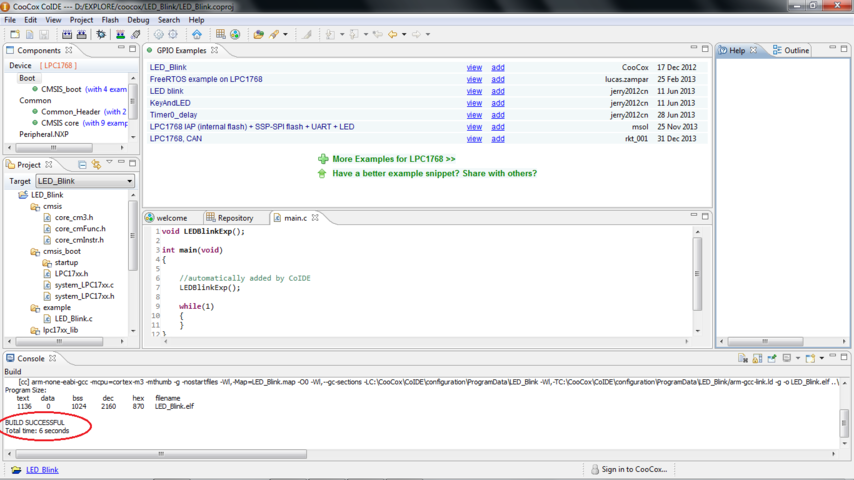
8. On successful compilation following window will appear.
CoIDE creates both bin and hex file. You don't need to configure anything.
You can locate these files in your project directory here : "...\LED_Blink\LED_Blink\Debug\bin"

