Difference between revisions of "8051 Library Usage Guide"
| Line 9: | Line 9: | ||
'''Step 3:'''Once the project is saved a new dialog box “Select Device for Target” opens, Select the controller(Atmel:At89s52/NXP:P89v51rd2) and click on OK.'' | '''Step 3:'''Once the project is saved a new dialog box “Select Device for Target” opens, Select the controller(Atmel:At89s52/NXP:P89v51rd2) and click on OK.'' | ||
[[File:3Select_DeviceForTarget.png]] | [[File:3Select_DeviceForTarget.png]] | ||
| + | |||
| + | '''Step 4:'''Once the project is created add a new header group to include the library header files.'' | ||
| + | [[File:4Add_NewHeaderGroup.png]] | ||
| + | |||
| + | '''Step 5: '''Add the library files to the project .c files to Source group and .h files to header group.'' | ||
| + | [[File:5Add_LibraryFiles.png]] | ||
Revision as of 12:39, 4 December 2013
Libray usage guide
- Below example demonstrates the step by step procedure to include the libraries into any applications.
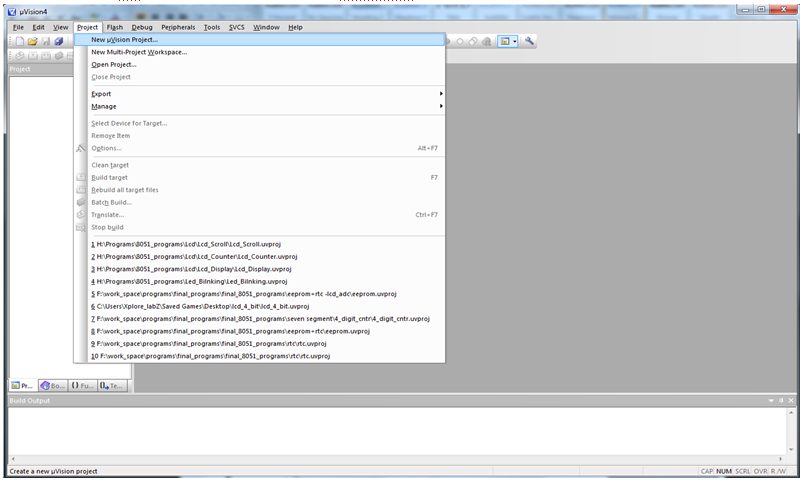
Step 1: Open the Keil software and select the New Microvision project from Project Menu as shown below.
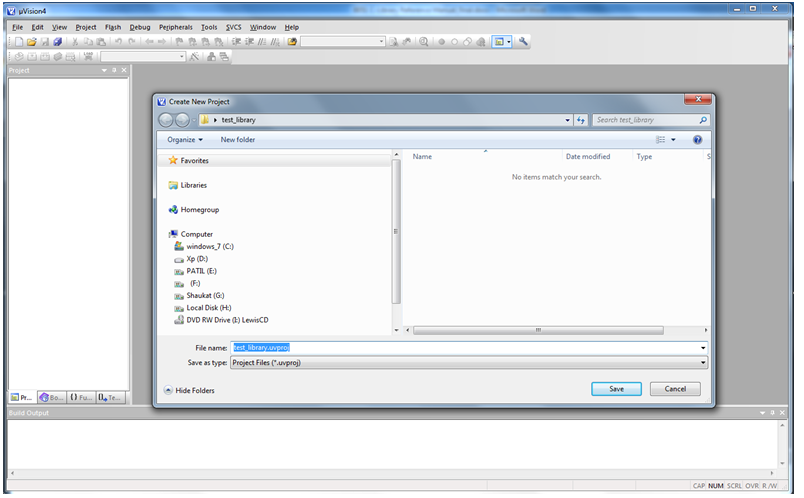
Step 2: Browse to your project folder and provide the project name and click on save.
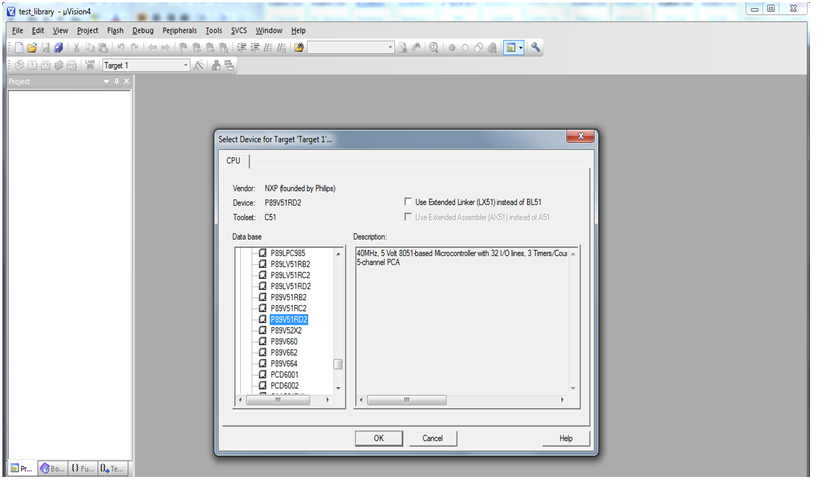
Step 3:Once the project is saved a new dialog box “Select Device for Target” opens, Select the controller(Atmel:At89s52/NXP:P89v51rd2) and click on OK.
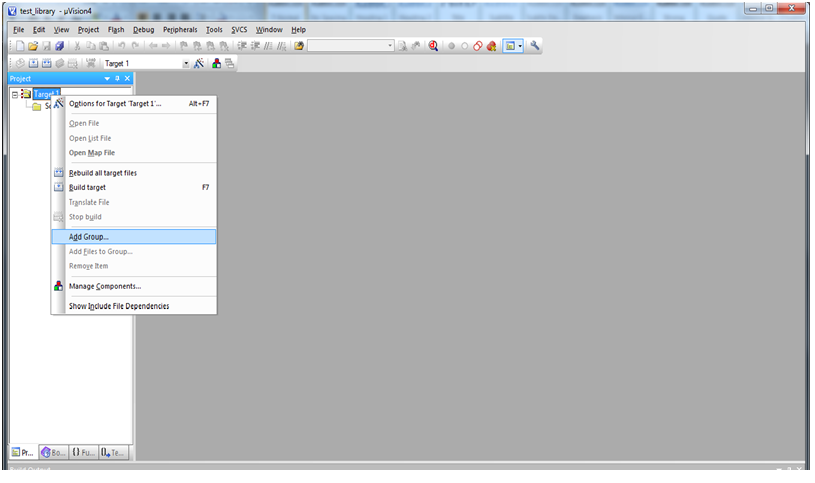
Step 4:Once the project is created add a new header group to include the library header files.
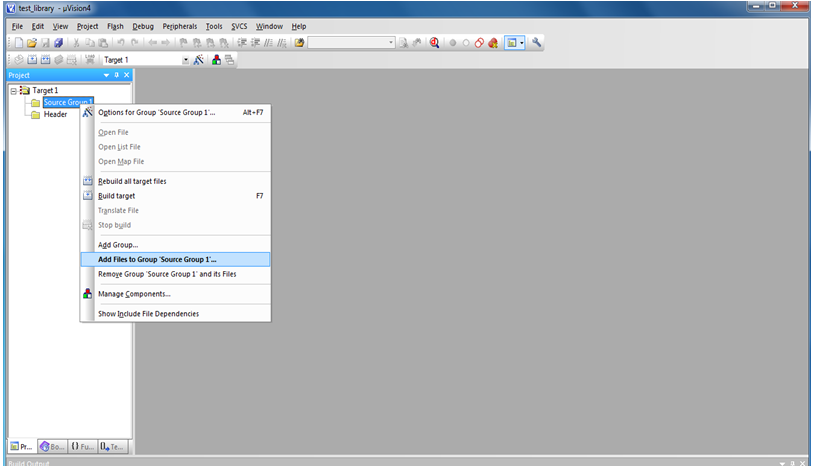
Step 5: Add the library files to the project .c files to Source group and .h files to header group.
