Difference between revisions of "Starter SST89E516RD USB Development board"
| Line 57: | Line 57: | ||
File:7 Flash.JPG | File:7 Flash.JPG | ||
</gallery> | </gallery> | ||
| + | {{DISQUS}} | ||
Revision as of 16:43, 25 August 2014
This is latest 8051 Starter Development board from Explore Embedded, the board uses SST89E512RD Microcontroller which is 100% compatible with P89V51RD2. The board has USB to Serial Convertor which can be used to program/flash the MCU; eliminates need for a programmer. It can used with laptops as well!
Features
- SST89E516RD Microcontroller with bootloader (no programmer needed)
- CP2102 USB to Serial Convertor on board
- 16 x 2 LCD Interface
- Switches x2
- LEDs x2
- All Ports pins as breakout.
- High quality FR4 , wave soldered PCB.
SST89E516RD MCU Features
- 1 KByte Internal RAM
- Dual Block SuperFlash EEPROM– 64 KByte primary block +8 KByte secondary block
- Support External Address Range up to 64KByte of Program and Data Memory
- Three High-Current Drive Ports (16 mA each)
- Three 16-bit Timers/Counters
- Full-Duplex, Enhanced UART– Framing Error Detection– Automatic Address Recognition
- Ten Interrupt Sources at 4 Priority Levels– Four External Interrupt Inputs
- Programmable Watchdog Timer (WDT)
- Programmable Counter Array (PCA)
- Four 8-bit I/O Ports (32 I/O Pins) andOne 4-bit Port
- Second DPTR register
- Low EMI Mode (Inhibit ALE)
- SPI Serial Interface
- Standard 12 Clocks per cycle, the device has adoption to double the speed to 6 clocks per cycle.
- TTL- and CMOS-Compatible Logic Levels
- Brown-out Detection
- Low Power Modes– Power-down Mode with External Interrupt Wake-up– Idle Mode
Downloads
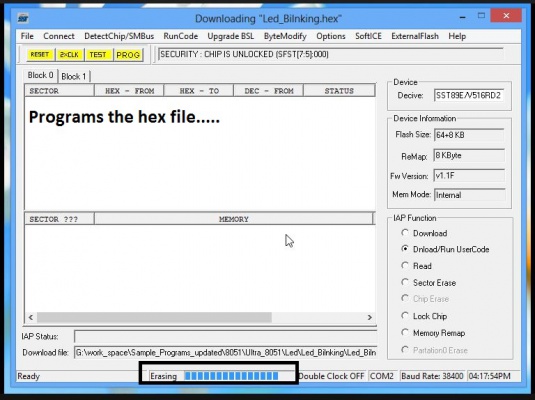
Setting up EasyIAP SW and programming the hex file
- Connect the Board to the computer and install Windows USB to UART Drivers for CP2102.
- Note: Power up the board with 7 to 12V, 1A adapter, the board does not power up from USB.
- Note down the COM Port Number e.g. COM 2 from device manager
- Download EasyIAP and install it.
- Follow the steps in the pictures below to detect the board and flash the hex file


