Difference between revisions of "Setting up Eclipse for ESP-IDF"
| Line 14: | Line 14: | ||
Install and start the IDE. | Install and start the IDE. | ||
| + | All the images below have steps marked with numbers, please perform them in a series. | ||
| + | To start with | ||
| + | # Select the project type as Empty Project | ||
| + | # Toolchains as Cross GCC | ||
| + | # Uncheck Use Default Location | ||
| + | # Enter the project Name as 01_hello_world | ||
[[File:2_make_file_proj_esp32.JPG]] | [[File:2_make_file_proj_esp32.JPG]] | ||
[[File:3_proj_properties.jpg]] | [[File:3_proj_properties.jpg]] | ||
Revision as of 14:35, 23 December 2016
(Tutorial in the making...)
Eclipse offers a very good development environment with numerous features, however setting it correctly is sometimes frustrating. Once it is done, it make the workflow quite simple. So let's set it up and see how it goes!
The first thing that needs to be done is to set-up ESP-IDF and ensure that all the dependencies are taken care of. Check the detailed tutorial on setting up ESP-IDF to get that done.
The ESP-IDF is setup in such a way that you can develop your application without modifying the ESP-IDF files. The application can reside in a completely separate directory from the ESP-IDF files. This allows the ESP-IDF core files to be updated independently of the application. We will be configuring the same blink example from the above tutorial.
To get started download the latest eclipse IDE for C/C++
http://www.eclipse.org/downloads/packages/eclipse-ide-cc-developers-includes-incubating-components/indigosr2
Install and start the IDE.
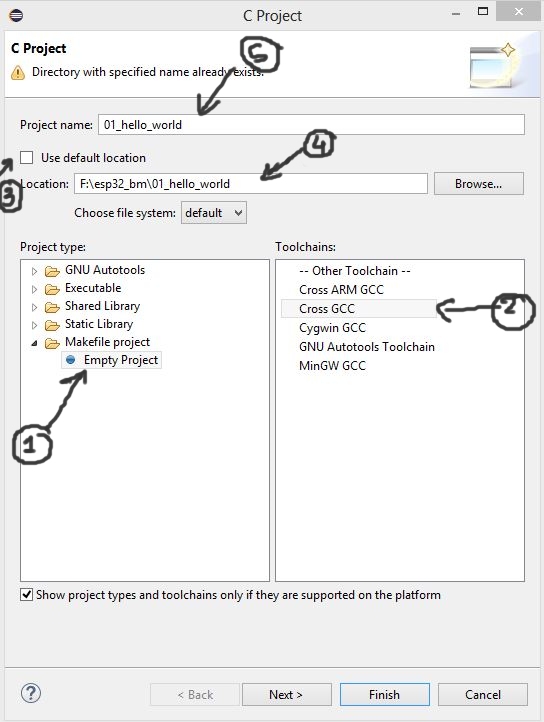
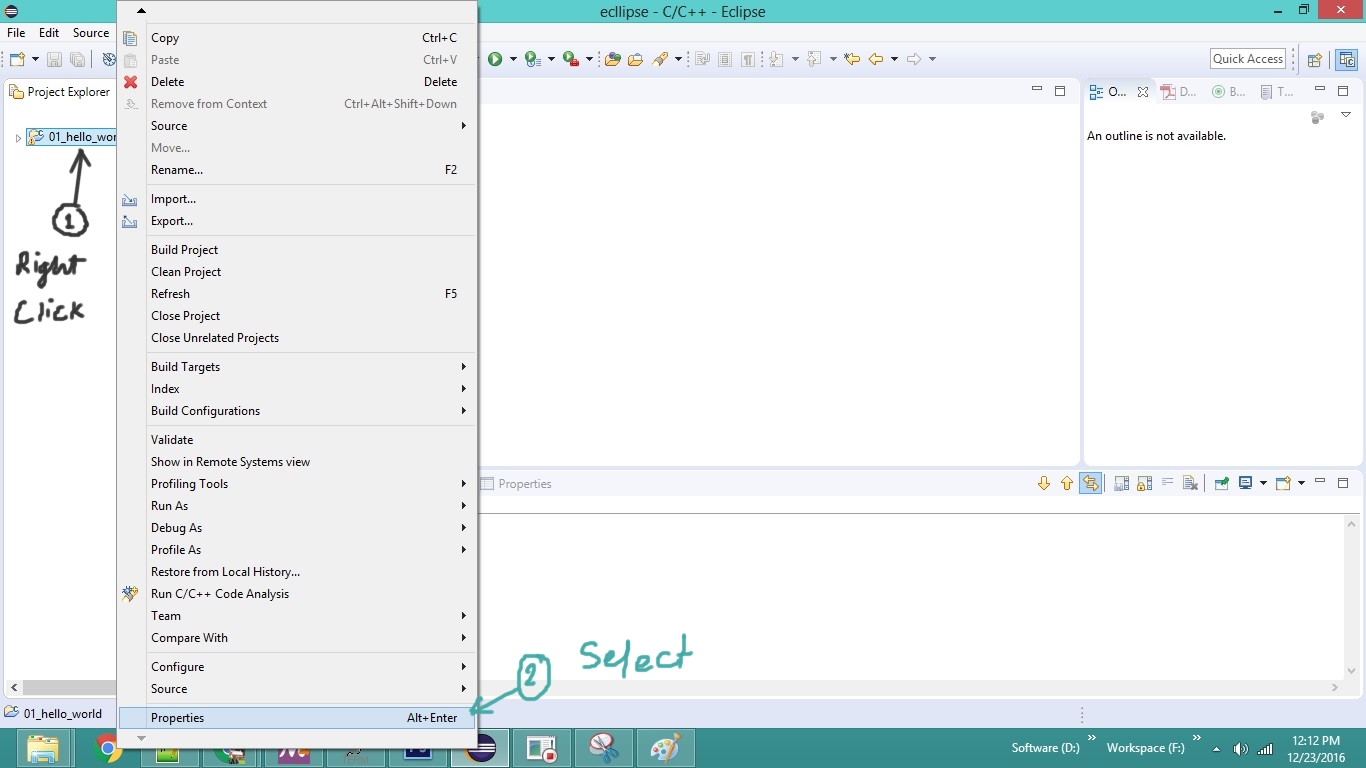
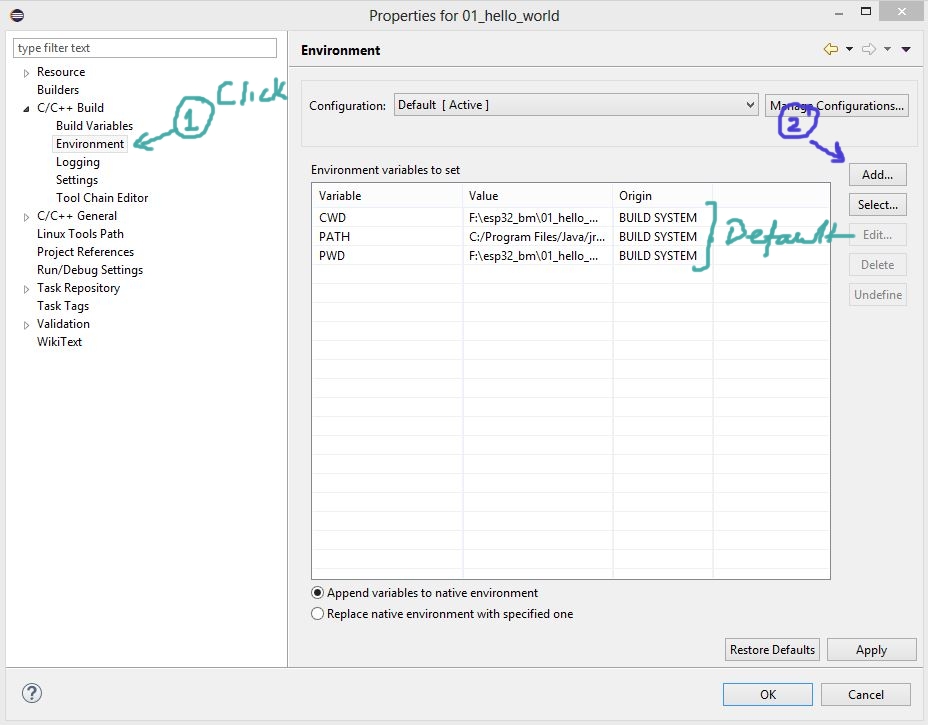
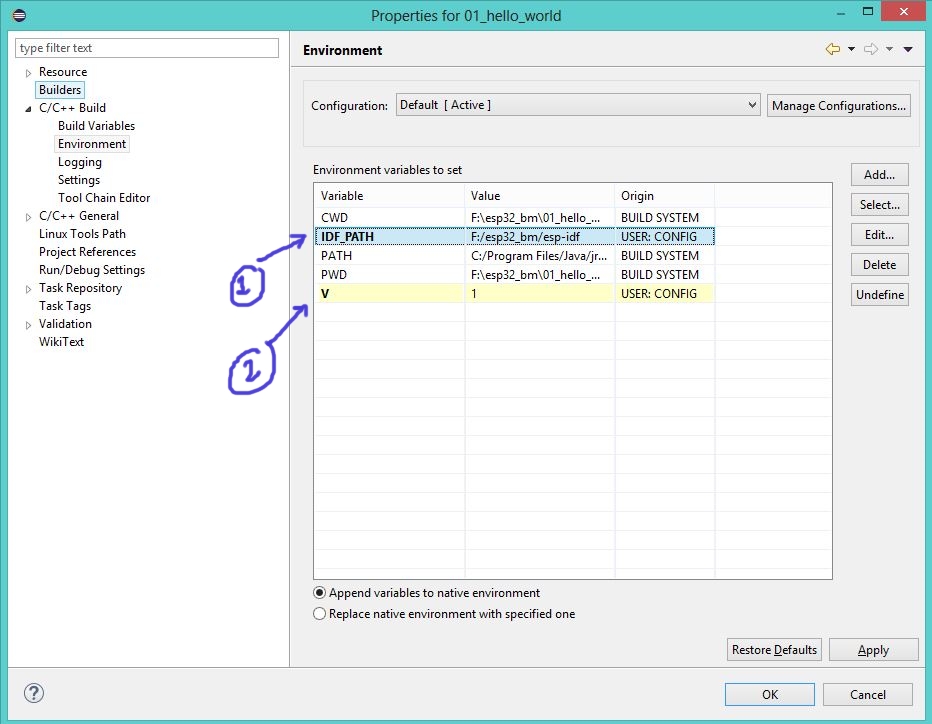
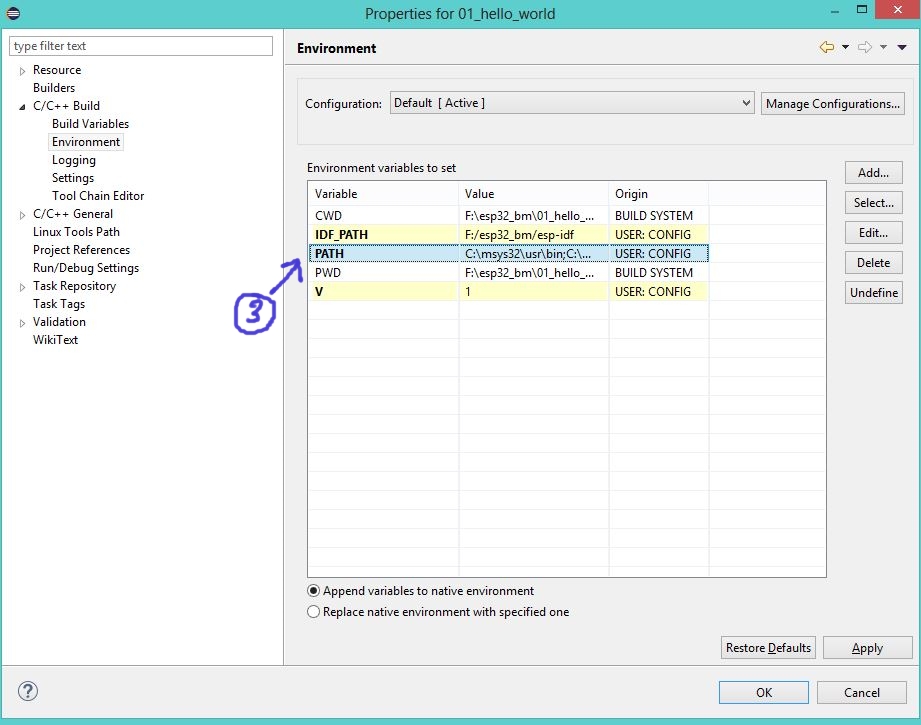
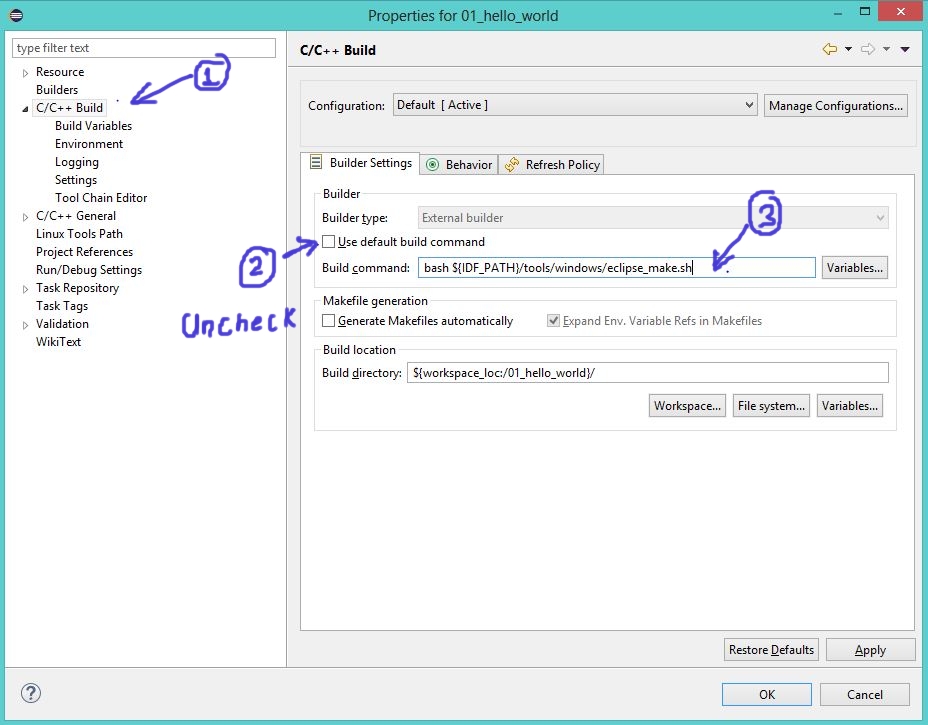
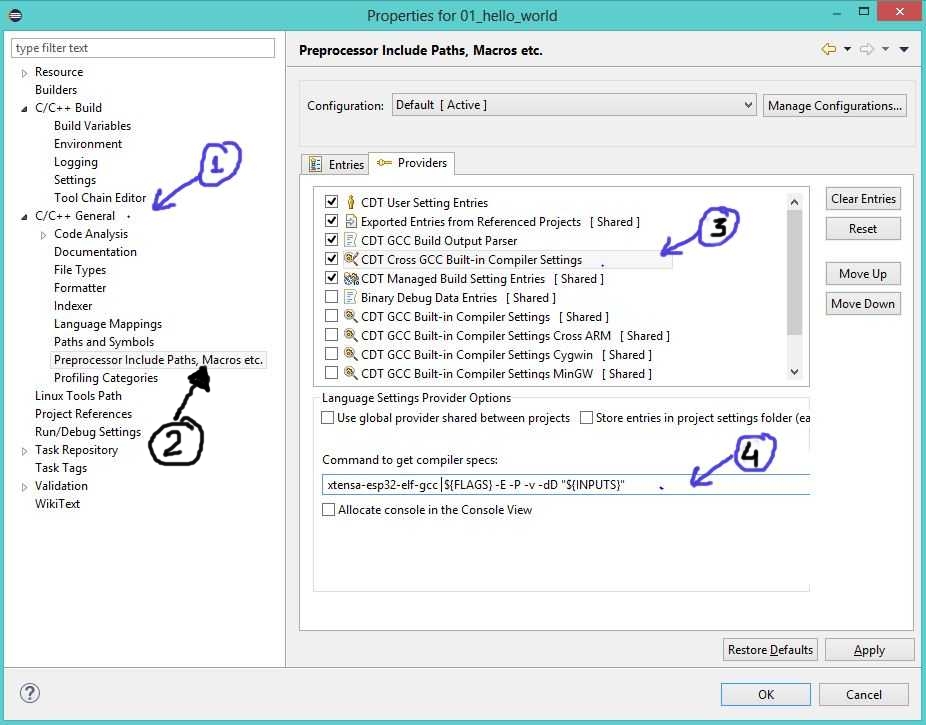
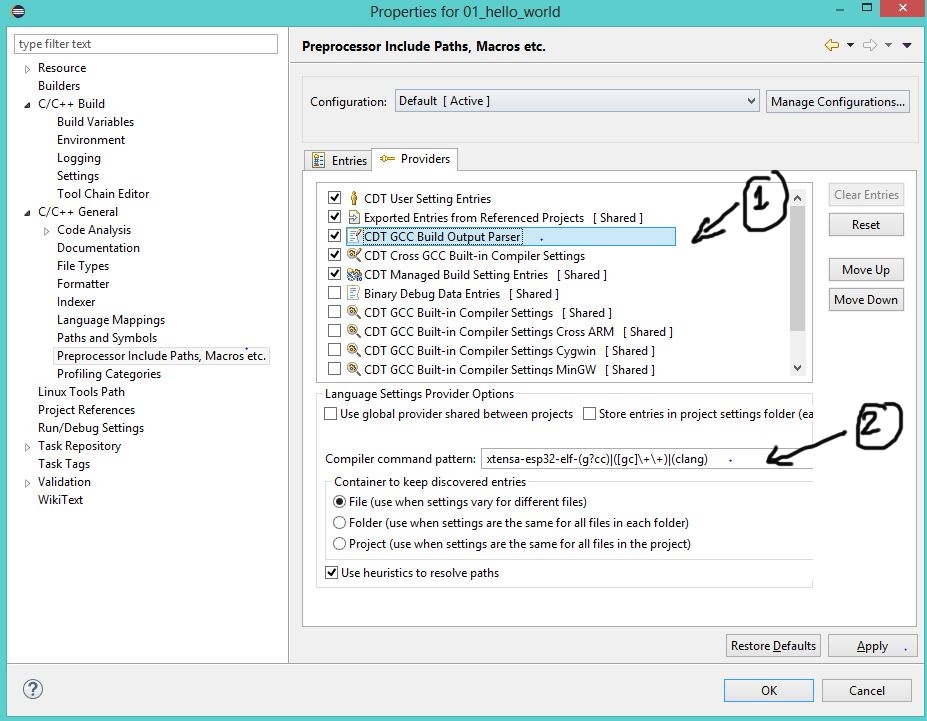
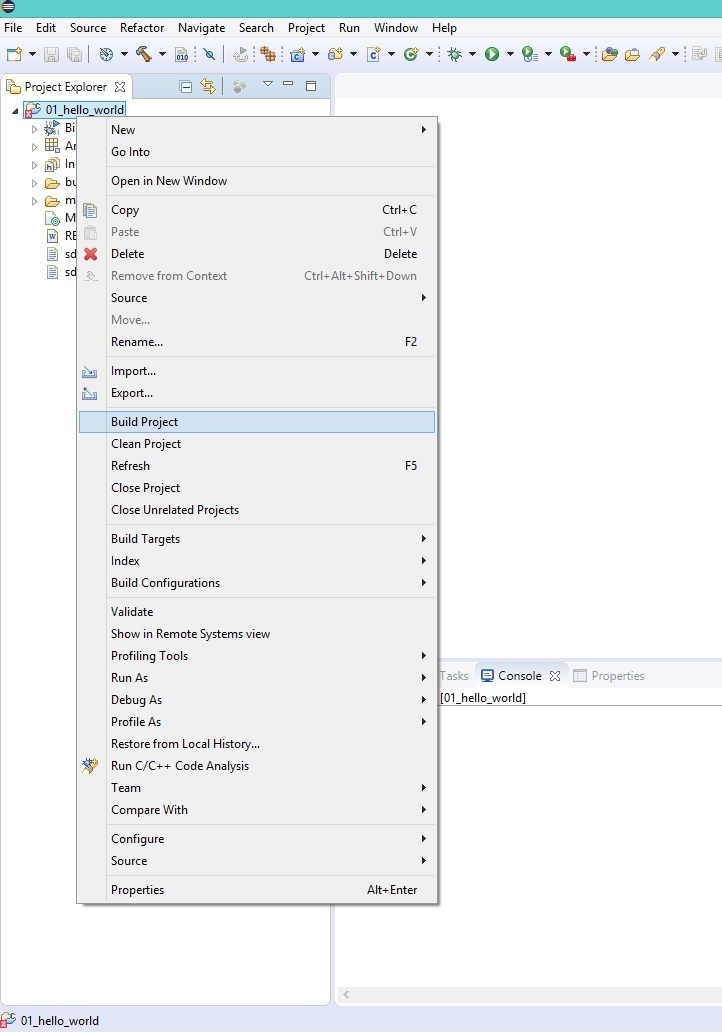
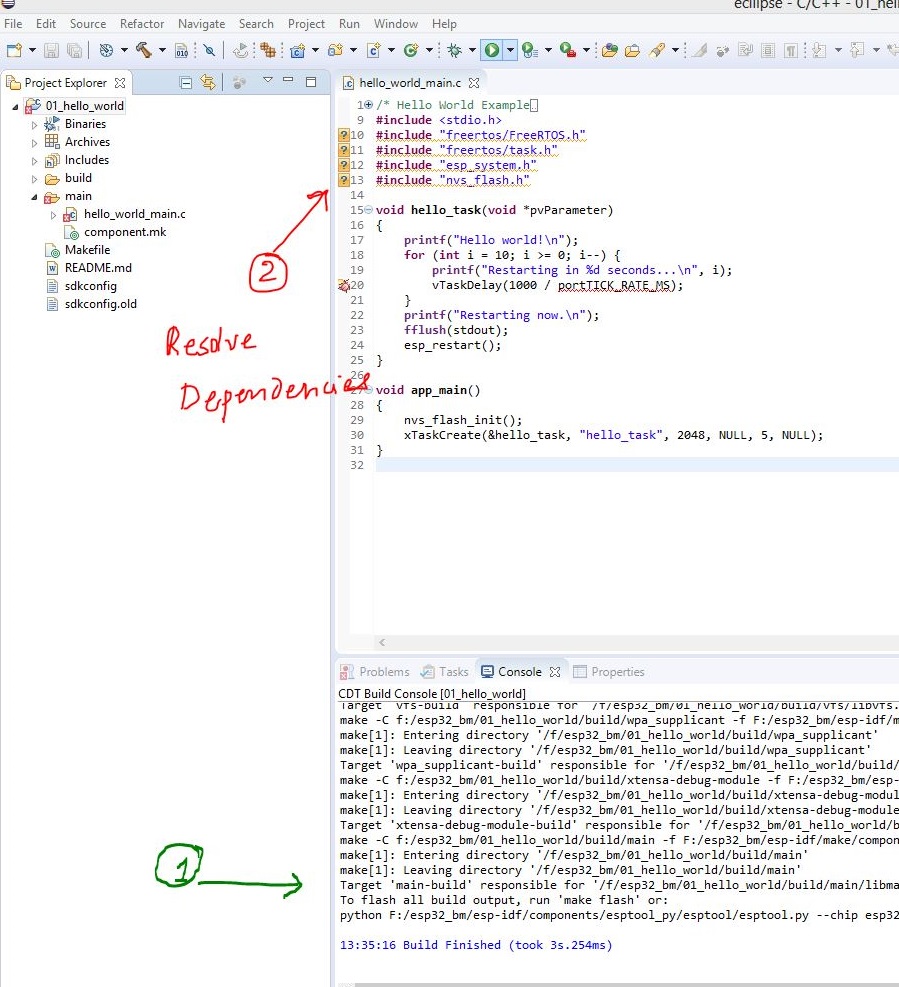
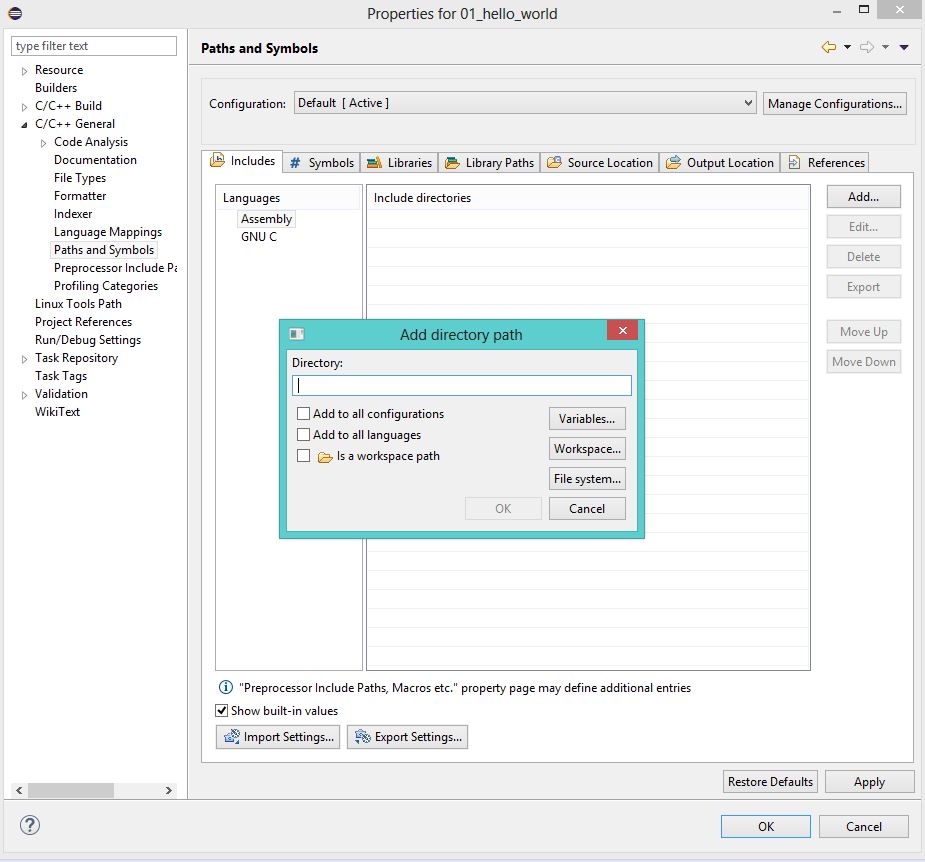
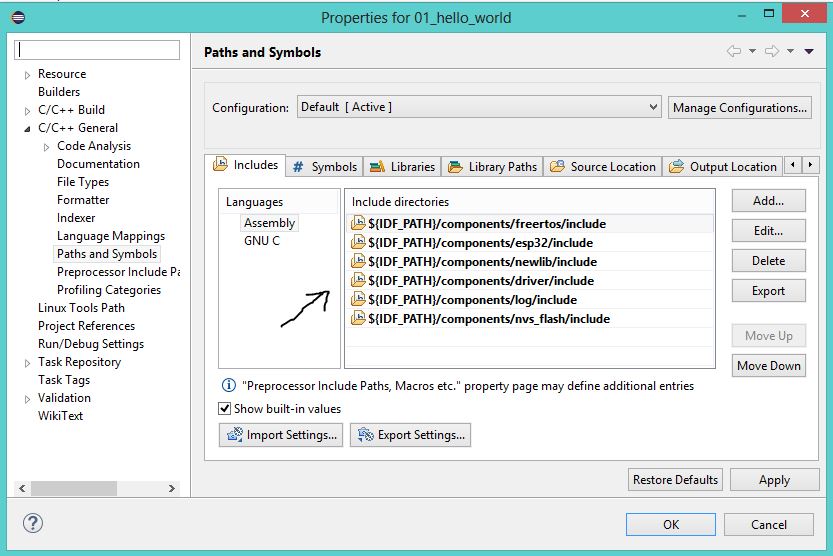
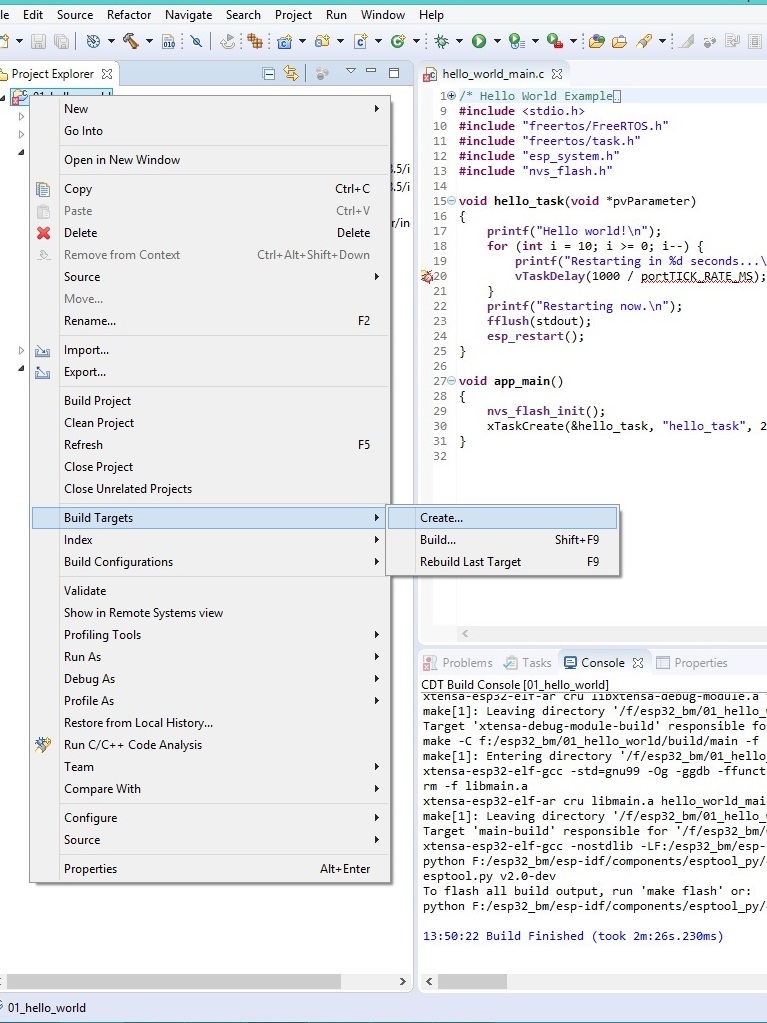
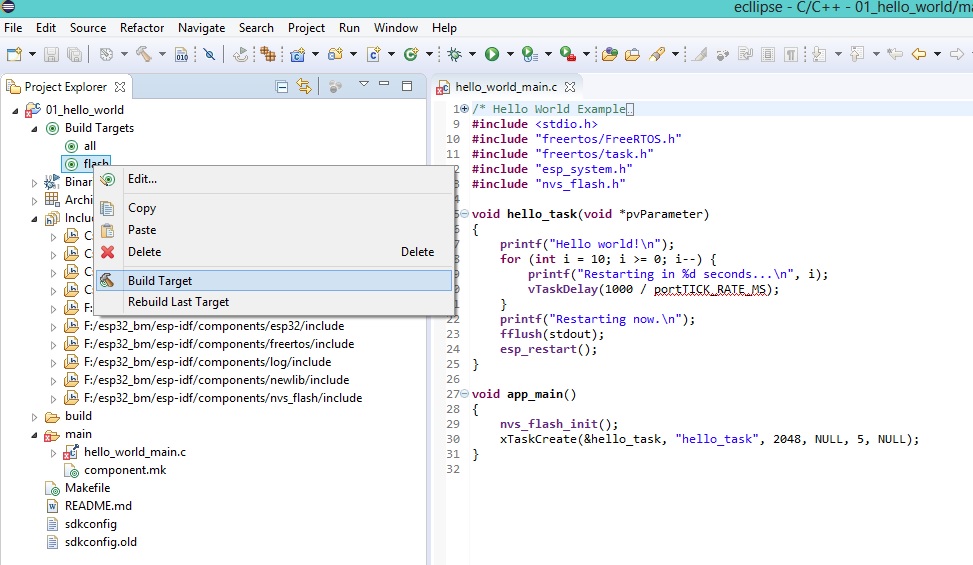
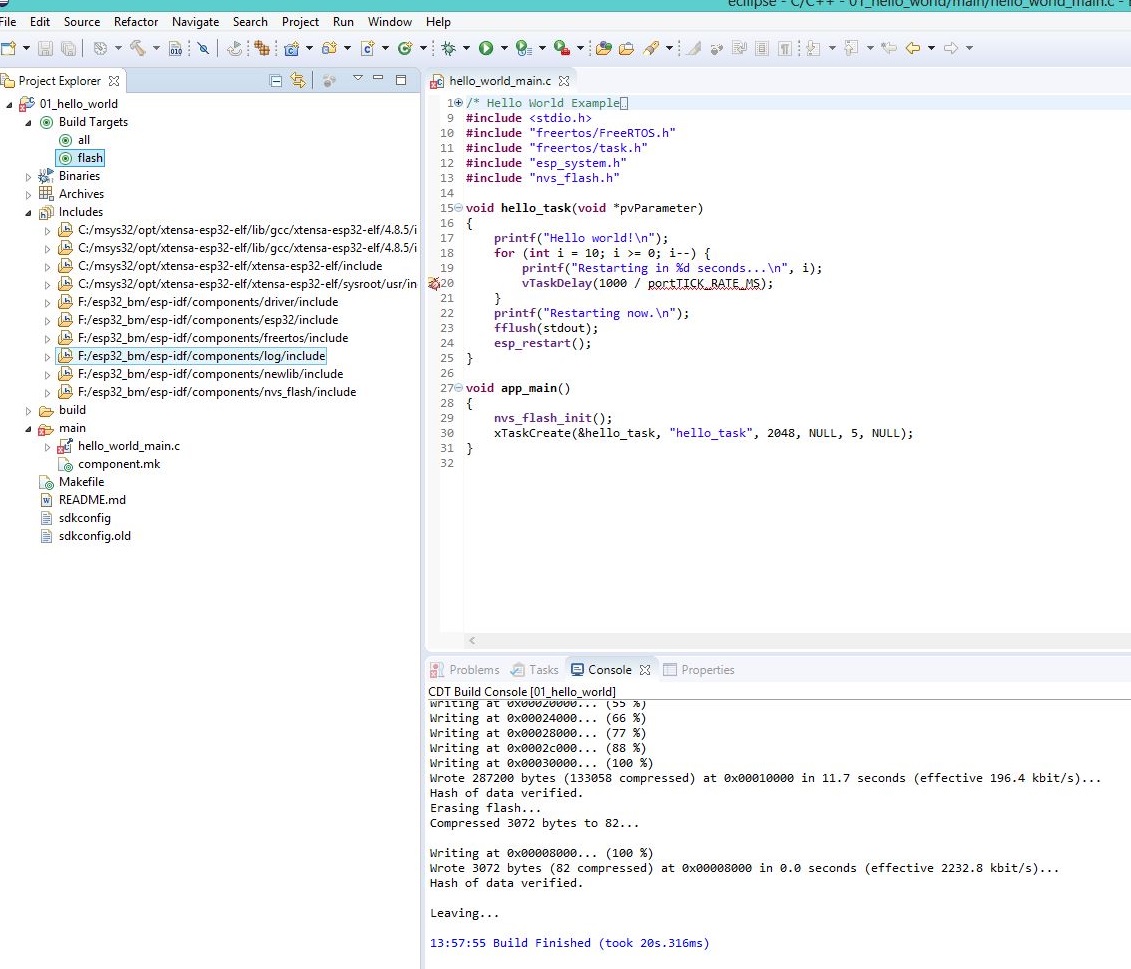
All the images below have steps marked with numbers, please perform them in a series. To start with
- Select the project type as Empty Project
- Toolchains as Cross GCC
- Uncheck Use Default Location
- Enter the project Name as 01_hello_world

