Difference between revisions of "Uploading Hex File To PIC18F4520 Using Pickit2"
(Created page with "Category:Starter PIC18F4520 In this tutorial we will see how to upload hex file using the below [https://www.exploreembedded.com/product/PIC%20USB%20Programmer PICKit 2 pr...") |
|||
| Line 20: | Line 20: | ||
<b>Step3:</b> | <b>Step3:</b> | ||
Now status window should show PICkit 2 connected, with proper device(PIC16F877A), else double check the connections and try again. | Now status window should show PICkit 2 connected, with proper device(PIC16F877A), else double check the connections and try again. | ||
| − | [[File: | + | [[File:Flashing HEX file to pic18f4520.png]]<br><br> |
| Line 32: | Line 32: | ||
Now click on Write to upload the hex file to target device.<br> | Now click on Write to upload the hex file to target device.<br> | ||
Status window will show the uploading status.<br> | Status window will show the uploading status.<br> | ||
| − | [[File: | + | [[File:Flashing HEX file to pic18f4520 1.png.png|none]] |
Revision as of 17:56, 9 August 2016
In this tutorial we will see how to upload hex file using the below PICKit 2 programmer.
Installing Pickit 2 Software
Download and Install the Pickit2 software from the below link.
Pickit 2 Software Setup
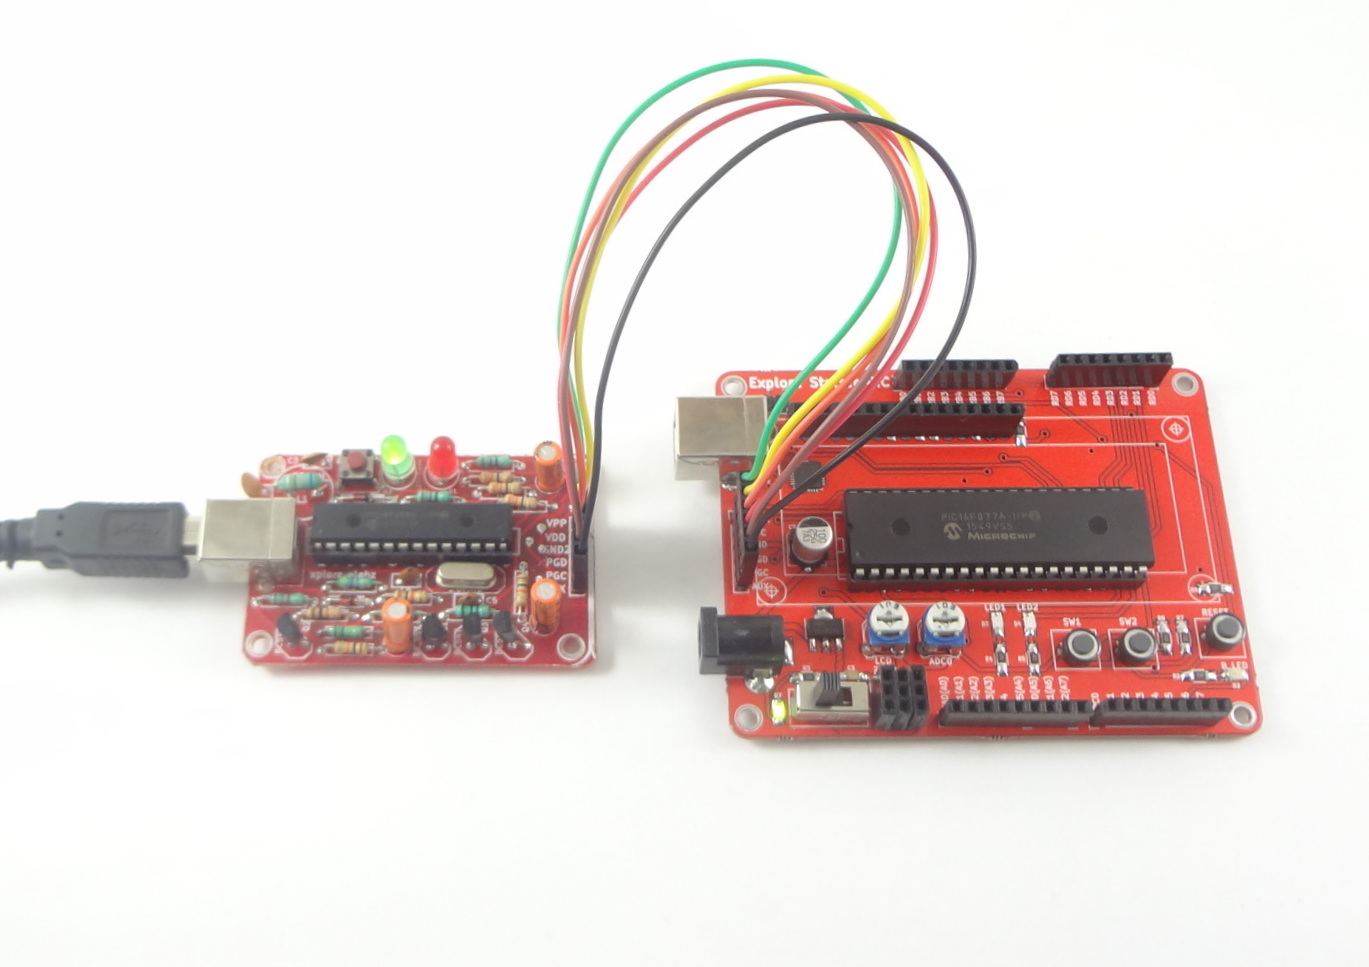
Step1: Connect the Pickit2 programmer to target board as shown below. Ensure the Boot Jumper is disconnected.
Step2:
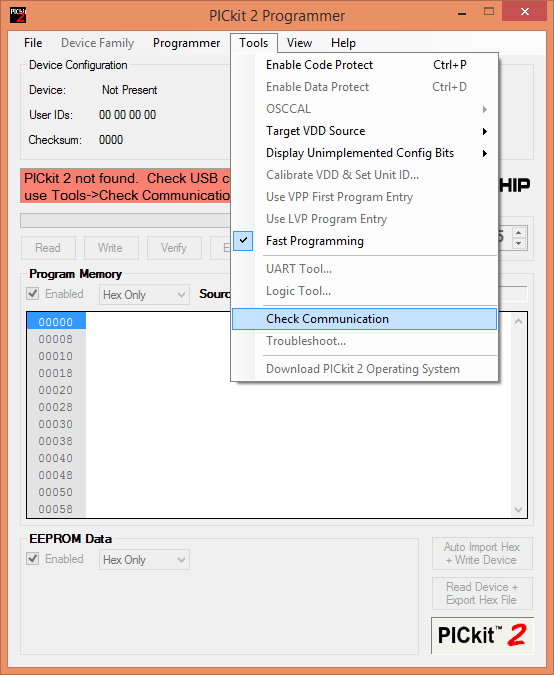
Run the Pickit2 application and check the device communication as shown below.
Step3:
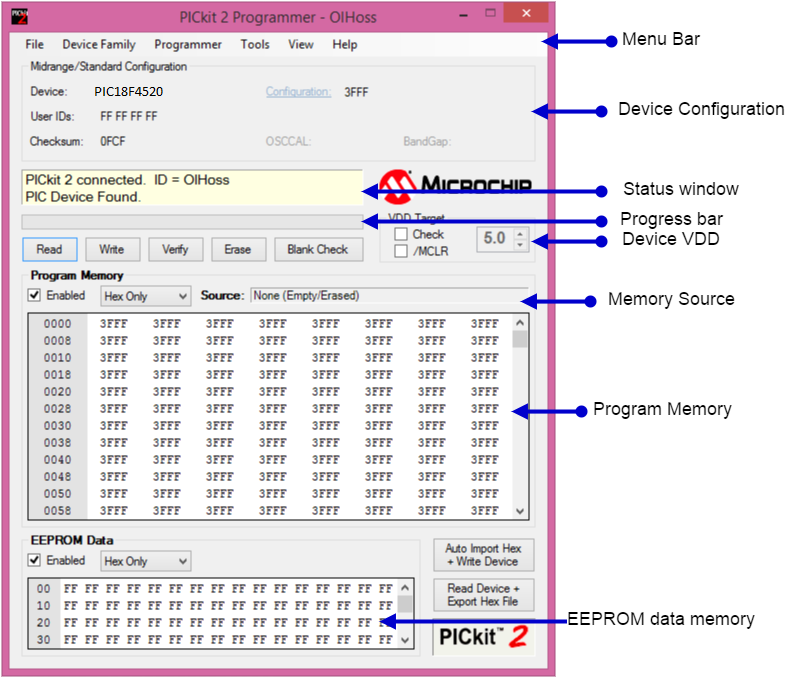
Now status window should show PICkit 2 connected, with proper device(PIC16F877A), else double check the connections and try again.

Step2:
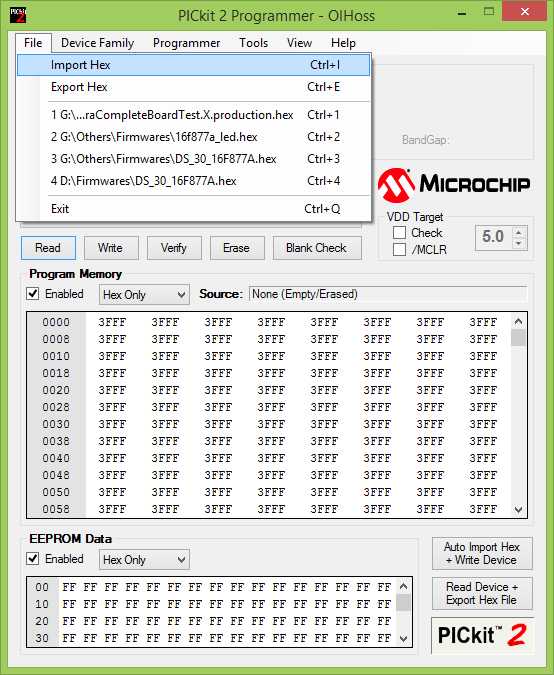
Import the .hex file from the menu File->Import Hex as shown below.
Step5:
The Configuration bits should be set to 0x3F3A.
Now click on Write to upload the hex file to target device.
Status window will show the uploading status.


