Difference between revisions of "A simple IOT demo with Explore ESP8266"
(→Components/Boards Used) |
|||
| Line 14: | Line 14: | ||
|- | |- | ||
| − | | 3|| [https://www.exploreembedded.com/product/DHT11%20Digital%20Temprature%20and%20Humidity%20Sensor DHT11]|| | + | | 3|| [https://www.exploreembedded.com/product/DHT11%20Digital%20Temprature%20and%20Humidity%20Sensor DHT11]|| <html><img src="https://www.exploreembedded.com/blog/wp-content/uploads/img-collections/dht11-sensor/1-dsc04714.jpg" width = "300"></html> |
|} | |} | ||
Revision as of 18:15, 12 October 2015
Sandeep (talk) 16:49, 27 August 2015 (IST)
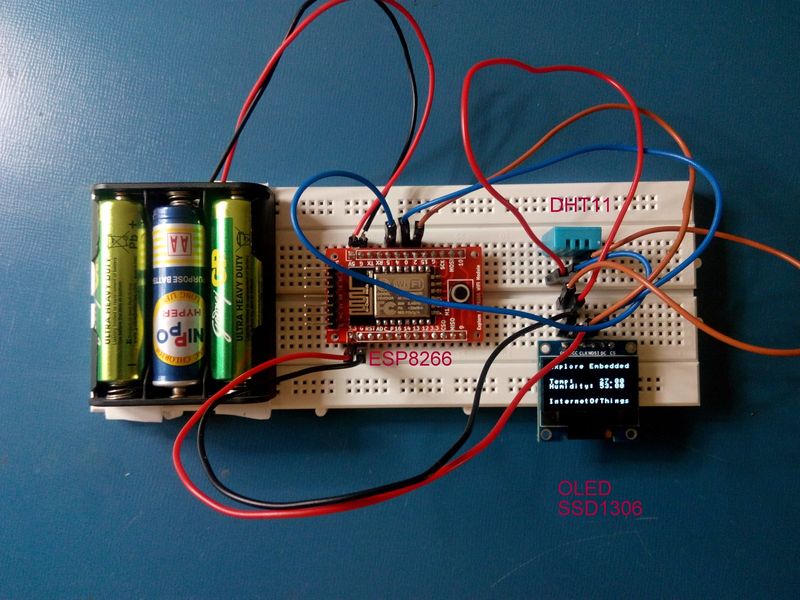
We were invited today to give a seminar on "How to get started with Embedded Systems" in a local Engineering college. With very little time on hand, wanted to quickly show the capabilities of ESP8266. So I decided to make a temperature humidity logger. With Thingspeak.com, it was extremely easy to log data and even trigger tweets!
Contents
Components/Boards Used
| 1 | Explore ESP8266 Wi-Fi Module | 
|
| 2 | OLED Display Module 128X64 | 
|
| 3 | DHT11 | 
|
Arduino code for ESP8266
Data logging on Thingspeak
Downloads
- Complete Arduino code
References and Credits
- https://hackaday.io/project/6132-esp8266oled this projected helped interfacing OLED with ESP8266
- Thanks to ESP8266 Arduino Community for porting Arduino
- DHT11 code library

