Difference between revisions of "Controlling AC devices with AVR using Relays"
Raghavendra (Talk | contribs) |
|||
| (6 intermediate revisions by 2 users not shown) | |||
| Line 5: | Line 5: | ||
<html> | <html> | ||
<div class="jumbotron "> | <div class="jumbotron "> | ||
| − | <span> <i class = "fa fa-warning fa- | + | <span> <i class = "fa fa-warning fa-5x pull-left" style="color:red;"></i></span> |
<p>Be careful while driving AC loads. It can be quite dangerous. Do not turn on the mains power while hooking up the circuit. You've been warned!</p> | <p>Be careful while driving AC loads. It can be quite dangerous. Do not turn on the mains power while hooking up the circuit. You've been warned!</p> | ||
</div> | </div> | ||
</html> | </html> | ||
| + | |||
=Hookup= | =Hookup= | ||
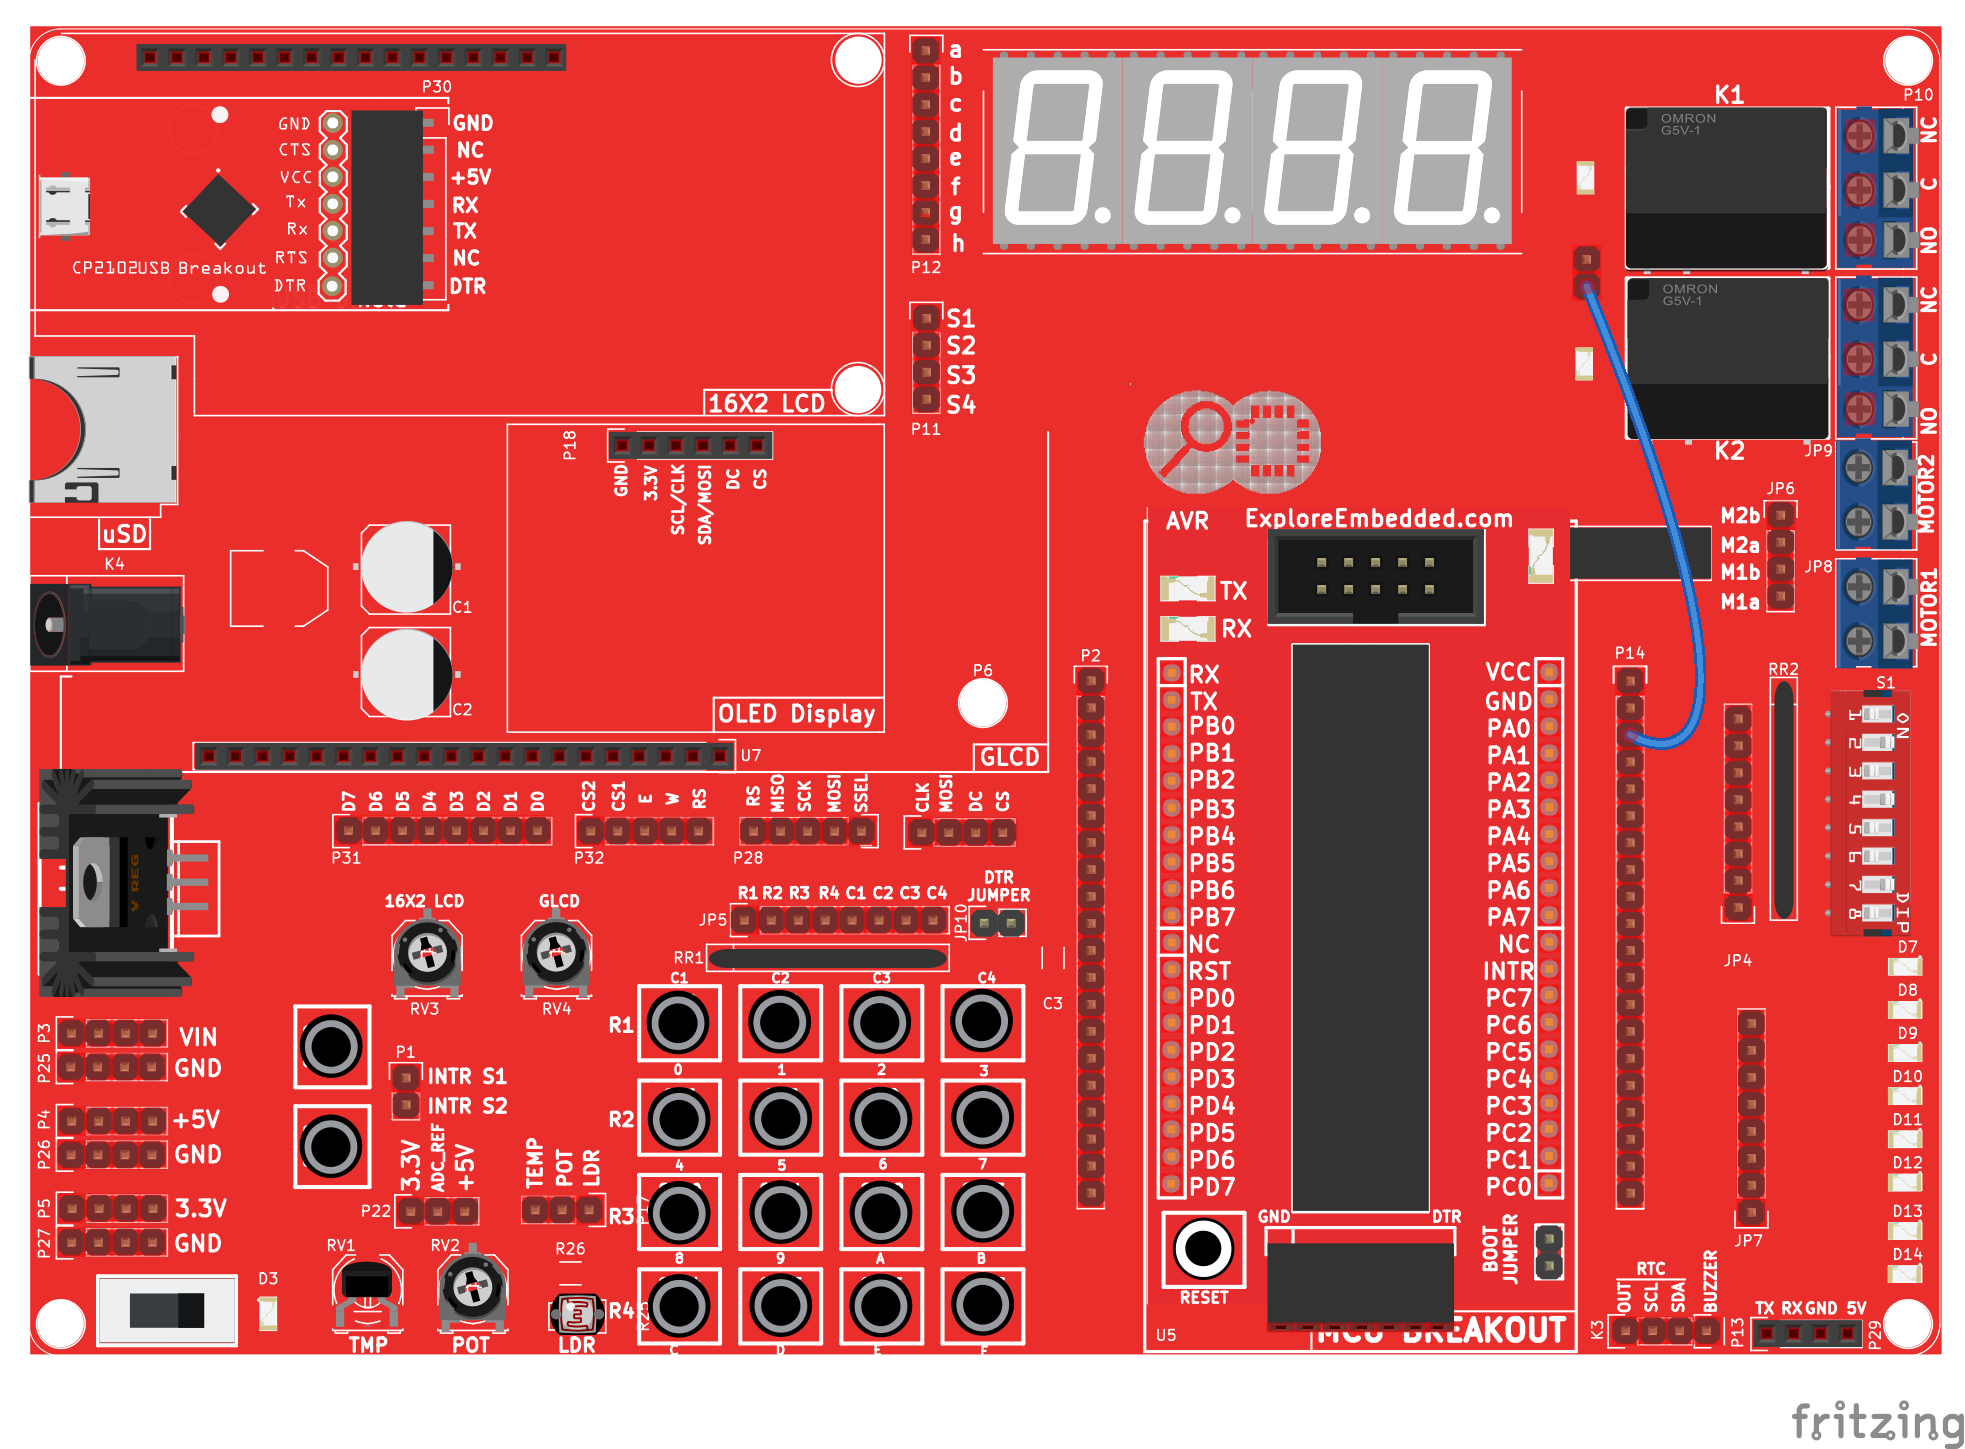
| − | The Ultra AVR Dev board comes with Relays on board. You simply need to hook up the relay inputs with the the port pins as shown in the figure below. | + | The Ultra AVR Dev board comes with Relays on board. You simply need to hook up the relay inputs with the the port pins as shown in the figure below. |
| − | =Code= | + | |
| − | The code turns ON and OFF the relays, every 5 seconds. | + | [[File:Controlling AC device using Relay AVR bb.png|none]] |
| + | |||
| + | =The Code= | ||
| + | The code turns ON and OFF the relays, every 5 seconds. | ||
| + | <html> | ||
| + | <script src="https://gist.github.com/raghavendrahassy/64c40290330c2e4edb6f.js"></script> | ||
| + | </html> | ||
=Demo= | =Demo= | ||
| + | |||
| + | [[File:0Lightbulb.gif#sthash.z7CJwlOp.dpuf|none]] | ||
| + | |||
| + | =Video Tutorial= | ||
| + | For those of you, who would like to watch instead of read we have made a video with all the gyan. | ||
| + | <br> | ||
| + | {{#ev:youtubehd|-lNAmSNV2-Q|640}} | ||
| + | |||
| + | |||
| + | = Downloads= | ||
| + | Download the complete project folder from the below link: | ||
| + | https://github.com/ExploreEmbedded/ATmega32_ExploreUltraAvrDevKit/archive/master.zip<br> | ||
| + | |||
| + | |||
| + | |||
| + | Have a opinion, suggestion , question or feedback about the article let it out here! | ||
| + | {{DISQUS}} | ||
Latest revision as of 11:42, 19 April 2016
Everyone of us wants to control a bulb, a fan etc at some point in time. We will look at driving single phase AC devices with a Relay using Atmega32.
Basics
The relay is driven using a simple transistor switch circuit. You may look at the schematic of the driver circuit from Ultra AVR Dev Board Schematic. It is a common collector transistor switch circuit. It provides additional current required to drive the relay. The current from the controller port pin is not sufficient, hence the driver is used.
Be careful while driving AC loads. It can be quite dangerous. Do not turn on the mains power while hooking up the circuit. You've been warned!
Hookup
The Ultra AVR Dev board comes with Relays on board. You simply need to hook up the relay inputs with the the port pins as shown in the figure below.
The Code
The code turns ON and OFF the relays, every 5 seconds.
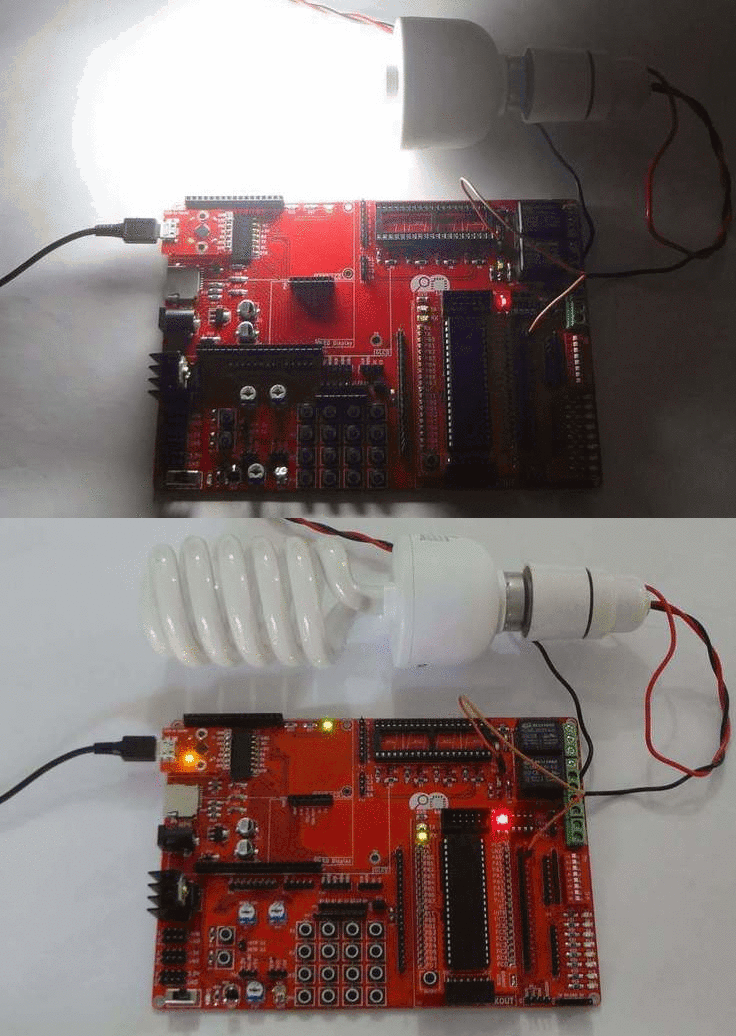
Demo
Video Tutorial
For those of you, who would like to watch instead of read we have made a video with all the gyan.
Downloads
Download the complete project folder from the below link:
https://github.com/ExploreEmbedded/ATmega32_ExploreUltraAvrDevKit/archive/master.zip
Have a opinion, suggestion , question or feedback about the article let it out here!


