Difference between revisions of "Setting up Keil for ARM"
| (2 intermediate revisions by the same user not shown) | |||
| Line 1: | Line 1: | ||
[[category:ARM Tutorials]] | [[category:ARM Tutorials]] | ||
| − | + | [[User:Amruta|Amruta]] ([[User talk:Amruta|talk]]) 19:22, 11 March 2015 (IST) | |
| − | [[User:Amruta|Amruta]] ([[User talk:Amruta|talk]]) | + | ---- |
| − | + | ||
==Sample Project for LPC1768== | ==Sample Project for LPC1768== | ||
Latest revision as of 17:48, 18 March 2015
Amruta (talk) 19:22, 11 March 2015 (IST)
Sample Project for LPC1768
Let’s start with a simple LED blinking program.
Launch the Keil application and follow the steps below :
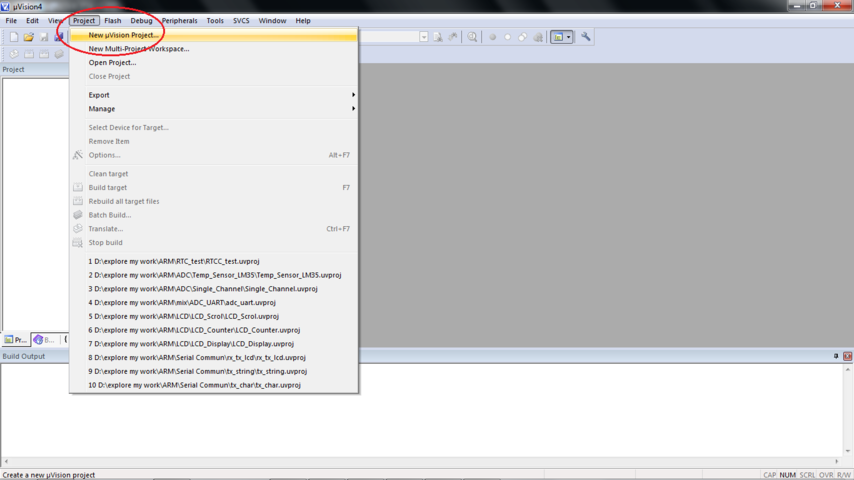
1. Go to the ‘Project’ menu from menu bar, select ‘Close Project’ option if there is already an open project.
This option will be available only if there is an open project.
Now select ‘New µVision Project’.
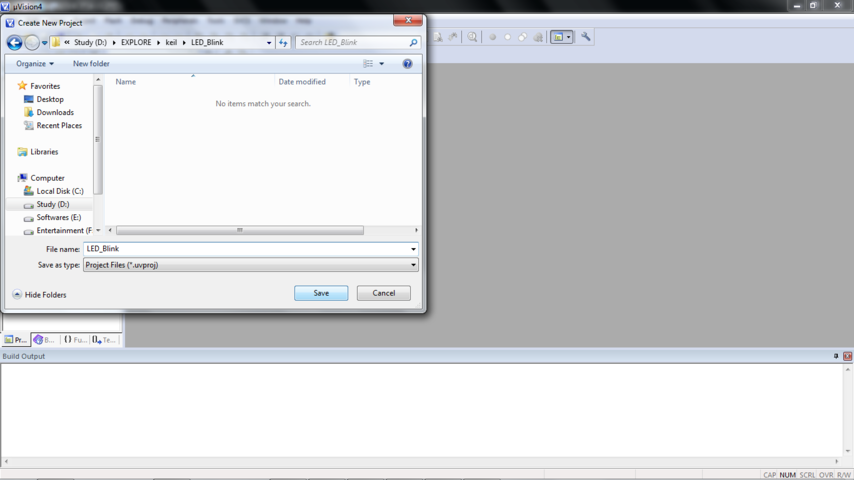
2. Select the folder where you want to create the project and give project name.
It’s better to create a new project in a new folder always.
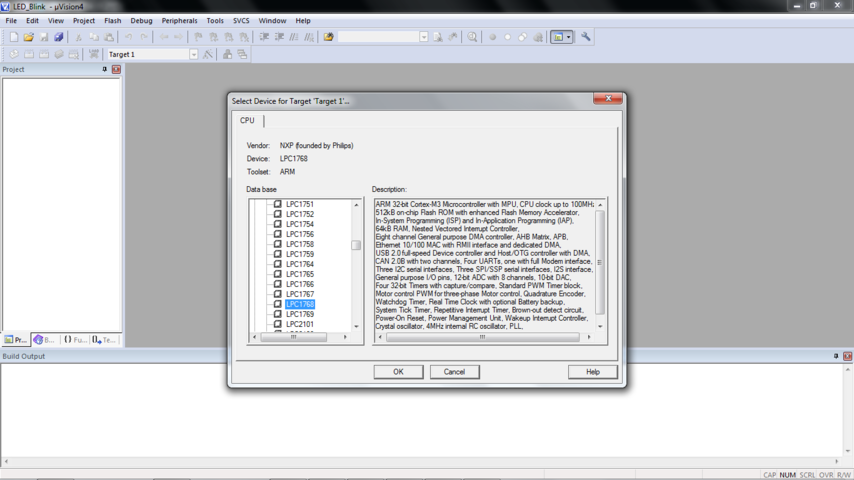
3. To select the device as LPC1768 follow NXP -> LPC1768. You can see the device description in the right tab.
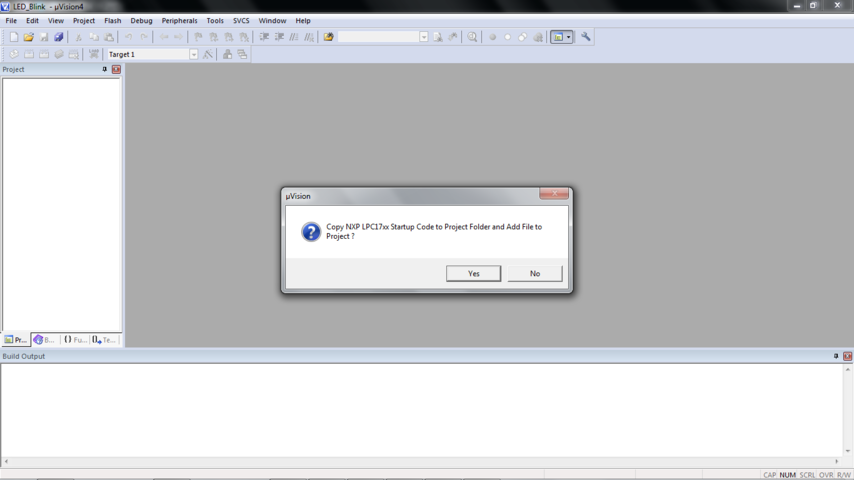
4. A window will pop up asking whether to add ‘Startup file’ to your project .
The ‘Startup file’ is required only when you want to go with C programming.
So, here we will click ‘Yes’ as we will be coding with C.
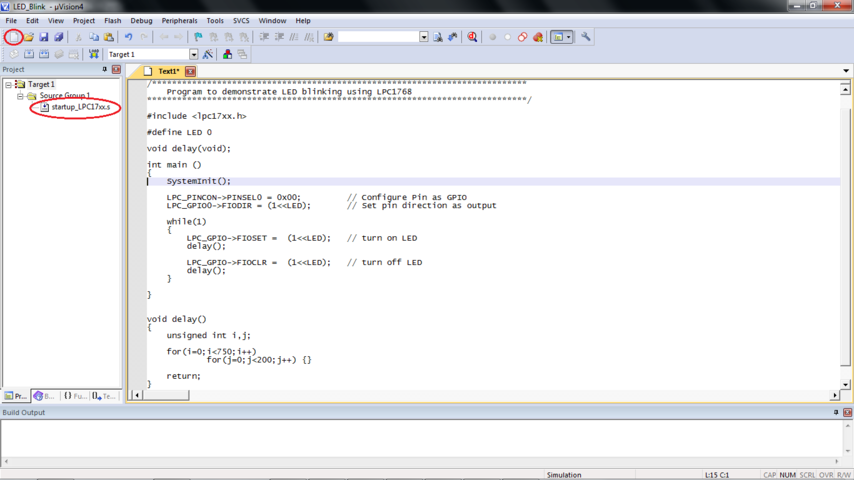
5. In the ‘Project’ tab if you expand ‘Target 1 -> Source Group 1’ you will see the ‘startup file’.
Click the ‘New’ tool located on toolbar.
A file with name ‘Text1’ will be created in editor. Write your code here.
Don’t forget to include lpc17xx header file and the function ‘SystemInit()’.
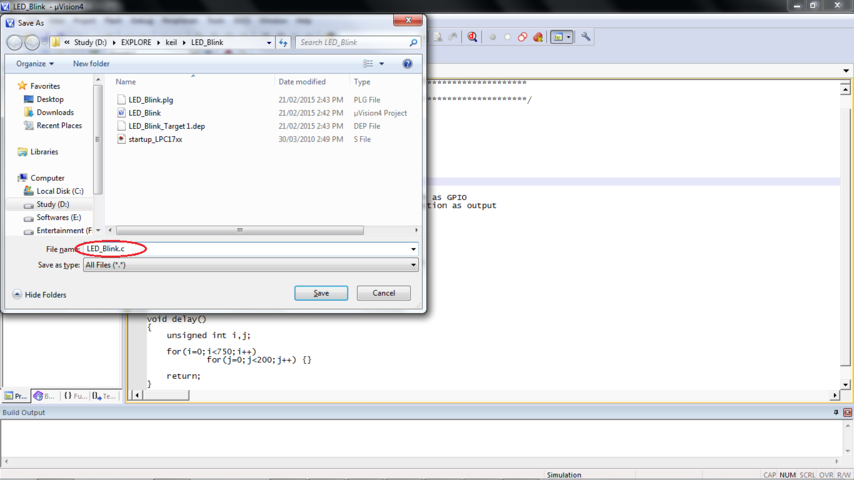
6. Save the file in the same directory where you created your project with the extension .c
You can notice the colour and font changes in the file.
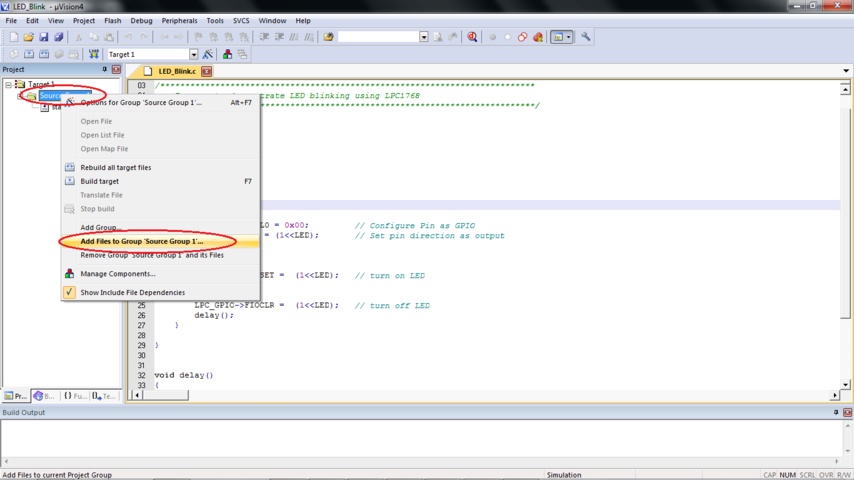
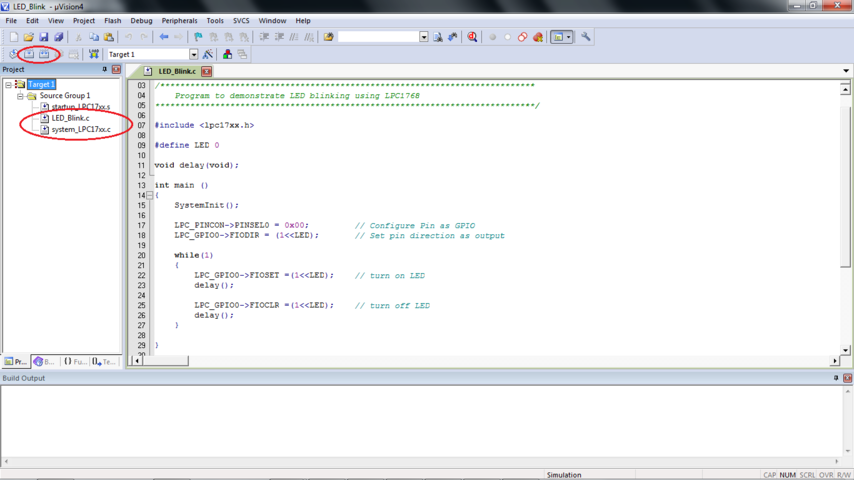
7. Now we need to add this file to the project.
To do this, right click on ‘source Group 1’ and select the option ‘Add files to the Source Group 1’.
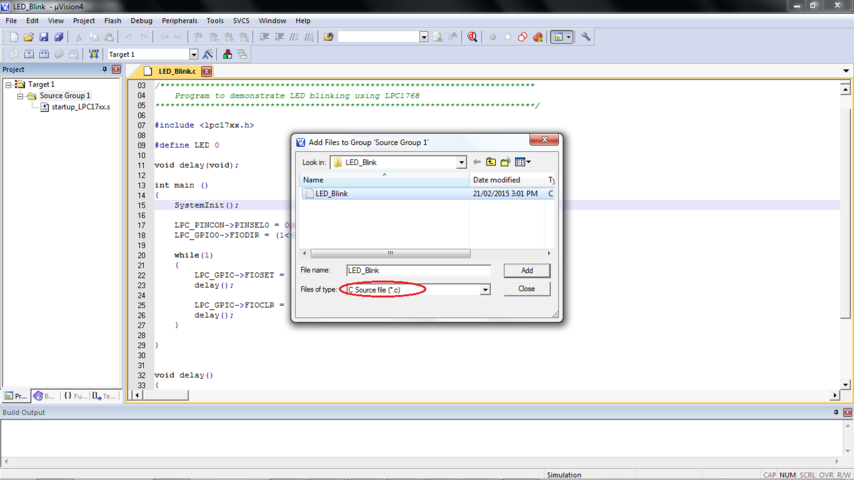
8. Add the .c file, say, LED_Blink.c
Also you should add system_LPC17xx.c file to your project.
You can find this file at “C:\Keil\ARM\Startup\NXP\LPC17xx”.
No need to copy this file to your project folder. Simply add the file by above procedure.
9. You can see both files under ‘Source Group 1’.
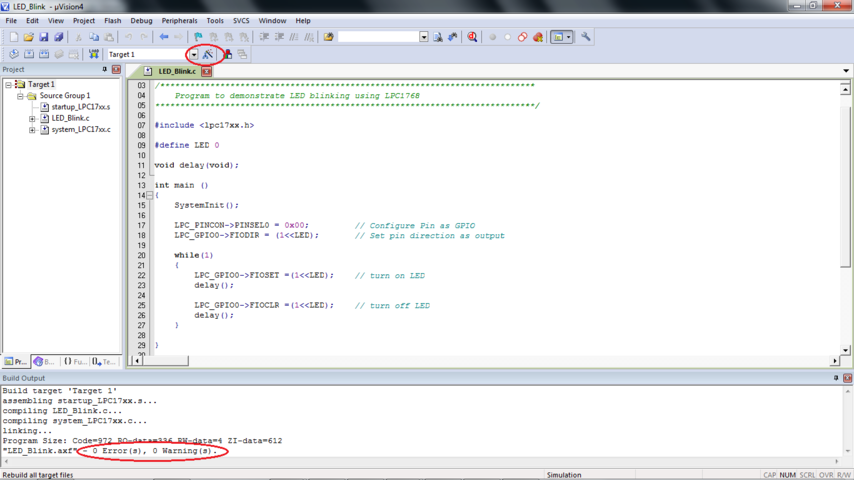
Now build the project by clicking ‘Build’ tool on toolbar.
10. You can see the errors in ‘Build Output’ tab (down) , if any. Remove the errors and rebuild the project.
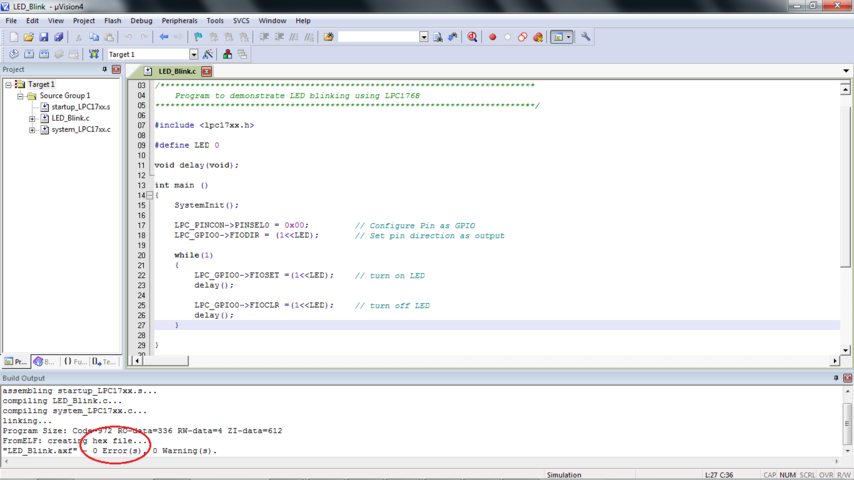
After successful compilation following window will appear.
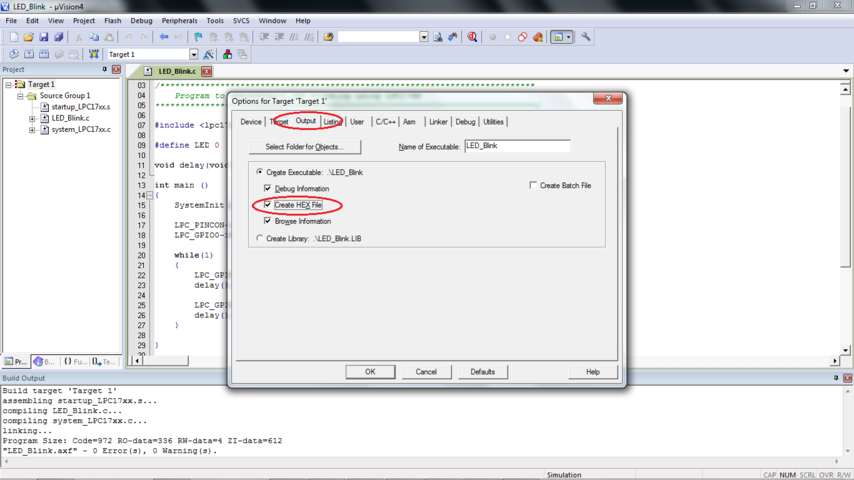
11. Keil doesn’t create image file until you specify the option.
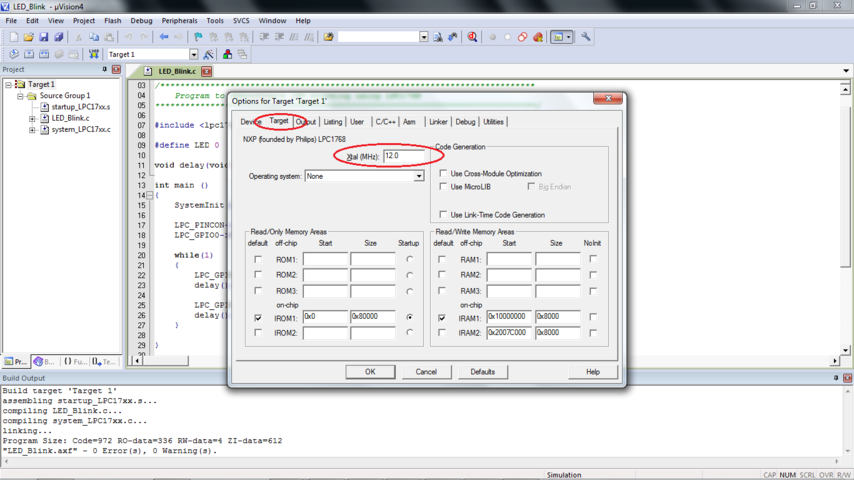
For this click ‘Target Option’ on toolbar.
In the window ‘Options for Target’, under ‘Target’ tab give crystal frequency in MHz
In the ‘Output ’ tab check the option ‘Create Hex File’ and click OK.
Rebuild the project.
12. You can see that hex file is created.
It will be in the your project folder.

