Difference between revisions of "Starter SST89E516RD USB Development board"
| (12 intermediate revisions by 2 users not shown) | |||
| Line 1: | Line 1: | ||
[[Category:8051 Development Boards]] | [[Category:8051 Development Boards]] | ||
| + | [[File:Cart add.png|right|link=https://www.exploreembedded.com/product/Starter%20SST89E516RD%20USB%20Development%20board]] | ||
{{Popup|type=l|text= ''This is latest 8051 Starter Development board from Explore Embedded, the board uses '''SST89E512RD''' Microcontroller which is '''100%''' compatible with '''P89V51RD2'''. The board has USB to Serial Convertor which can be used to program/flash the MCU; eliminates need for a programmer. It can used with laptops as well!''}} | {{Popup|type=l|text= ''This is latest 8051 Starter Development board from Explore Embedded, the board uses '''SST89E512RD''' Microcontroller which is '''100%''' compatible with '''P89V51RD2'''. The board has USB to Serial Convertor which can be used to program/flash the MCU; eliminates need for a programmer. It can used with laptops as well!''}} | ||
| + | [[File:DSC09000.JPG|x480px]] | ||
| + | <gallery mode="packed"> | ||
| + | File:DSC09010.JPG | ||
| + | File:DSC09023.JPG | ||
| + | File:DSC01041.JPG | ||
| + | </gallery> | ||
{{Box|type=l_green_light|text = '''Features'''}} | {{Box|type=l_green_light|text = '''Features'''}} | ||
{{Box|type=l_green_light|text = <br/> | {{Box|type=l_green_light|text = <br/> | ||
| − | *SST89E516RD Microcontroller with | + | *SST89E516RD Microcontroller with bootloader ''(no programmer needed)'' |
*CP2102 USB to Serial Convertor on board | *CP2102 USB to Serial Convertor on board | ||
*16 x 2 LCD Interface | *16 x 2 LCD Interface | ||
| Line 9: | Line 16: | ||
*LEDs x2 | *LEDs x2 | ||
*All Ports pins as breakout. | *All Ports pins as breakout. | ||
| − | *High quality FR4 | + | *High quality FR4 , wave soldered PCB. |
| + | }} | ||
| + | {{Box|type=l_green_light|text = '''SST89E516RD MCU Features'''}} | ||
| + | {{Box|type=l_green_light|text = <br/> | ||
| + | *1 KByte Internal RAM | ||
| + | *Dual Block SuperFlash EEPROM– 64 KByte primary block +8 KByte secondary block | ||
| + | *Support External Address Range up to 64KByte of Program and Data Memory | ||
| + | *Three High-Current Drive Ports (16 mA each) | ||
| + | *Three 16-bit Timers/Counters | ||
| + | *Full-Duplex, Enhanced UART– Framing Error Detection– Automatic Address Recognition | ||
| + | *Ten Interrupt Sources at 4 Priority Levels– Four External Interrupt Inputs | ||
| + | *Programmable Watchdog Timer (WDT) | ||
| + | *Programmable Counter Array (PCA) | ||
| + | *Four 8-bit I/O Ports (32 I/O Pins) andOne 4-bit Port | ||
| + | *Second DPTR register | ||
| + | *Low EMI Mode (Inhibit ALE) | ||
| + | *SPI Serial Interface | ||
| + | *Standard 12 Clocks per cycle, the device has adoption to double the speed to 6 clocks per cycle. | ||
| + | *TTL- and CMOS-Compatible Logic Levels | ||
| + | *Brown-out Detection | ||
| + | *Low Power Modes– Power-down Mode with External Interrupt Wake-up– Idle Mode | ||
| + | }} | ||
| + | =Downloads= | ||
| + | {{Box|type=l_green_light|text = <br/> | ||
| + | *[http://xplorelabz.com/wiki/images/a/a7/8051_USB_Development_Board.pdf 8051 USB Development Board Schematic] | ||
| + | * [http://xplorelabz.com/wiki/images/d/d3/CP210x_VCP_Windows.zip Windows USB to UART Drivers for CP2102] | ||
| + | *[http://exploreembedded.com/wiki/images/c/cb/EasyIAP_Rev_6.0.zip Programming Software: EasyIAP] | ||
| + | *[http://exploreembedded.com/wiki/images/2/2c/Starter_x51_USB.zip Sample Code] | ||
| + | }} | ||
| + | =Setting up EasyIAP SW and programming the hex file= | ||
| + | {{Box|type=l_green_light|text = <br/> | ||
| + | *Connect the Board to the computer and install [http://xplorelabz.com/wiki/images/d/d3/CP210x_VCP_Windows.zip Windows USB to UART Drivers for CP2102]. | ||
| + | **Note: Power up the board with 7 to 12V, 1A adapter, the board does not power up from USB. | ||
| + | *Note down the '''COM Port Number e.g. COM 2''' from device manager | ||
| + | *[http://exploreembedded.com/wiki/images/c/cb/EasyIAP_Rev_6.0.zip Download EasyIAP] and install it. | ||
| + | *Follow the steps in the pictures below to detect the board and flash the hex file | ||
}} | }} | ||
| + | [[File:7 Flash.JPG|framed|x400px|Follow steps in images below:]] | ||
| + | <gallery> | ||
| + | File:0_device manager.JPG | ||
| + | File:1_Install SW.JPG | ||
| + | File:3_setup.JPG | ||
| + | File:4_connect.JPG | ||
| + | File:5_Browse.JPG | ||
| + | File:6_OK.JPG | ||
| + | File:7 Flash.JPG | ||
| + | </gallery> | ||
| + | =8051 Video Tutorials= | ||
| + | And that's not all watch this complete series of 8051 video tutorials, which we believe should definitely help you build | ||
| + | {{#widget:YouTube|playlist=PLRuRKN7_FVgtdXWWM-uosWYfmOFDp63dd|width=680}} | ||
| + | {{DISQUS}} | ||
Latest revision as of 18:41, 6 March 2015
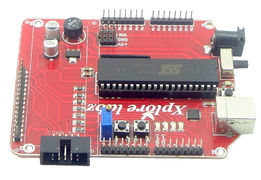
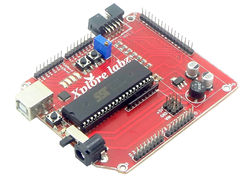
This is latest 8051 Starter Development board from Explore Embedded, the board uses SST89E512RD Microcontroller which is 100% compatible with P89V51RD2. The board has USB to Serial Convertor which can be used to program/flash the MCU; eliminates need for a programmer. It can used with laptops as well!
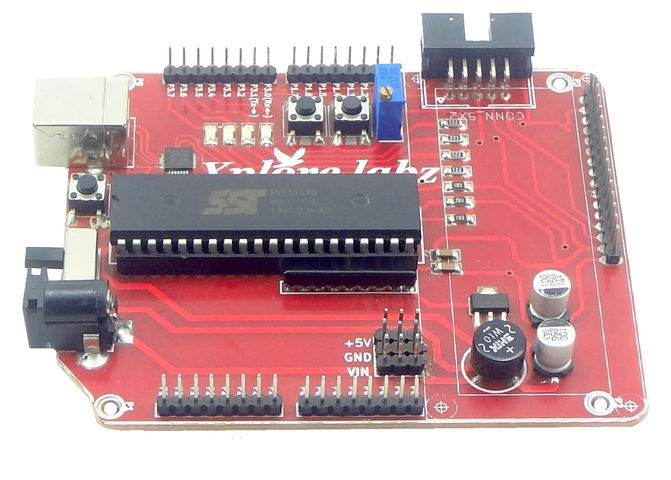
Features
- SST89E516RD Microcontroller with bootloader (no programmer needed)
- CP2102 USB to Serial Convertor on board
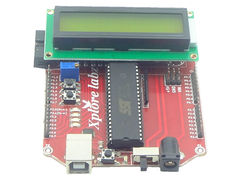
- 16 x 2 LCD Interface
- Switches x2
- LEDs x2
- All Ports pins as breakout.
- High quality FR4 , wave soldered PCB.
SST89E516RD MCU Features
- 1 KByte Internal RAM
- Dual Block SuperFlash EEPROM– 64 KByte primary block +8 KByte secondary block
- Support External Address Range up to 64KByte of Program and Data Memory
- Three High-Current Drive Ports (16 mA each)
- Three 16-bit Timers/Counters
- Full-Duplex, Enhanced UART– Framing Error Detection– Automatic Address Recognition
- Ten Interrupt Sources at 4 Priority Levels– Four External Interrupt Inputs
- Programmable Watchdog Timer (WDT)
- Programmable Counter Array (PCA)
- Four 8-bit I/O Ports (32 I/O Pins) andOne 4-bit Port
- Second DPTR register
- Low EMI Mode (Inhibit ALE)
- SPI Serial Interface
- Standard 12 Clocks per cycle, the device has adoption to double the speed to 6 clocks per cycle.
- TTL- and CMOS-Compatible Logic Levels
- Brown-out Detection
- Low Power Modes– Power-down Mode with External Interrupt Wake-up– Idle Mode
Downloads
Setting up EasyIAP SW and programming the hex file
- Connect the Board to the computer and install Windows USB to UART Drivers for CP2102.
- Note: Power up the board with 7 to 12V, 1A adapter, the board does not power up from USB.
- Note down the COM Port Number e.g. COM 2 from device manager
- Download EasyIAP and install it.
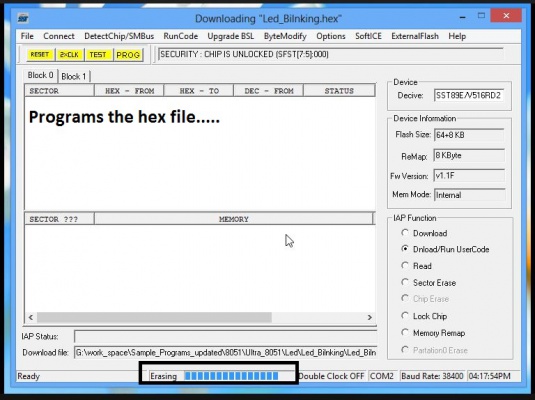
- Follow the steps in the pictures below to detect the board and flash the hex file
8051 Video Tutorials
And that's not all watch this complete series of 8051 video tutorials, which we believe should definitely help you build {{#widget:YouTube|playlist=PLRuRKN7_FVgtdXWWM-uosWYfmOFDp63dd|width=680}}


