Difference between revisions of "Uploading Hex File Using At89s52 ISP Programmer"
| Line 53: | Line 53: | ||
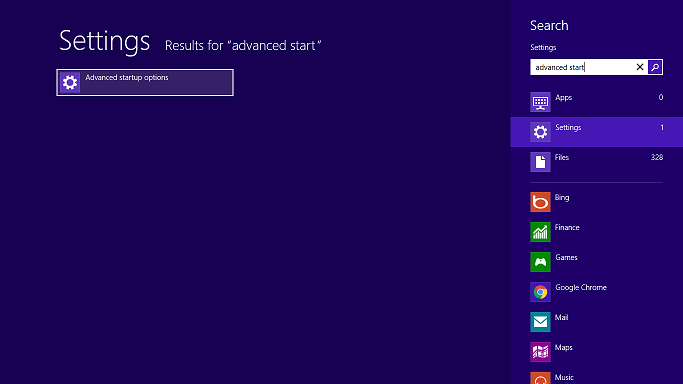
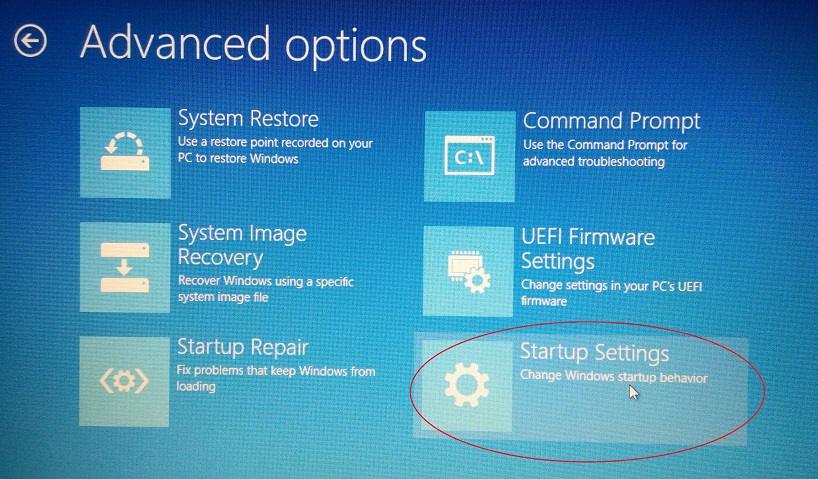
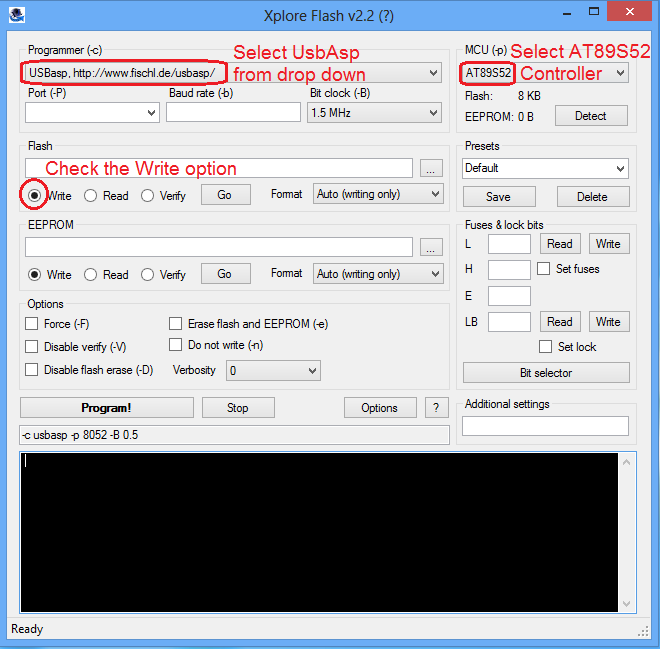
<b>STEP 1:</b> | <b>STEP 1:</b> | ||
| − | [[File:XploreFlash 01. | + | [[File:XploreFlash 01.png ]] <br> |
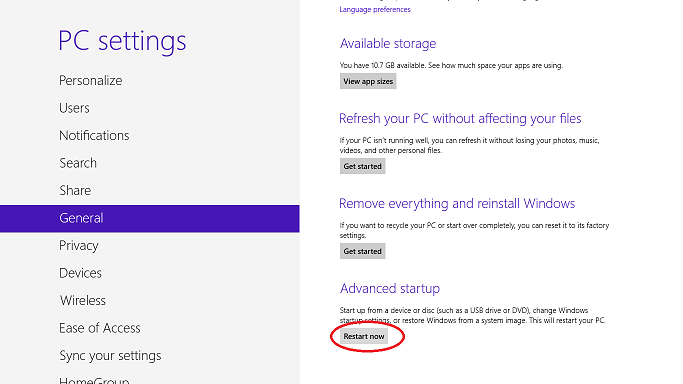
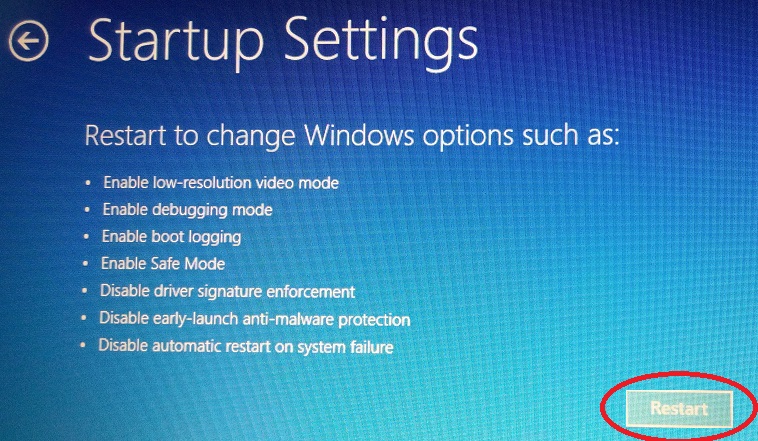
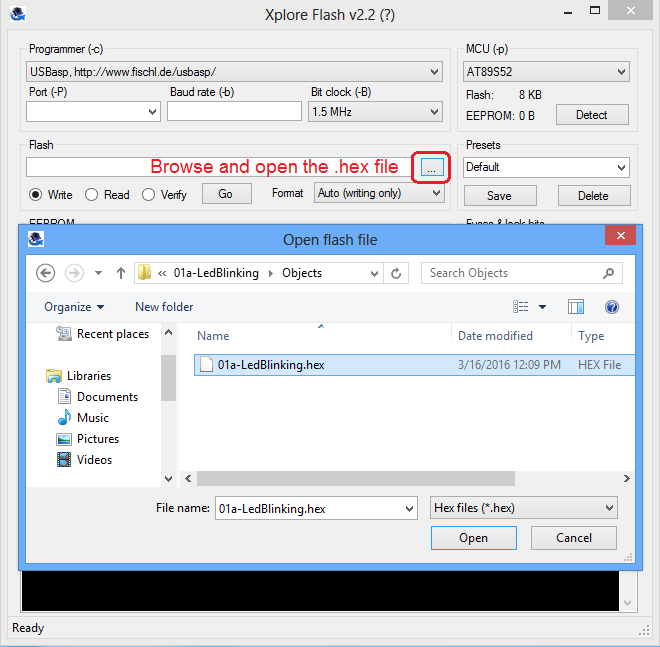
<b>STEP 2:</b> | <b>STEP 2:</b> | ||
| − | [[File:XploreFlash 02. | + | [[File:XploreFlash 02.png]] <br> |
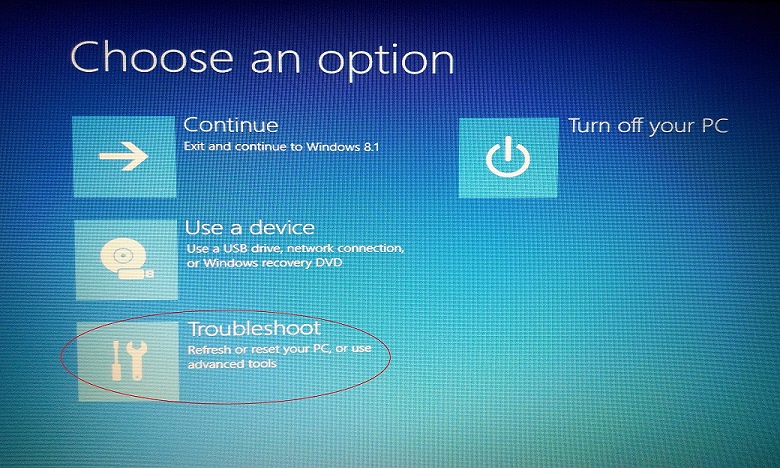
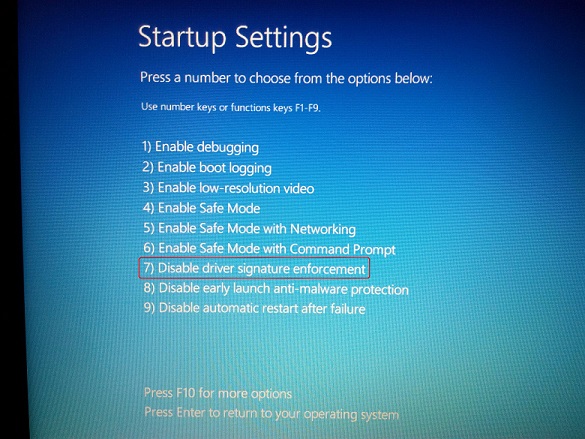
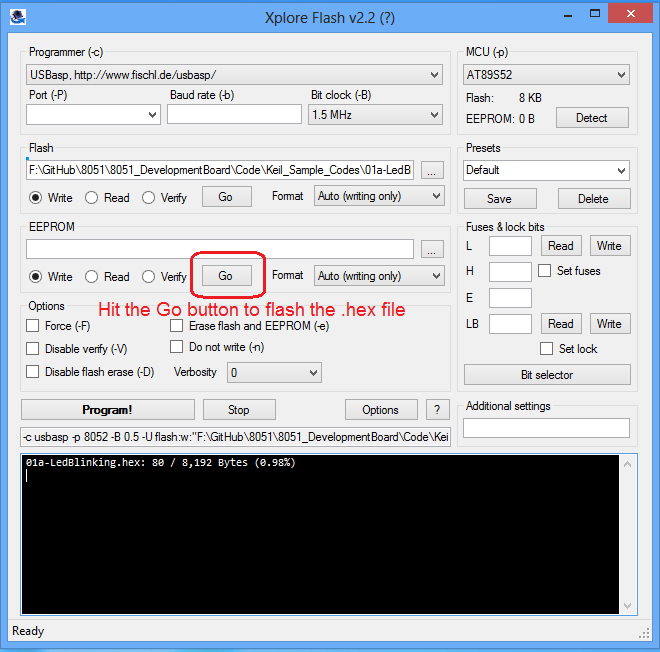
<b>STEP 3:</b> | <b>STEP 3:</b> | ||
| − | [[File:XploreFlash 03. | + | [[File:XploreFlash 03.png]] <br> |
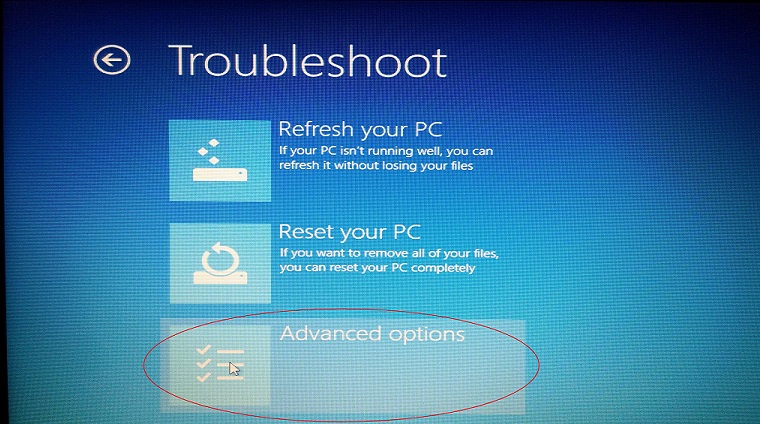
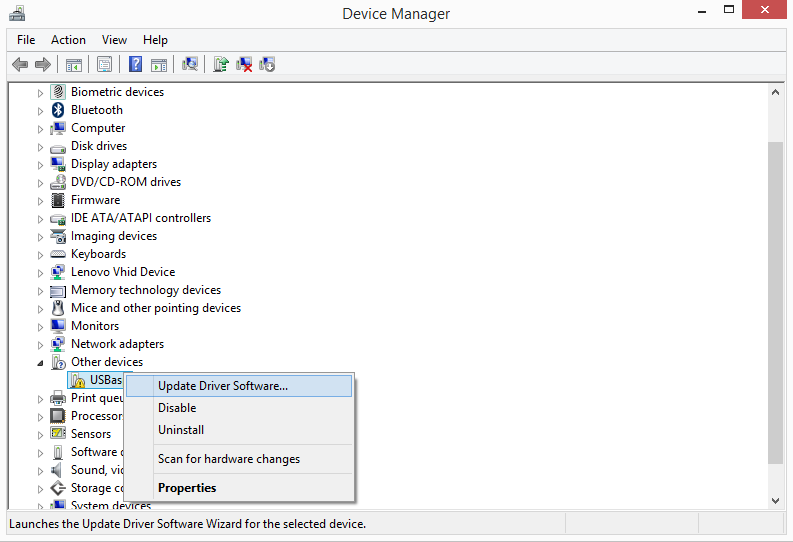
<b>STEP 4:</b> | <b>STEP 4:</b> | ||
[[File:XploreFlash 04.PNG]] <br> | [[File:XploreFlash 04.PNG]] <br> | ||
Revision as of 19:08, 26 June 2016
In this tutorial, we will see how to use XploreFlash for flashing the hex files to AT89s52.
First, we will see how to install the XploreFlash software along with UsbAsp drivers and then continue with flashing the controller.
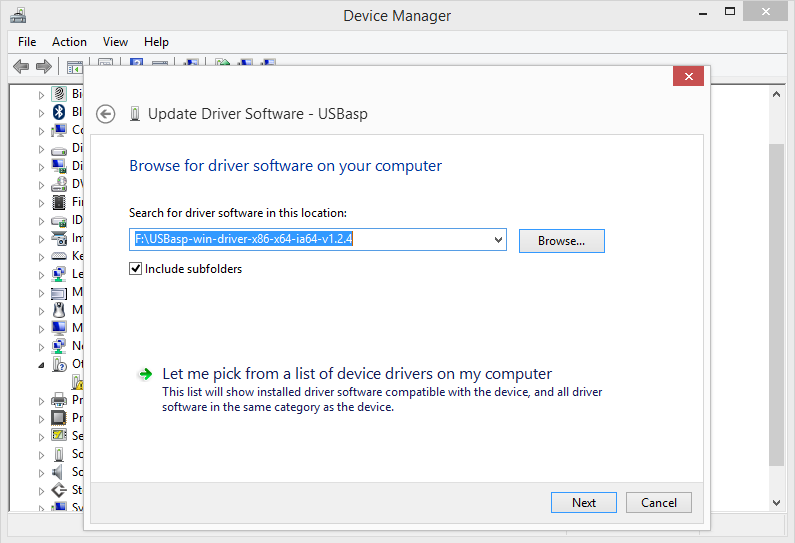
Installing UsbAsp Drivers
Download the UsbAsp drivers from this link and follow the below steps.
In case your are using Windows7/Vista/Xp, skip the first 4 steps and directly jump to step5.
Windows 8 and above do not allow the installation of drivers that are not digitally signed. This needs to be disabled by follows the below steps.
STEP 1:
