Difference between revisions of "Setting Up FreeRTOS on Arduino"
| Line 14: | Line 14: | ||
=Running First Example= | =Running First Example= | ||
Now run the the IDE and open the first example from <b>File->Examples->FreeRTOS->01-TaskSwitching</b> as shown in below image.<br> | Now run the the IDE and open the first example from <b>File->Examples->FreeRTOS->01-TaskSwitching</b> as shown in below image.<br> | ||
| − | Compile and upload the code. Open the serial monitor | + | [[FILE:FreeRtosExample1.png]]<br> |
| + | |||
| + | Compile and upload the code. Open the serial monitor to see the output.<br> | ||
| + | [[FILE:FreeRtosExample1Output.png]] | ||
Revision as of 13:20, 23 June 2016
In this tutorial we will see how to setup the Arduino IDE for FreeRTOS.
After setting up the IDE, we will run the first FreeRTOS example on Arduino Uno.
Setting Up
Download and install the Arduino IDE from this link.
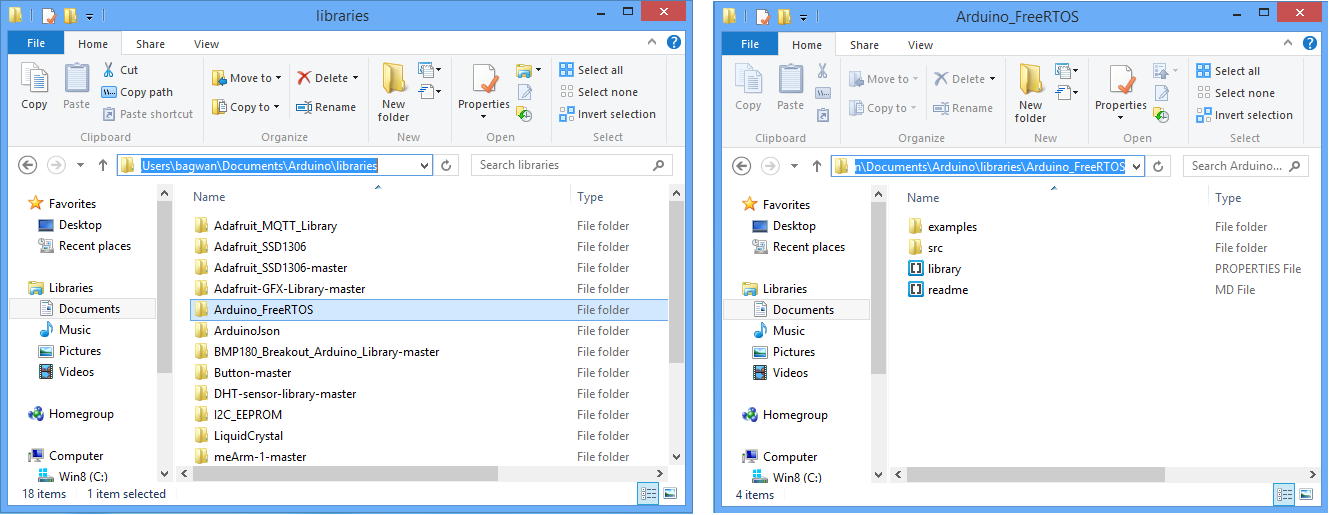
Downlaod the FreeRtos files form the github and paste into the library folder of arduino.
The folder structure should be as shown below.

Running First Example
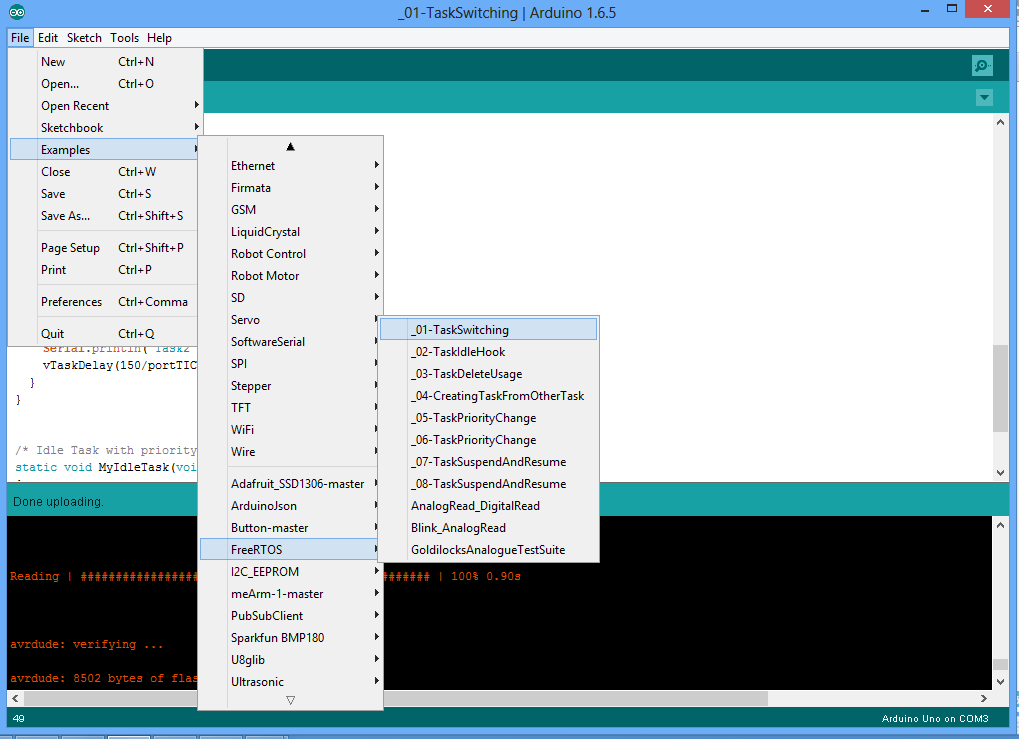
Now run the the IDE and open the first example from File->Examples->FreeRTOS->01-TaskSwitching as shown in below image.

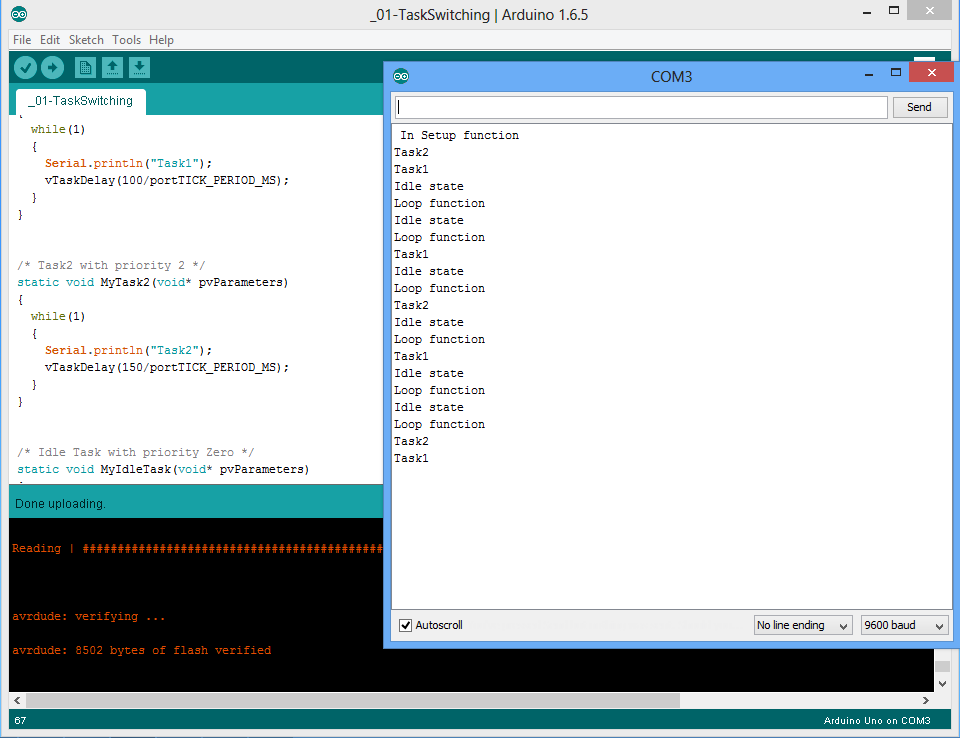
Compile and upload the code. Open the serial monitor to see the output.

