Difference between revisions of "Using ARM GCC with LPC 1768"
(→Procedure) |
|||
| Line 3: | Line 3: | ||
---- | ---- | ||
=Introduction= | =Introduction= | ||
| − | In this tutorial we will compile a project on | + | In this tutorial we will compile a project on LPC1768 through command line using ARM GCC and make utility. The best part of it is we don't need any IDE to compile the program, a simple makefile will do job for you. To start with you will require ARM GCC and make utility, download both from following links. |
=Downloads= | =Downloads= | ||
[https://launchpad.net/gcc-arm-embedded ARM GCC] | [https://launchpad.net/gcc-arm-embedded ARM GCC] | ||
| Line 18: | Line 18: | ||
==Procedure== | ==Procedure== | ||
| − | We will compile a simple Led Blinking program for | + | We will compile a simple Led Blinking program for LPC1768 using ARM GCC using following procedure |
#There are different ways to access your files depending on the makefile. We can write makefile as per our folder structure and where we are storing different files. As per the makefile we are using make one folder in your local directory where you will store all your source and header files | #There are different ways to access your files depending on the makefile. We can write makefile as per our folder structure and where we are storing different files. As per the makefile we are using make one folder in your local directory where you will store all your source and header files | ||
#Along with the makefile, main and all other library files, keep all following files in this folder | #Along with the makefile, main and all other library files, keep all following files in this folder | ||
| Line 35: | Line 35: | ||
[[File:GCC2.PNG|x480px|center]] | [[File:GCC2.PNG|x480px|center]] | ||
| − | #After compilation is over hex and bin file gets generated which can be flashed to our | + | #After compilation is over hex and bin file gets generated which can be flashed to our LPC1768 board directly. |
{{DISQUS}} | {{DISQUS}} | ||
Revision as of 15:57, 4 December 2015
Vaibhav Katkar (talk) 15:20, 4 December 2015 (IST)
Introduction
In this tutorial we will compile a project on LPC1768 through command line using ARM GCC and make utility. The best part of it is we don't need any IDE to compile the program, a simple makefile will do job for you. To start with you will require ARM GCC and make utility, download both from following links.
Downloads
Setting Environment
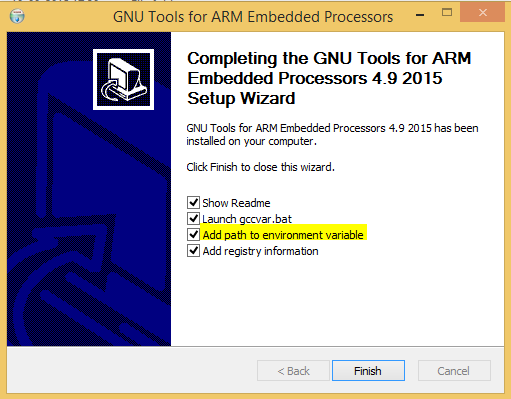
- Once ARM GCC is downloaded install it on your machine. While installing do select the option Add path to environment variable as shown below
- To test the ARM GCC open the command line and use command arm-none-eabi-gcc -v, which will give the version information.
- After installing ARM GCC install make utility by following the instructions
Procedure
We will compile a simple Led Blinking program for LPC1768 using ARM GCC using following procedure
- There are different ways to access your files depending on the makefile. We can write makefile as per our folder structure and where we are storing different files. As per the makefile we are using make one folder in your local directory where you will store all your source and header files
- Along with the makefile, main and all other library files, keep all following files in this folder
Core Support: core_cm3.c, core_cm3.h, core_cm3.o
Device Support: system_LPC17xx.c, system_LPC17xx.h, lpc17xx.h
Startup file: startup_LPC17xx.c
Linker Script: LPC17xx.ld
- You can get all these files from Github
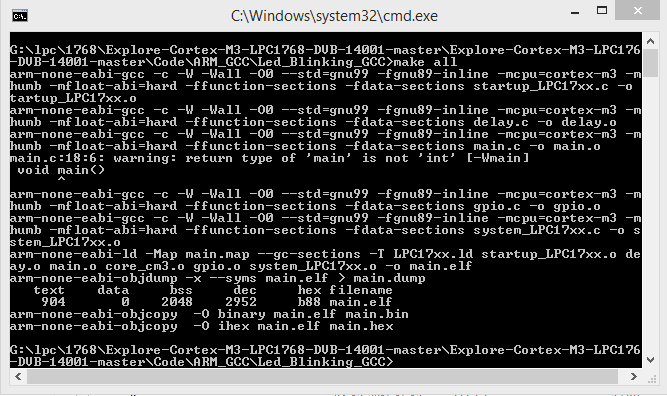
- After that open command line in your local directoty and compile program by using make all command
- After compilation is over hex and bin file gets generated which can be flashed to our LPC1768 board directly.


