Difference between revisions of "Installing Explore Embedded Arduino Boards"
| Line 20: | Line 20: | ||
[[File:6.png|850x620px]] | [[File:6.png|850x620px]] | ||
# Install '''ExploreEmbedded AVR Boards by ExploreEmbedded''' among the different boards available. | # Install '''ExploreEmbedded AVR Boards by ExploreEmbedded''' among the different boards available. | ||
| + | |||
| + | {{DISQUS}} | ||
[[File:7.png|850x600px]] | [[File:7.png|850x600px]] | ||
# Select the specific board now from '''Tools'''. Eg. - Explore Atmega32 | # Select the specific board now from '''Tools'''. Eg. - Explore Atmega32 | ||
Revision as of 19:15, 10 September 2015
Vaibhav Katkar (talk) 18:44, 10 September 2015 (IST)
The Arduino IDE from 1.6.0 onwards, makes it very easy for adding third party boards like ours, this tutorial explains how to add custom boards with just one URL.
To use Explore Embedded boards using Arduino one have to first add these boards into the Arduino. For adding the boards
do following procedure.
- First copy following link-
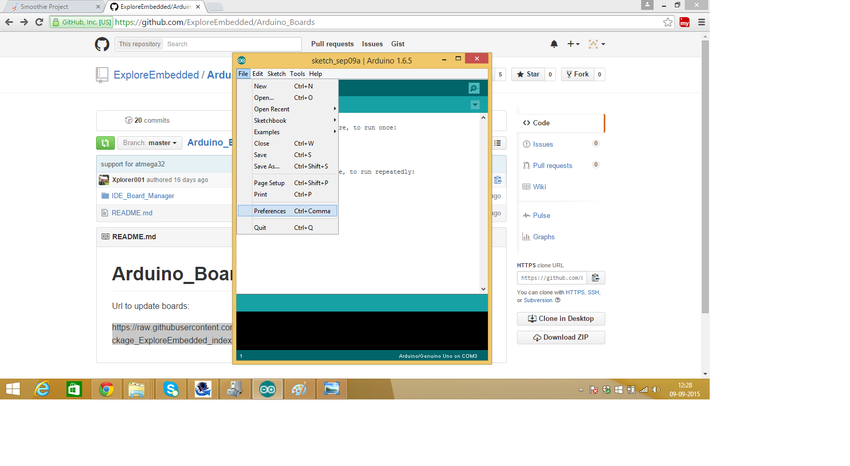
- Open Aduino, select File option and click on Preferences.
- Now paste that link into the Additional Boards Manager URLs and click on OK.
- Select Tools and click on Board Manager, to install the new boards.
- Install ExploreEmbedded AVR Boards by ExploreEmbedded among the different boards available.
- Select the specific board now from Tools. Eg. - Explore Atmega32


