Difference between revisions of "AWS IOT with Arduino ESP32"
(new lines) |
|||
| (14 intermediate revisions by 2 users not shown) | |||
| Line 1: | Line 1: | ||
[[category:ESP32 Arduino]] | [[category:ESP32 Arduino]] | ||
| − | In the earlier [[Secure IOT with AWS and Hornbill ESP32|tutorial]] we discussed how to setup AWS IOT for an Amazon user account. Now lets see | + | In the earlier [[Secure IOT with AWS and Hornbill ESP32|tutorial]] we discussed how to setup AWS IOT for an Amazon user account. Now lets see how to use the Arduino esp32 AWS IOT library to communicate with AWS server. |
| + | [[File:00Aws arduino esp32.jpg]] | ||
=AWS IOT for ESP32= | =AWS IOT for ESP32= | ||
| − | Download the AWS IOT library for Arduino ESP32 from | + | Download the AWS IOT library for Arduino ESP32 from [https://github.com/ExploreEmbedded/Hornbill-Examples/tree/master/arduino-esp32/AWS_IOT this link].<br> |
Now open the first example pubSubTest.ino as shown below. | Now open the first example pubSubTest.ino as shown below. | ||
[[File:ESP32 AWS IOT LIB.png]]. | [[File:ESP32 AWS IOT LIB.png]]. | ||
| Line 19: | Line 20: | ||
=AWS Certificate Configuration= | =AWS Certificate Configuration= | ||
The below certificate and private key needs to be copied to aws_iot_certificate.c file in the form of array.<br> | The below certificate and private key needs to be copied to aws_iot_certificate.c file in the form of array.<br> | ||
| − | aws-root-ca.pem | + | aws-root-ca.pem |
| − | certificate.pem.crt | + | certificate.pem.crt |
| − | private.pem.key | + | private.pem.key |
[[File:ESP32 AWS IOT Certificates.png]] | [[File:ESP32 AWS IOT Certificates.png]] | ||
=Upload the sketch and verify the output = | =Upload the sketch and verify the output = | ||
| + | Publish and subscribe(received) messages printed on terminal. | ||
| + | [[File:ESP32 AWS IOT Terminal LOG.png]] | ||
| + | <br><br> | ||
| + | |||
| + | Published message viewed on MQTT Fx client software: | ||
| + | [[File:ESP32 AWS IOT MQTT LOG.png]] | ||
| + | <br><br> | ||
| + | |||
| + | Publish a message from MQTT Fx Client and verify the received message on terminal. | ||
| + | [[File:ESP32 AWS IOT PUBLISH SUBSCRIBE.png]] | ||
| + | <br><br> | ||
| + | |||
| + | =Logging Temperature and Humidity using DHT11 sensor= | ||
| + | After setting the AWS client and AWS IOT lib, lets log the real time temperature and humidity using DHT11 sensor.<br> | ||
| + | Install the Adafruit DHT11 sensor library using Arduino Library Manager or download it from [https://github.com/adafruit/DHT-sensor-library this link]. <br> | ||
| + | |||
| + | Do the connection as shown below. | ||
| + | [[File:0 ESP32 AWS IOT DTH11 Logging.png]] | ||
| + | |||
| + | Now copy paste the below code and configure the Wifi SSID, Host Address and upload the sketch. | ||
| + | <html> | ||
| + | <script src="https://gist.github.com/SaheblalBagwan/b39e80d2b0de87731fce7a7a5f37bea4.js"></script> | ||
| + | </html> | ||
| + | |||
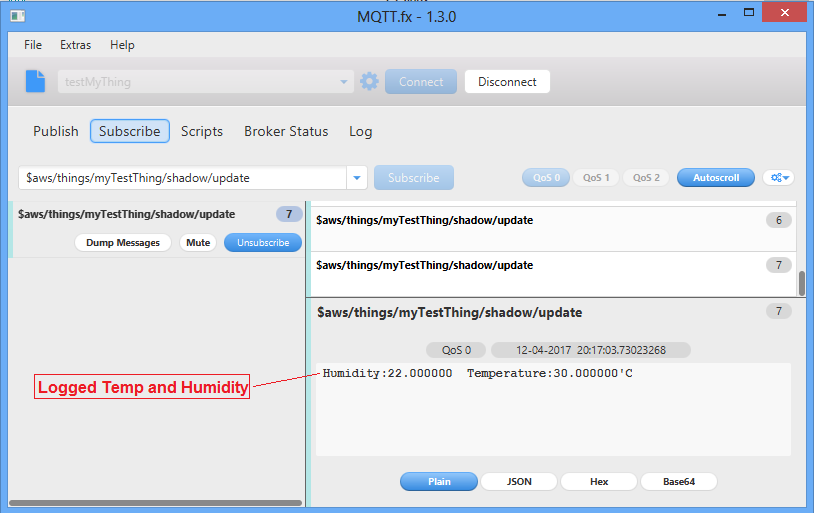
| + | Temp and Humidity logged to AWS IOT server. | ||
| + | [[File:ESP32 AWS IOT DTH11 Logging.png]] | ||
| + | |||
| + | =Download= | ||
| + | Download the Arduino ESP32 AWS IOT lib and examples form [https://github.com/ExploreEmbedded/Hornbill-Examples/tree/master/arduino-esp32/AWS_IOT this link]. | ||
| + | |||
| + | Kindly check our latest [https://github.com/BuildStormTechnologies/arduino-esp32-aws-iot AWS IoT] libraries, with additional features such as:<br> | ||
| + | 1. Device provisioning.<br> | ||
| + | 2. Shadow updates.<br> | ||
| + | 3. Jobs management.<br> | ||
| + | 4. Over-the-Air (OTA) updates.<br> | ||
| + | 5. Mobile app for aws<br><br> | ||
| + | Additionally, you can explore [https://github.com/BuildStormTechnologies libraries] tailored for various platforms such as Azure, Thingsboard, and Kaa IoT, supporting both WiFi and cellular-based applications.<br> | ||
| + | |||
| + | <br><br> | ||
| + | |||
| + | Have an opinion, suggestion , question or feedback about the article let it out here! | ||
| + | {{DISQUS}} | ||
Latest revision as of 11:05, 14 April 2024
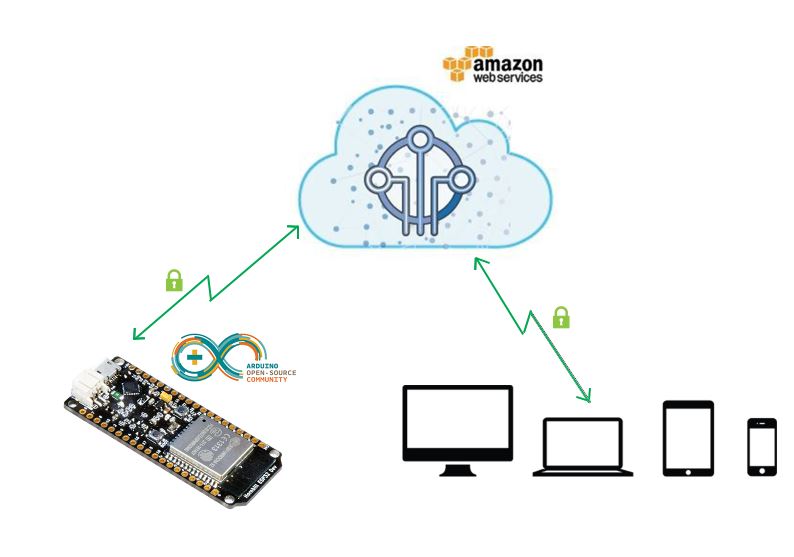
In the earlier tutorial we discussed how to setup AWS IOT for an Amazon user account. Now lets see how to use the Arduino esp32 AWS IOT library to communicate with AWS server.
Contents
AWS IOT for ESP32
Download the AWS IOT library for Arduino ESP32 from this link.
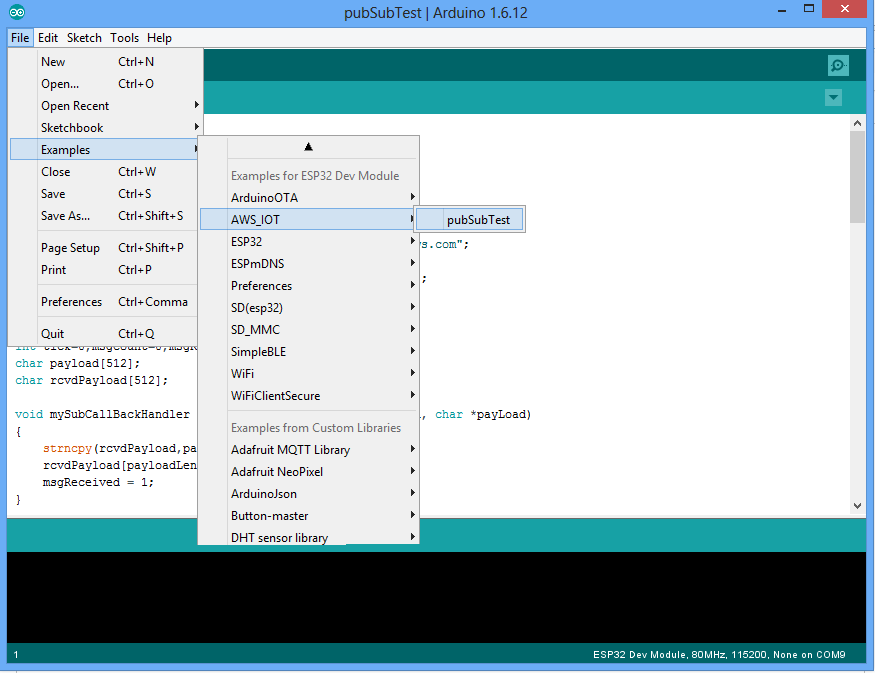
Now open the first example pubSubTest.ino as shown below.
 .
.
Wifi SSID and Host Address Configuration
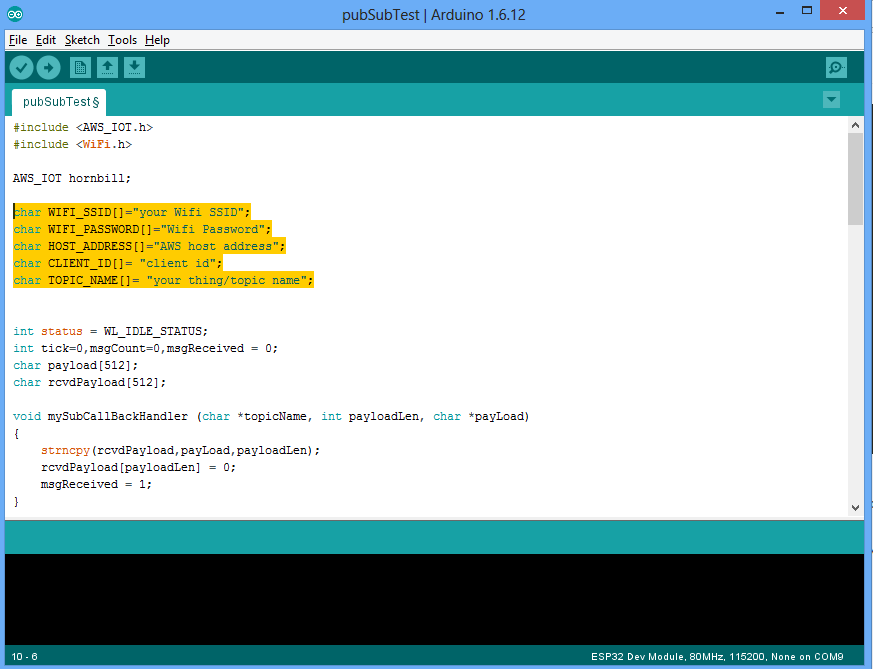
Configure the below parameters at the beginning of the sketch as shown in the image.
WIFI_SSID
WIFI_PASSWORD
HOST_ADDRESS
CLIENT_ID
TOPIC_NAME
AWS Certificate Configuration
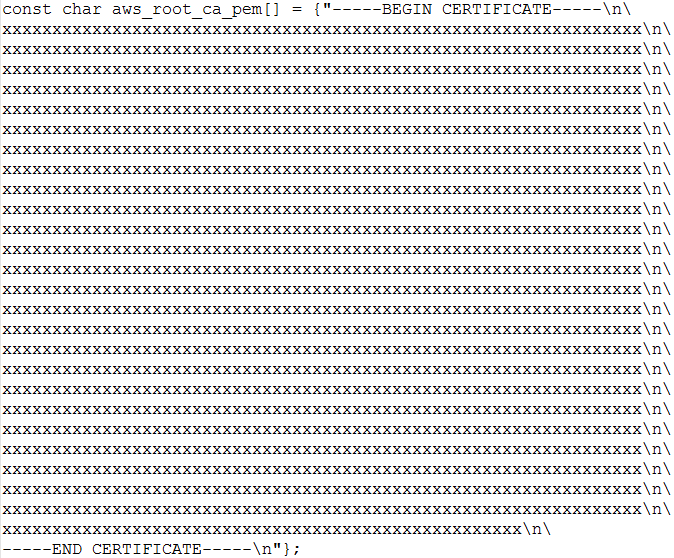
The below certificate and private key needs to be copied to aws_iot_certificate.c file in the form of array.
aws-root-ca.pem
certificate.pem.crt
private.pem.key
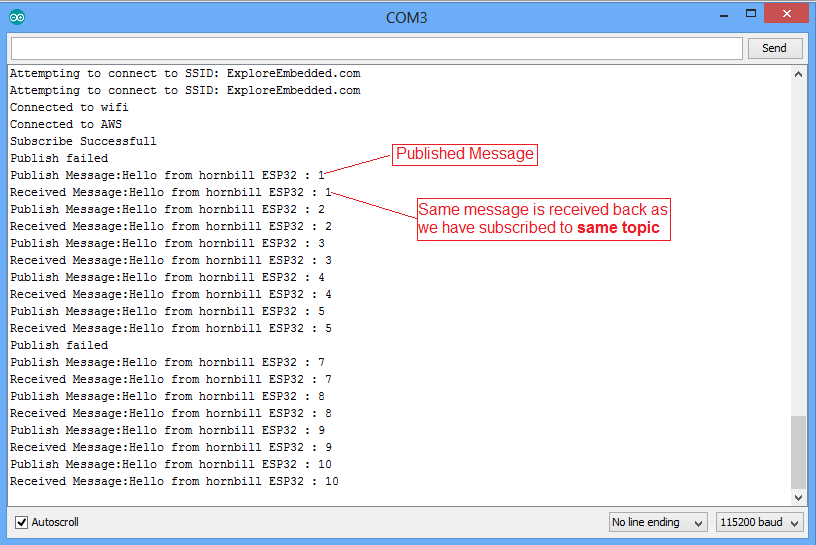
Upload the sketch and verify the output
Publish and subscribe(received) messages printed on terminal.
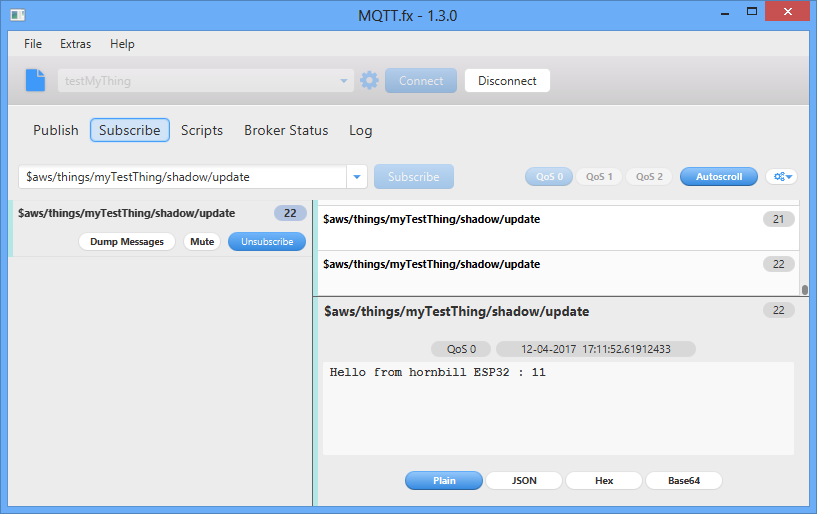
Published message viewed on MQTT Fx client software:
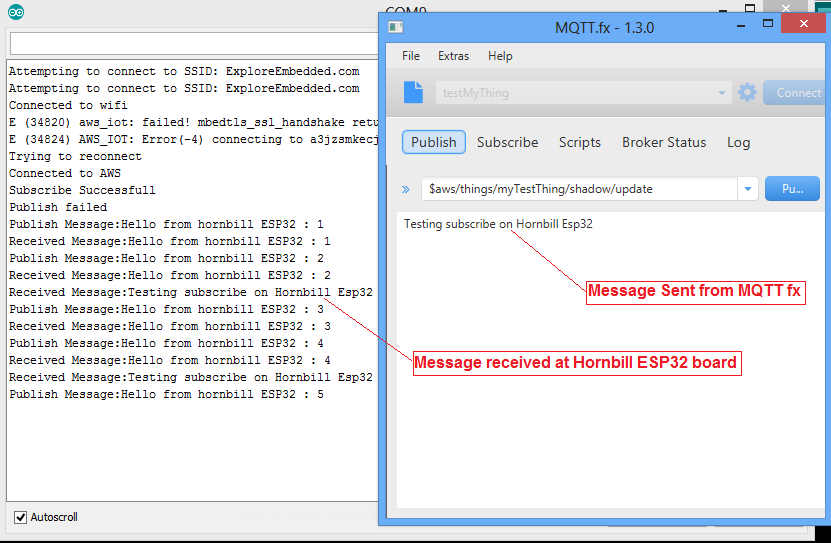
Publish a message from MQTT Fx Client and verify the received message on terminal.
Logging Temperature and Humidity using DHT11 sensor
After setting the AWS client and AWS IOT lib, lets log the real time temperature and humidity using DHT11 sensor.
Install the Adafruit DHT11 sensor library using Arduino Library Manager or download it from this link.
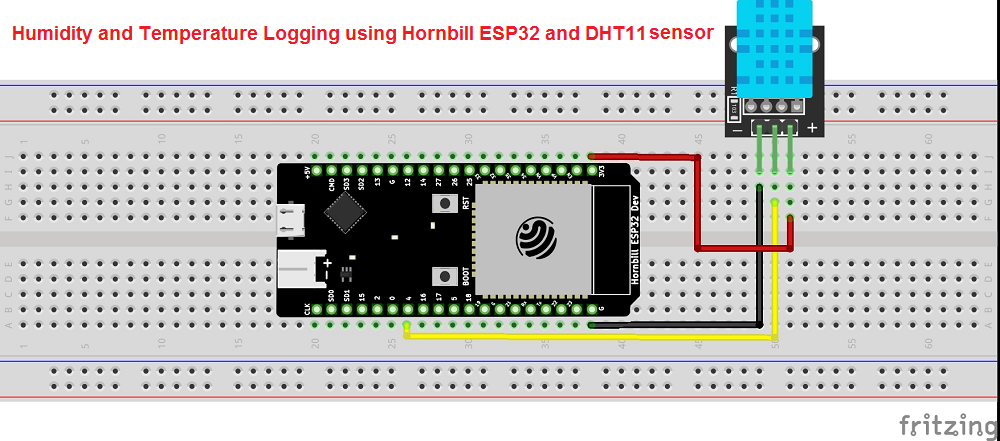
Do the connection as shown below.
Now copy paste the below code and configure the Wifi SSID, Host Address and upload the sketch.
Temp and Humidity logged to AWS IOT server.
Download
Download the Arduino ESP32 AWS IOT lib and examples form this link.
Kindly check our latest AWS IoT libraries, with additional features such as:
1. Device provisioning.
2. Shadow updates.
3. Jobs management.
4. Over-the-Air (OTA) updates.
5. Mobile app for aws
Additionally, you can explore libraries tailored for various platforms such as Azure, Thingsboard, and Kaa IoT, supporting both WiFi and cellular-based applications.
Have an opinion, suggestion , question or feedback about the article let it out here!

