LPC2148 RTC Programming
In this tutorial, we will be discussing the internal RTC of LPC2148 . We will see what are the different registers associated with the RTC but we will mainly focus on basics registers required to use RTC. Later we will see how to use Explore Embedded library for RTC.
Contents
RTC Registers
The RTC includes a number of registers. We will concentrate on some of the basic required registers.
| Register | Description |
| CCR | Clock Control Register |
| Consolidated Time Registers | |
| CTIME 0 | Consolidated Time Register 0 |
| CTIME 1 | Consolidated Time Register 1 |
| CTIME 2 | Consolidated Time Register 2 |
| Time Counter Registers | |
| SEC | Seconds Counter |
| MIN | Minutes Register |
| HOUR | Hours Register |
| DOM | Day of Month Register |
| DOW | Day of Week Register |
| DOY | Day of Year Register |
| MONTH | Months Register |
| YEAR | Years Register |
| CALIBRATION | Calibration value Register |
RTC Register Configuration
Lets see how to configure these registers.
| CCR | ||||
| 31:5 | 4 | 3:2 | 1 | 0 |
| - | CLKSRC | CTTEST | CTCRST | CLKEN |
CCR ( Clock Control Register )
The Clock Control Register register controls the operation of the clock divide circuit.
Bit 0 – CLKEN : Clock Enable
This bit is written with one to enable time counters and written with zero to disable time counters.
Bit 1 - CTCRST : CTC Reset
When this bit is set to one, the internal oscillator divider are reset.
Bit 3:2 - CTTEST
Test Enable. These bits should always be zero during normal operation.
Bit 4 - CLKSRC: Clock Source
0: Clock Tick Counter takes its clock from the Prescaler.
1: If this bit is 1, the CTC takes its clock from the 32 kHz oscillator that’s connected to
the RTCX1 and RTCX2 pins.
Bit 31:5 - Reserved
Time Counter Register
The time value consists of the eight counters and there is separate register associated with each counter. To update the RTC, new values should be written to these registers.
| Time Counter Registers | |||
| Register | Description | Minimum Value | Maximum Value |
| SEC | Seconds value | 0 | 59 |
| MIN | Minutes value | 0 | 59 |
| HOUR | Hours value | 0 | 23 |
| DOM | Day of Month value | 1 | 28,29,30 or 31(depending on the month) |
| DOW | Day of Week value | 0 | 6 |
| DOY | Day of Year value | 1 | 365 (366 for Leap Year) |
| MONTH | Month value | 1 | 12 |
| YEAR | Year value | 0 | 4095 |
Consolidated Time Registers
The values of the Time Counters can optionally be read in a consolidated format which allows the programmer to read all time counters with only three read operations.
There are 3 Consolidated Time Registers. The minimum and maximum values of the various fields in these registers are same as the respective Time Counter Register.
These registers are read only. New values should be written to Time Counter Registers.
| Consolidated Time Register 0 ( CTIME0 ) | |||||||
| 31:27 | 26:24 | 23:21 | 20:16 | 15:14 | 13:8 | 7:6 | 5:0 |
| Reserved | Day of Week | Reserved | Hours | Reserved | Minute | Reserved | Second |
| Consolidated Time Register 1 ( CTIME1 ) | |||||
| 31:27 | 27:16 | 15:12 | 11:8 | 7:5 | 4:0 |
| Reserved | Year | Reserved | Month | Reserved | Day of Month |
| Consolidated Time Register 2 ( CTIME2 ) | |
| 31:12 | 11:0 |
| Reserved | Day of Year |
Steps for Using RTC
Initialize RTC
- Select the Clock source Internal/external(32k).
- Enable the clock for RTC
Set Date and Time
As discussed, there are separate Time Counter registers for each time parameter(hour, min, sec and date). We just need to copy the required values to these registers.
Read Date and Time
The values of date and time can be read from associated Time Counter registers. Alternately, date and time can also be read from Consolidated Time registers.
We will use Time Counter registers for both reading and writing.
Code Example
Example 1
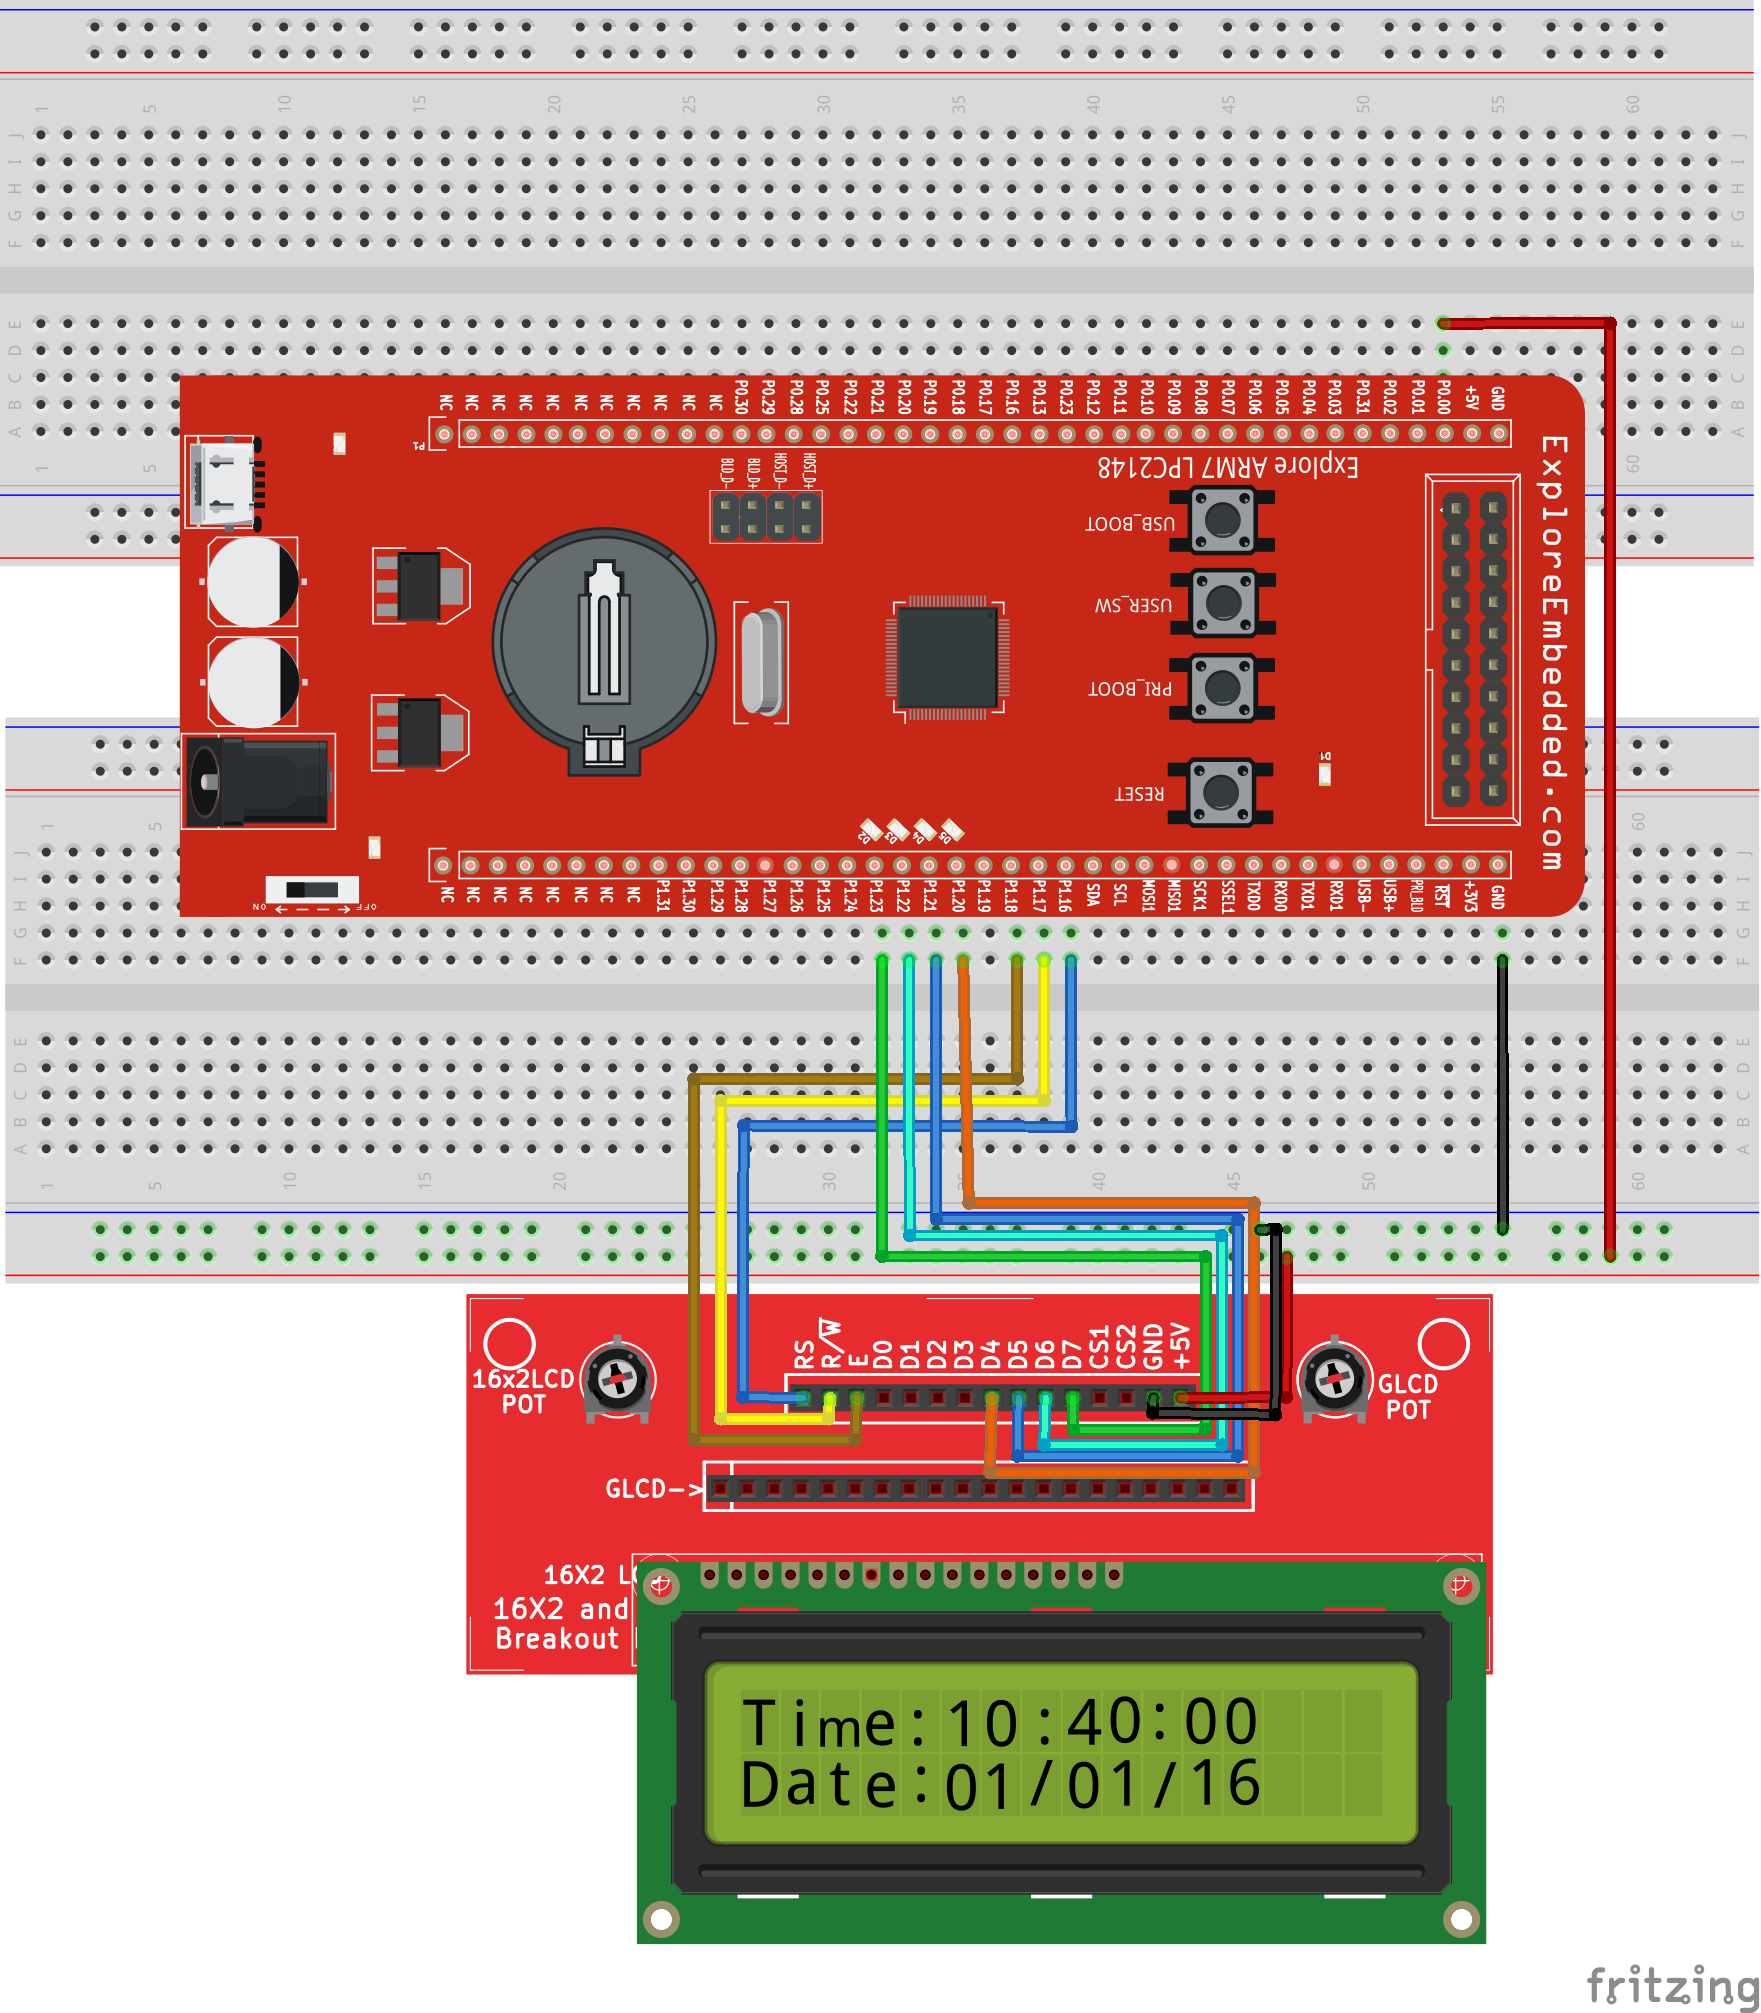
In this example we will see how to use lpc1768 inbuilt RTC. The time and date will be displayed continuously on 2x16 LCD.
Using Explore Embedded Libraries
Now we will discuss how to use Explore Embedded Libraries for LPC2148 inbuilt RTC.
Connection
Do the connections as shown the below image and flash the compiled code.

Downloads
Download the complete project folder from this link
