Difference between revisions of "Secure IOT with AWS and Hornbill ESP32"
| Line 5: | Line 5: | ||
For using the AWS services you need to have a user account and login using the [https://www.amazon.com/ap/signin?openid.assoc_handle=aws&openid.return_to=https%3A%2F%2Fsignin.aws.amazon.com%2Foauth%3Fresponse_type%3Dcode%26client_id%3Darn%253Aaws%253Aiam%253A%253A015428540659%253Auser%252Fhomepage%26redirect_uri%3Dhttps%253A%252F%252Fconsole.aws.amazon.com%252Fconsole%252Fhome%253Fstate%253DhashArgs%252523%2526isauthcode%253Dtrue%26noAuthCookie%3Dtrue&openid.mode=checkid_setup&openid.ns=http%3A%2F%2Fspecs.openid.net%2Fauth%2F2.0&openid.identity=http%3A%2F%2Fspecs.openid.net%2Fauth%2F2.0%2Fidentifier_select&openid.claimed_id=http%3A%2F%2Fspecs.openid.net%2Fauth%2F2.0%2Fidentifier_select&action=&disableCorpSignUp=&clientContext=&marketPlaceId=&poolName=&authCookies=&pageId=aws.ssop&siteState=unregistered%2Cen_US&accountStatusPolicy=P1&sso=&openid.pape.preferred_auth_policies=MultifactorPhysical&openid.pape.max_auth_age=120&openid.ns.pape=http%3A%2F%2Fspecs.openid.net%2Fextensions%2Fpape%2F1.0&server=%2Fap%2Fsignin%3Fie%3DUTF8&accountPoolAlias=&forceMobileApp=0&language=en_US&forceMobileLayout=0 AWS Login link] | For using the AWS services you need to have a user account and login using the [https://www.amazon.com/ap/signin?openid.assoc_handle=aws&openid.return_to=https%3A%2F%2Fsignin.aws.amazon.com%2Foauth%3Fresponse_type%3Dcode%26client_id%3Darn%253Aaws%253Aiam%253A%253A015428540659%253Auser%252Fhomepage%26redirect_uri%3Dhttps%253A%252F%252Fconsole.aws.amazon.com%252Fconsole%252Fhome%253Fstate%253DhashArgs%252523%2526isauthcode%253Dtrue%26noAuthCookie%3Dtrue&openid.mode=checkid_setup&openid.ns=http%3A%2F%2Fspecs.openid.net%2Fauth%2F2.0&openid.identity=http%3A%2F%2Fspecs.openid.net%2Fauth%2F2.0%2Fidentifier_select&openid.claimed_id=http%3A%2F%2Fspecs.openid.net%2Fauth%2F2.0%2Fidentifier_select&action=&disableCorpSignUp=&clientContext=&marketPlaceId=&poolName=&authCookies=&pageId=aws.ssop&siteState=unregistered%2Cen_US&accountStatusPolicy=P1&sso=&openid.pape.preferred_auth_policies=MultifactorPhysical&openid.pape.max_auth_age=120&openid.ns.pape=http%3A%2F%2Fspecs.openid.net%2Fextensions%2Fpape%2F1.0&server=%2Fap%2Fsignin%3Fie%3DUTF8&accountPoolAlias=&forceMobileApp=0&language=en_US&forceMobileLayout=0 AWS Login link] | ||
| − | + | Existing users can directly login and directly jump to next. New users should register first and link the credit card for payments. Basic plan is free for first Year, other plans are chargeable. Check [https://aws.amazon.com/iot-platform/pricing/ this link] for available plans. | |
| − | + | ||
| − | Existing users can directly login and directly jump to next. New users should register | + | |
| − | + | ||
| − | + | ||
| − | + | ||
| − | + | ||
| − | + | ||
| − | + | ||
| − | + | ||
| − | + | ||
| − | + | ||
| − | + | ||
| − | + | ||
| − | + | ||
| − | Basic plan is free for first Year, other plans are chargeable. | + | |
| − | + | ||
| − | [ | + | |
| − | + | ||
| − | + | ||
| − | + | ||
| − | + | ||
| − | + | ||
| − | + | ||
| − | + | ||
| − | + | ||
| − | + | ||
| − | + | ||
| − | + | ||
| − | + | ||
| − | + | ||
| − | + | ||
| − | + | ||
| − | + | ||
| − | + | ||
| − | + | ||
<br><br> | <br><br> | ||
Revision as of 18:18, 8 April 2017
In this tutorial we will discuss how to configure the AWS for amazon user account and later we will see how to setup a new things and generate certificates to communicate with your IOT device using AWS MQTT services.
Contents
AWS User Account
For using the AWS services you need to have a user account and login using the AWS Login link
Existing users can directly login and directly jump to next. New users should register first and link the credit card for payments. Basic plan is free for first Year, other plans are chargeable. Check this link for available plans.
Creating a new thing
After Login, click on Signin To Console to go to AWS dash board.
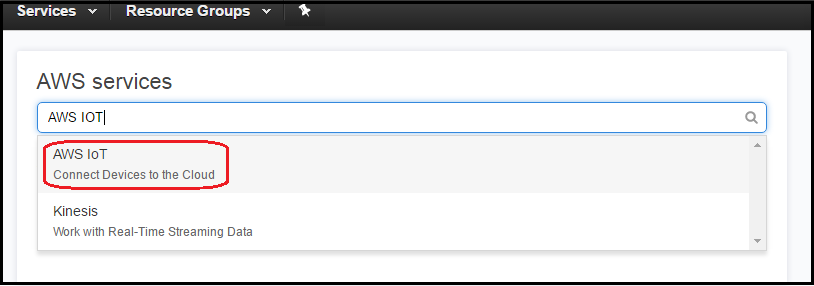
Now type AWS IOT and Select the AWS IOT (Connect Devices to Cloud) from drop down as shown below.
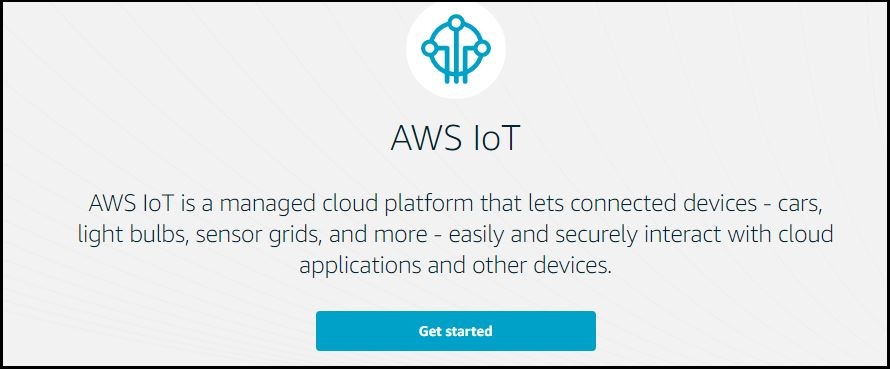
Now the AWS GetStarted Window will open only for the first time. Click on GetStarted to go to dash board.
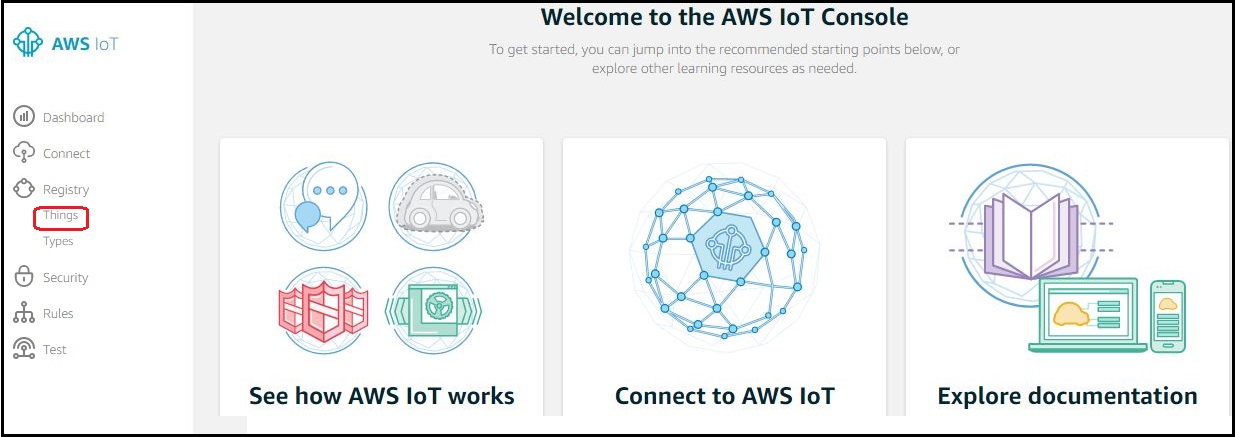
Click on Register-->Things for registering a new Thing as shown below.
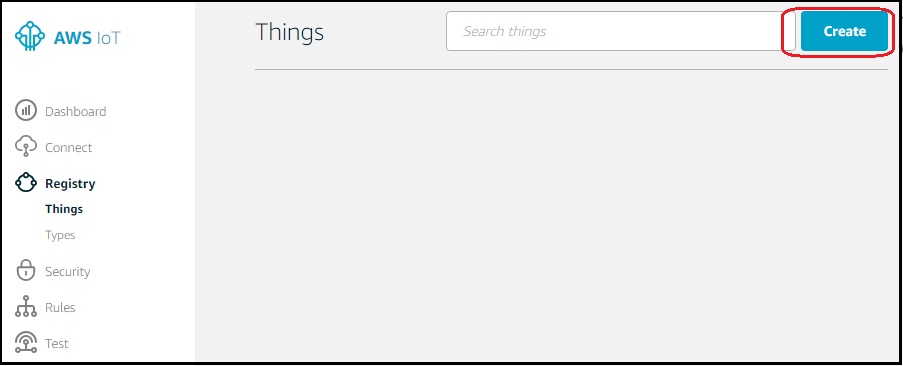
Now click on Create to create a new Thing.
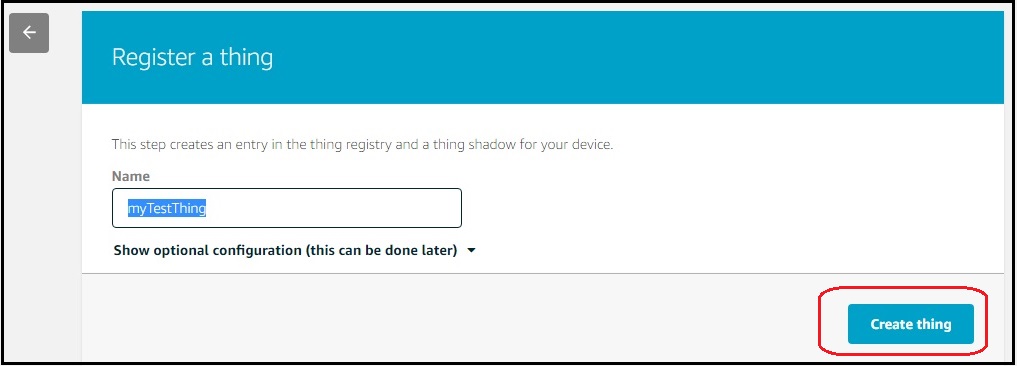
Provide a unique Thing name and click on Create to proceed.
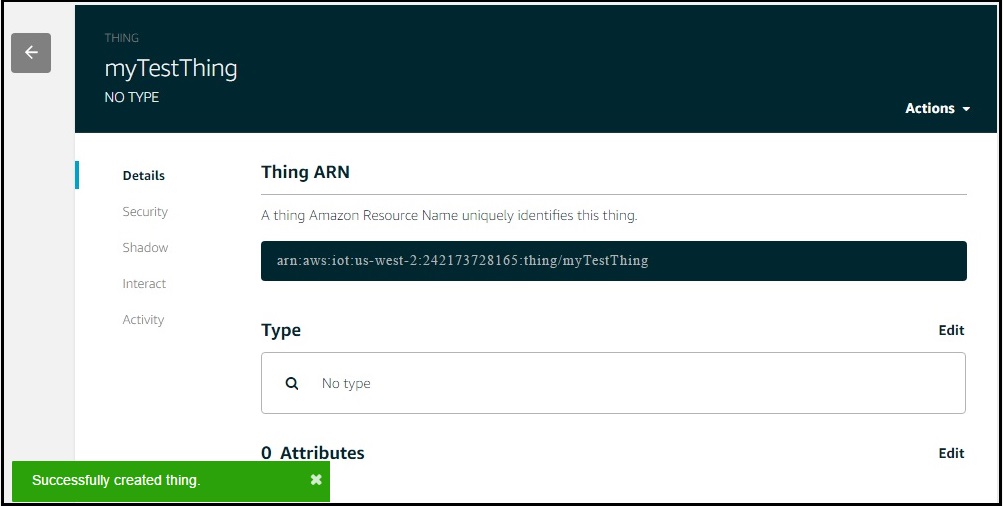
myTestThing is SuccessFul created as shown below.
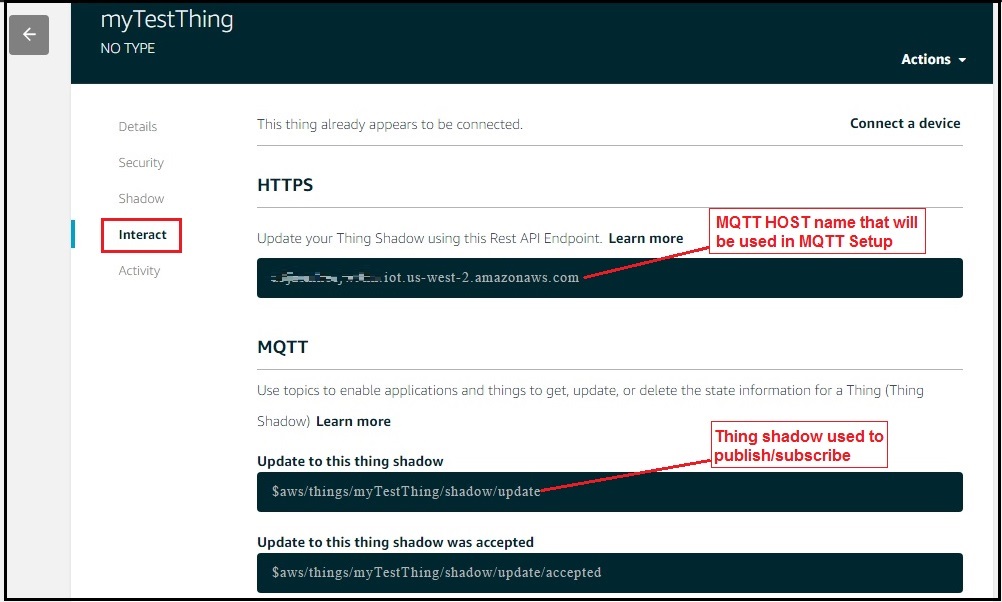
Get the MQTT HOST name and thing name from Interact menu. These will be used to connect with AWS MQTT and also to subscribe/publish the topics.
Generate certificates for new thing
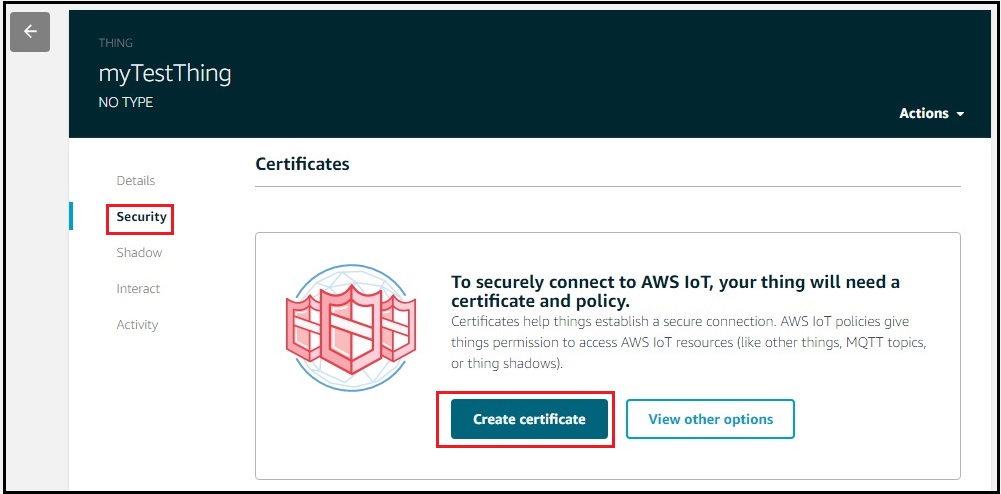
Go to Security menu and click on Create Certificate to register the certificates.
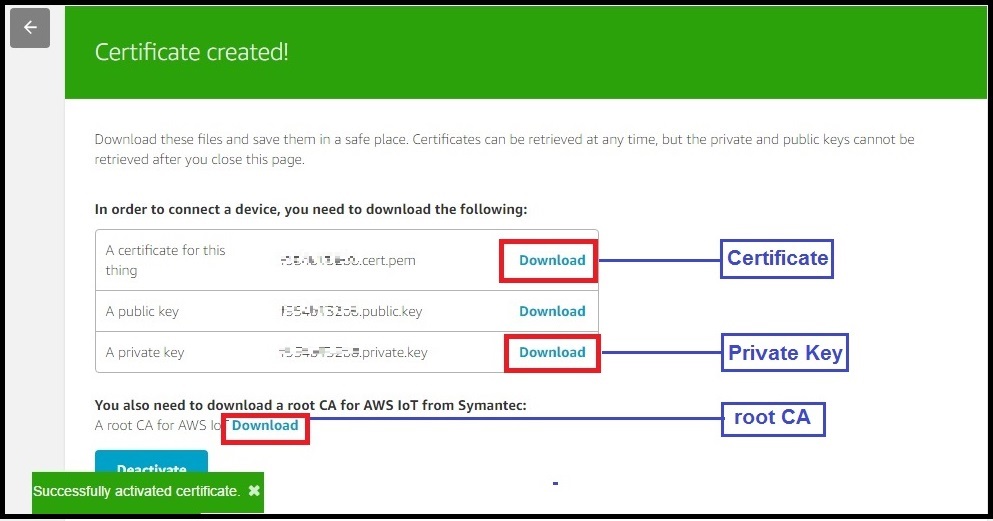
Click on the activate button to activate the certificates and download the certificate,private key and root CA as name them as below.
 aws-root-ca.pem

 certificate.pem.crt

 private.pem.key
Define and Attach Policies
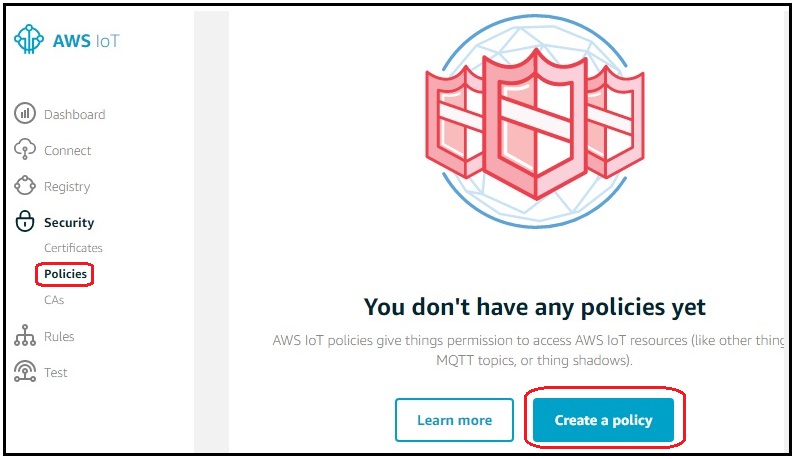
Go do AWS dash board and select the Security-->Policies and click on Create a Policy as shown below.
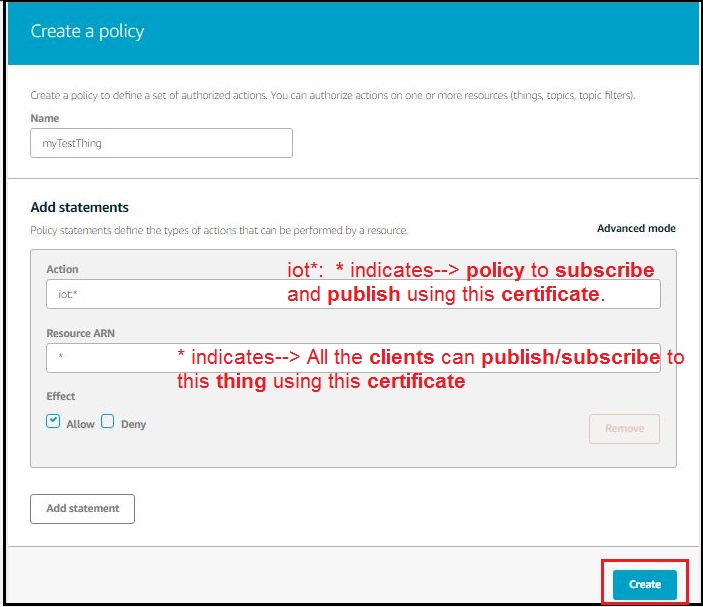
Define the policy for myTestThing as shown below
Now go back to Certificates and attach the policy that was defined above
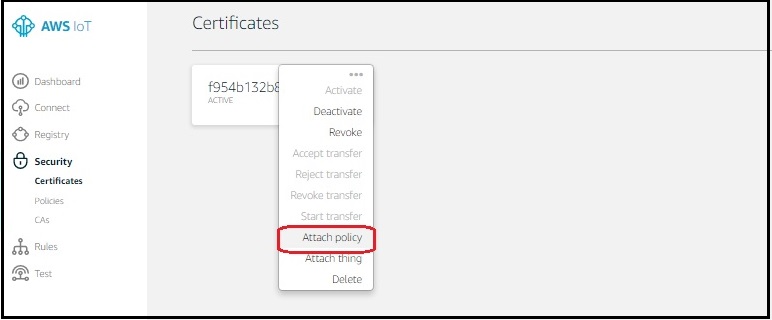
Select the thing and attach the policies define above.
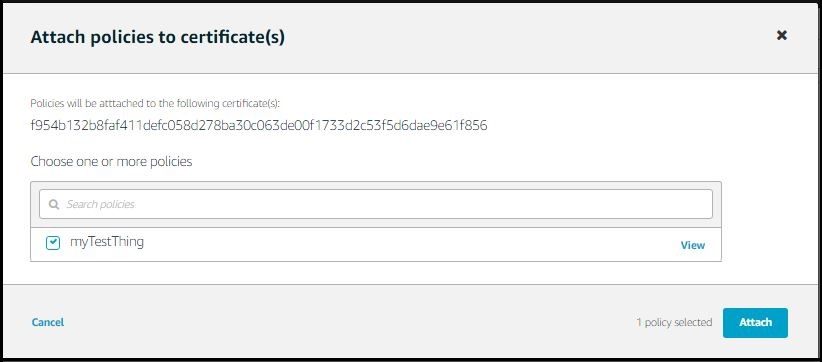
Verify the Attached Policies
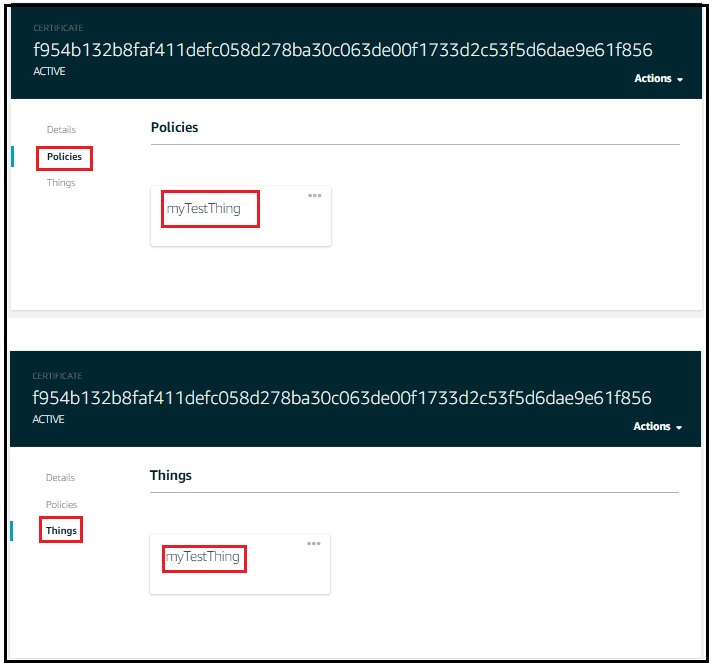
Now verify whether the policies are attached to newly created thing as shown below.
