
PIC18F4520 RTC(DS1307) Interface
In this tutorial we'll see, how to interface RTC with PIC18F4520 Starter board. For this we will be using RTC breakout which has DS1307 RTC on it. For basics of RTC just have a look at our Real Time Clock(DS1307) with AVR tutorial.
Contents
[hide]Prerequisites
Please check this tutorial for detailed explanation on DS1307 RTC.
Hookup
Starter PIC board has facility to connect LCD, we will be using 16x2 LCD for displaying the data and time.
The DS1307 RTC module will be connected I2C(SCL-RC.3,SDA-RC.4) pins of Starter board as shown in below image.
Code
| #include "rtc.h" | |
| #include "lcd.h" | |
| int main() | |
| { | |
| rtc_t rtc; | |
| /*Connect RS->PB0, RW->PB1, EN->PB2 and data bus to PORTB.4 to PORTB.7*/ | |
| LCD_SetUp(PB_0,PB_1,PB_2,P_NC,P_NC,P_NC,P_NC,PB_4,PB_5,PB_6,PB_7); | |
| LCD_Init(2,16); | |
| /*Connect SCL->PC3, SDA->PC4*/ | |
| RTC_Init(); | |
| rtc.hour = 0x10; // 10:40:20 am | |
| rtc.min = 0x40; | |
| rtc.sec = 0x00; | |
| rtc.date = 0x01; //1st Jan 2016 | |
| rtc.month = 0x01; | |
| rtc.year = 0x16; | |
| rtc.weekDay = 5; // Friday: 5th day of week considering monday as first day. | |
| /*##### Set the time and Date only once. Once the Time and Date is set, comment these lines | |
| and reflash the code. Else the time will be set every time the controller is reset*/ | |
| RTC_SetDateTime(&rtc); // 10:40:20 am, 1st Jan 2016 | |
| /* Display the Time and Date continuously */ | |
| while(1) | |
| { | |
| RTC_GetDateTime(&rtc); | |
| LCD_GoToLine(0); | |
| LCD_Printf("time:%2x:%2x:%2x \nDate:%2x/%2x/%2x",(uint16_t)rtc.hour,(uint16_t)rtc.min,(uint16_t)rtc.sec,(uint16_t)rtc.date,(uint16_t)rtc.month,(uint16_t)rtc.year); | |
| } | |
| return (0); | |
| } |
Demo

Downloads
Download the complete project folder from the below link:
Have a opinion, suggestion , question or feedback about the article let it out here!

Pic18f4520 Starter Board Introduction
Kit Contents: PIC18F4520 Starter Board comes with the following features: PIC18F4520 MCU with ds30 bootloader LCD 16x2 breakout. On Board Usb-To-Serial...

Pic18f4520 MPLABx Setup
In this tutorial we will see how to setup a Mplabx project to generate .hex file for Pic18f4520 MPLABx Setup Steps Step1: Open the MPLABx software and select the...
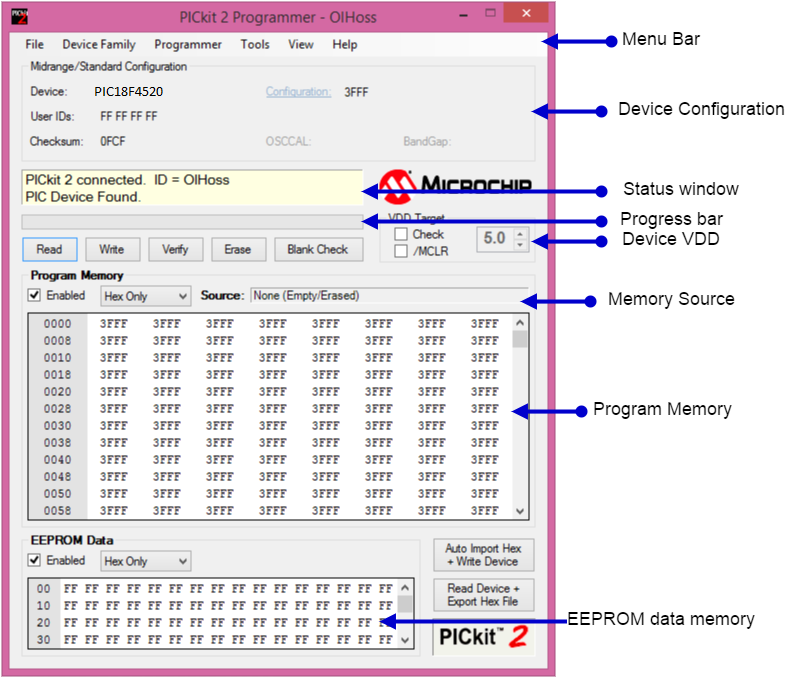
Uploading Hex File To PIC18F4520 Using Pickit2
In this tutorial we will see how to upload hex file using the below PICKit 2 programmer. Installing Pickit 2 Software Download and Install the Pickit2 software from...
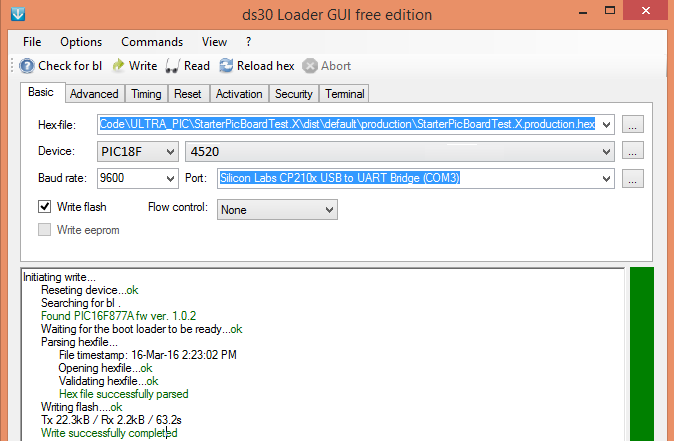
Uploading Hex File to PIC18F4520 Using Ds30 Bootloader
We will see in this tutorial how to upload hex file to PIC controller using DS30 loader GUI. Installing DS30 Software Download the DS30 Loader Software from the...